Double Hornet’s Silk Capacity: Exact Locations for All 18 Spool Fragments in Hollow Knight: Silksong
If you want Hornet to carry more silk, there are 18 spool fragments tucked around Pharloom. Find them, and for every two fragments your silk capacity increases — after all 18, Hornet can bind twice when the spool is full. Below are precise locations and the requirements to reach each fragment, laid out so you can clear them methodically.
- Spool fragment #1 — Mosshome
- Spool fragment #2 — Above the magma in the Deep Docks
- Spool fragment #3 — Greymoor
- Spool fragment #4 — Bellhart
- Spool fragment #5 — Weavenest Atla
- Spool fragment #6 — Flea caravan in Blasted Steps
- Spool fragment #7 — Grand Gate
- Spool fragment #8 — Below the Ventrica in the Underworks
- Spool fragment #9 — Below the spikes in the Underworks
- Spool fragment #10 — Cogwork Core
- Spool fragment #11 — Under the elevator in Whiteward
- Spool fragment #12 — “Balm for the Wounded” quest in Whiteward
- Spool fragment #13 — High Halls
- Spool fragment #14 — Mount Fay
- Spool fragment #15 — Songclave
- Spool fragment #16 — Hidden cave in the Deep Docks
- Spool fragment #17 — Grindle in Blasted Steps
- Spool fragment #18 — Memorium
All spool fragment locations in Hollow Knight: Silksong
There are exactly 18 spool fragments scattered across Pharloom. For every two fragments you collect, Hornet’s spool gains more capacity. Some fragments are available early, but many require movement abilities like Clawline or items such as the Faydown Cloak. Therefore, plan routes that match the abilities you have unlocked.
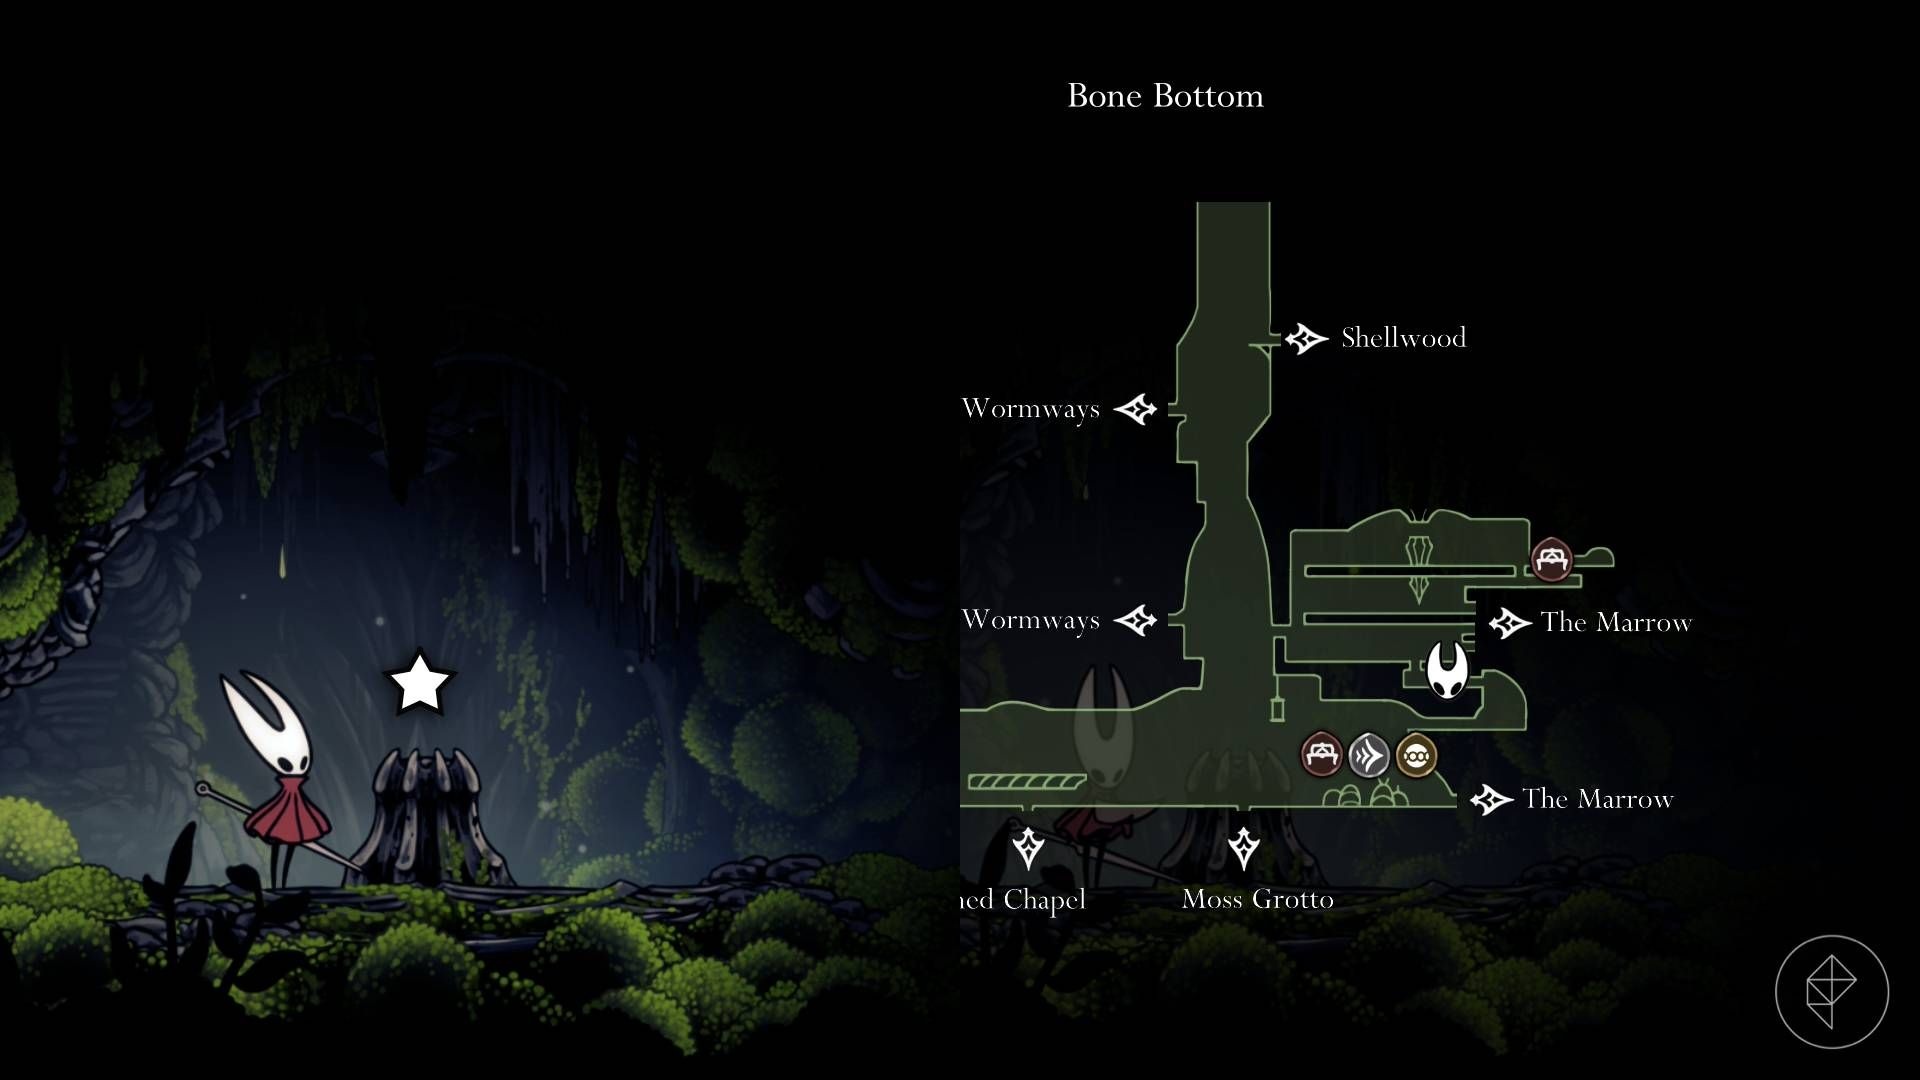
Spool fragment #1 — Mosshome
To reach this fragment, enter Mosshome from The Marrow’s upper-left exit (above where you meet Shakra). Exit left, drop to the platform, and activate the local elevator for a convenient return point. Then hop right, climb up, and break the wall beneath the rosary cache. Avoid traps, move into the next room, and pick up the fragment.
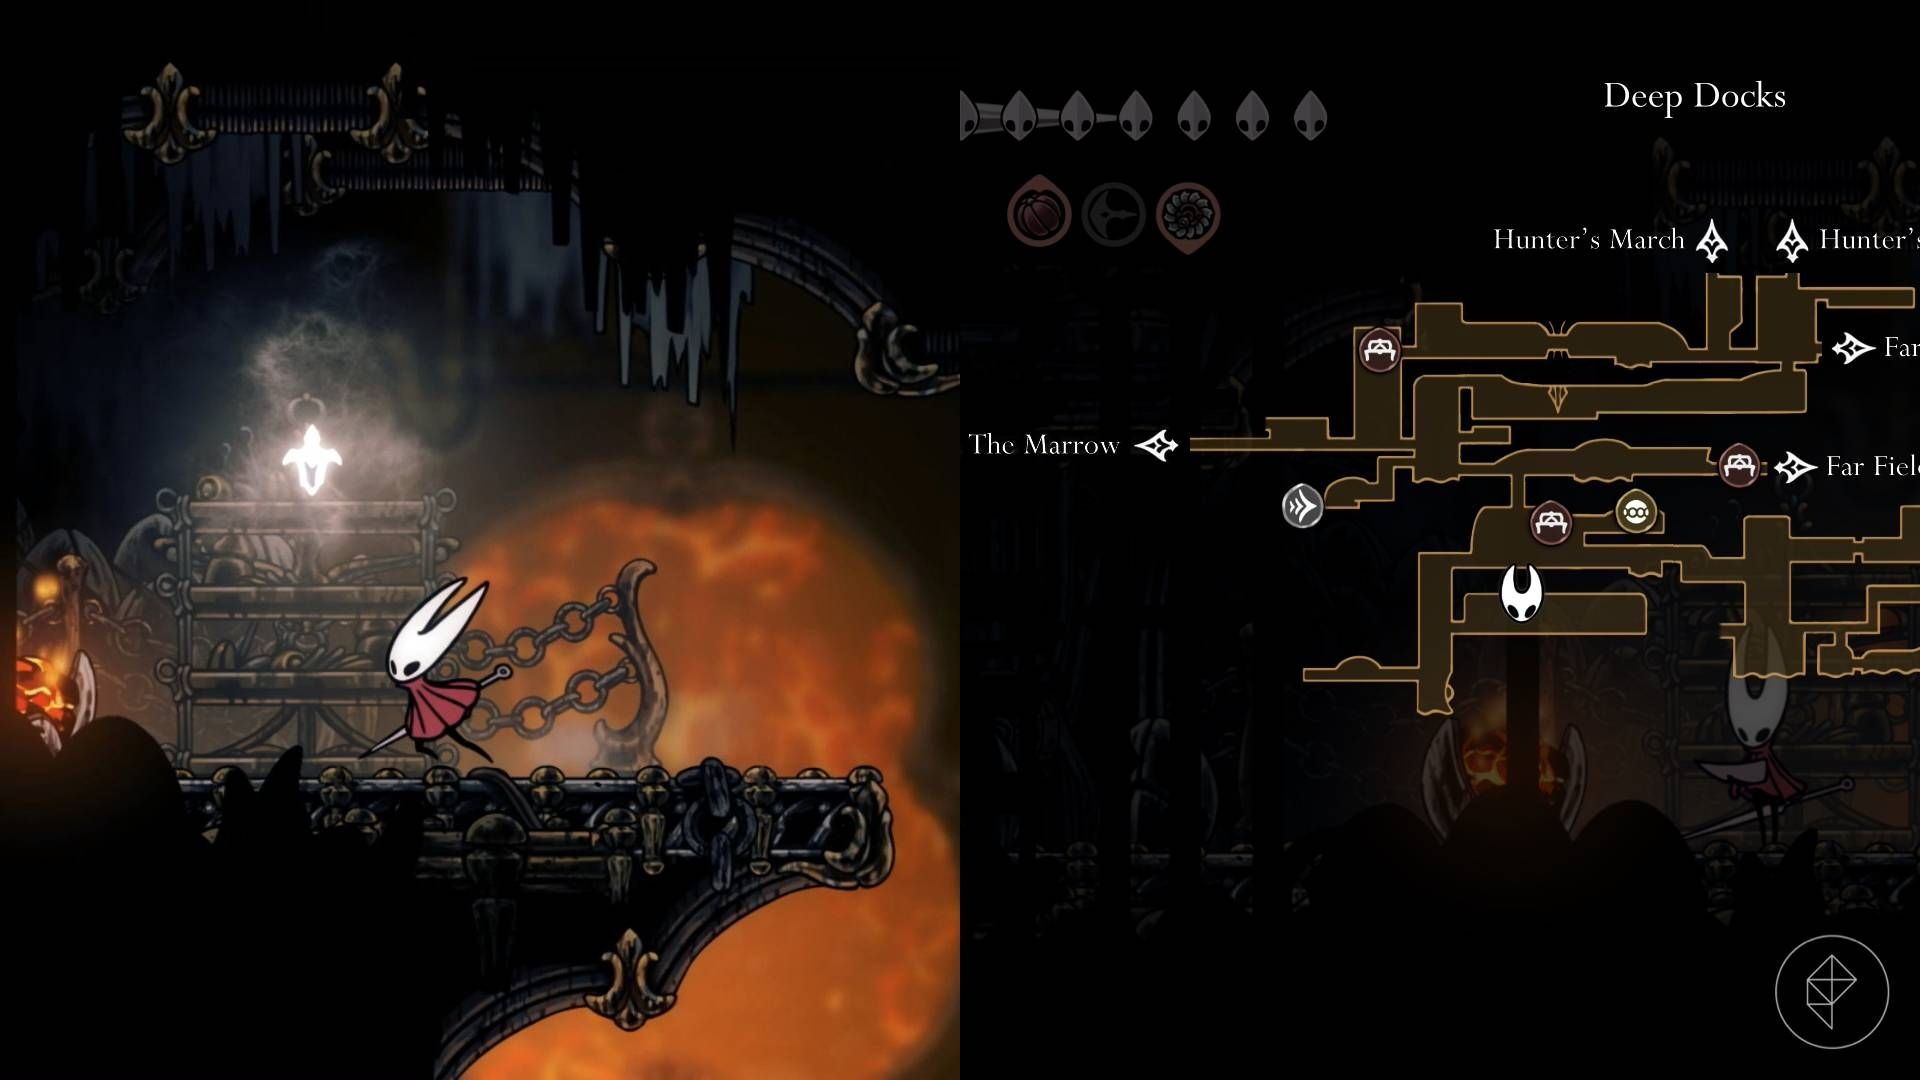
Spool fragment #2 — Above the magma in the Deep Docks
Enter the chamber with lava pools and jump continuously across the magma to avoid damage. At the far end flip the lever to rearrange hanging platforms. Then return using the new platform layout and reach the left ledge to claim the fragment.
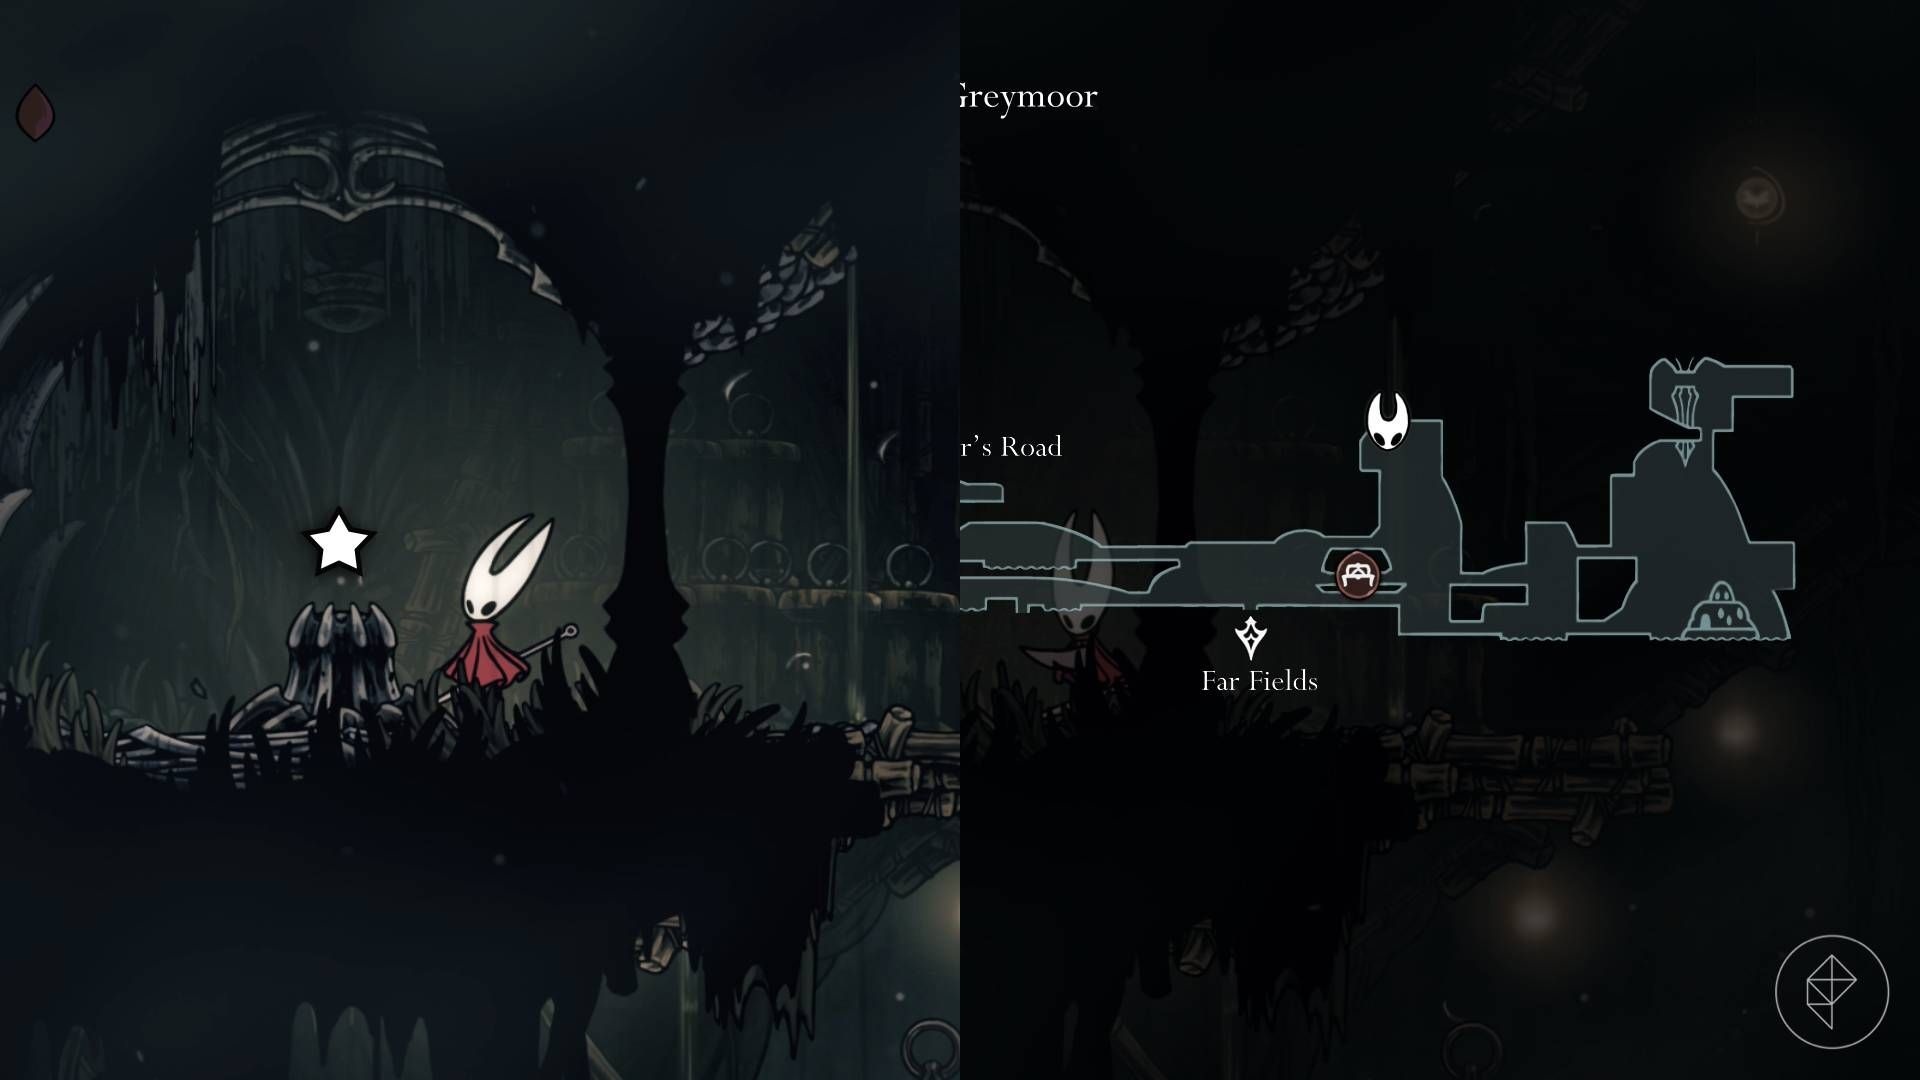
Spool fragment #3 — Greymoor
From the Far Fields entrance, go to the house on the lake and clear the arena there. Defeating the encounter releases a bundle of balloons. Pogo up the balloons; at the top, look left in a small alcove to grab the fragment. If you’ve taken the “Craw Clearing” wish, you can also collect Ragpelt on the climb.
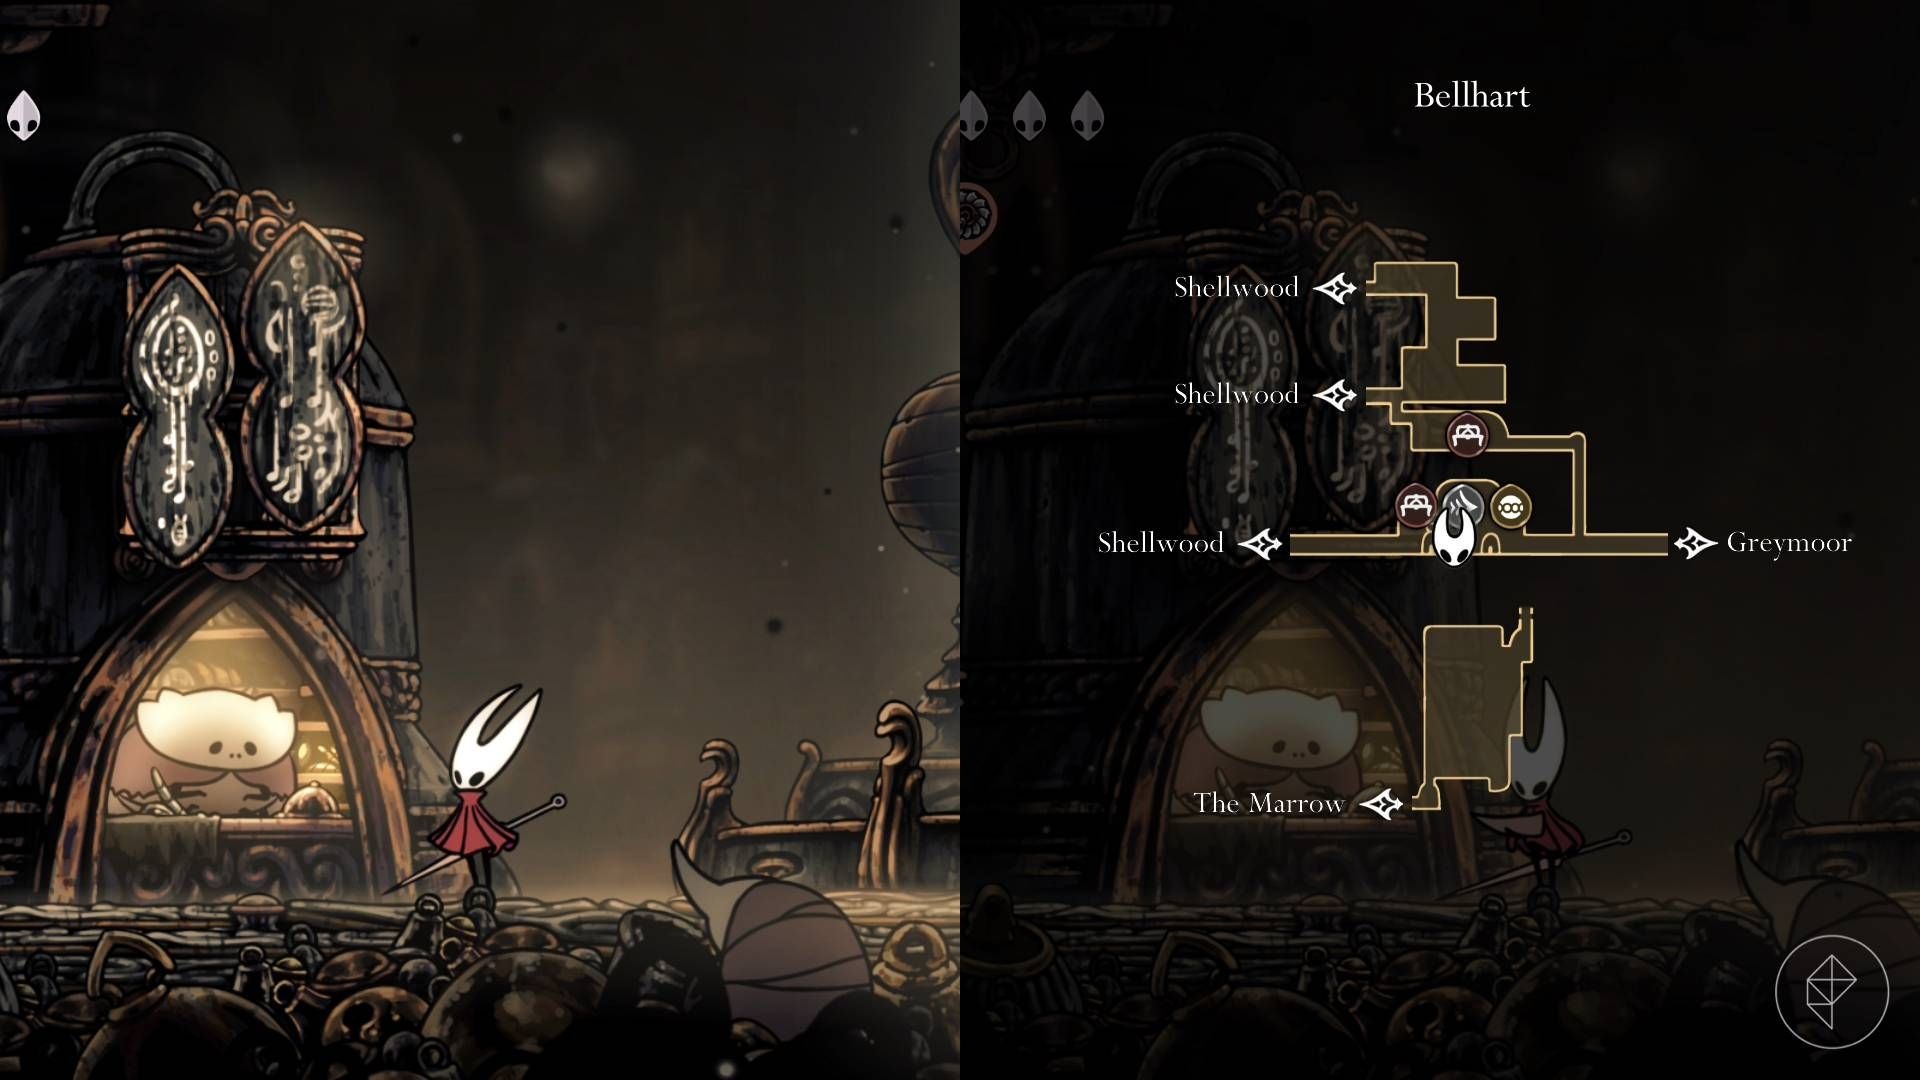
Spool fragment #4 — Bellhart
After you defeat Widow and finish the “Threadspun Town” quest, Frey the merchant in Bellhart sells a spool fragment for 270 rosary beads. So, if you prefer buying over platforming, this is a straightforward option.
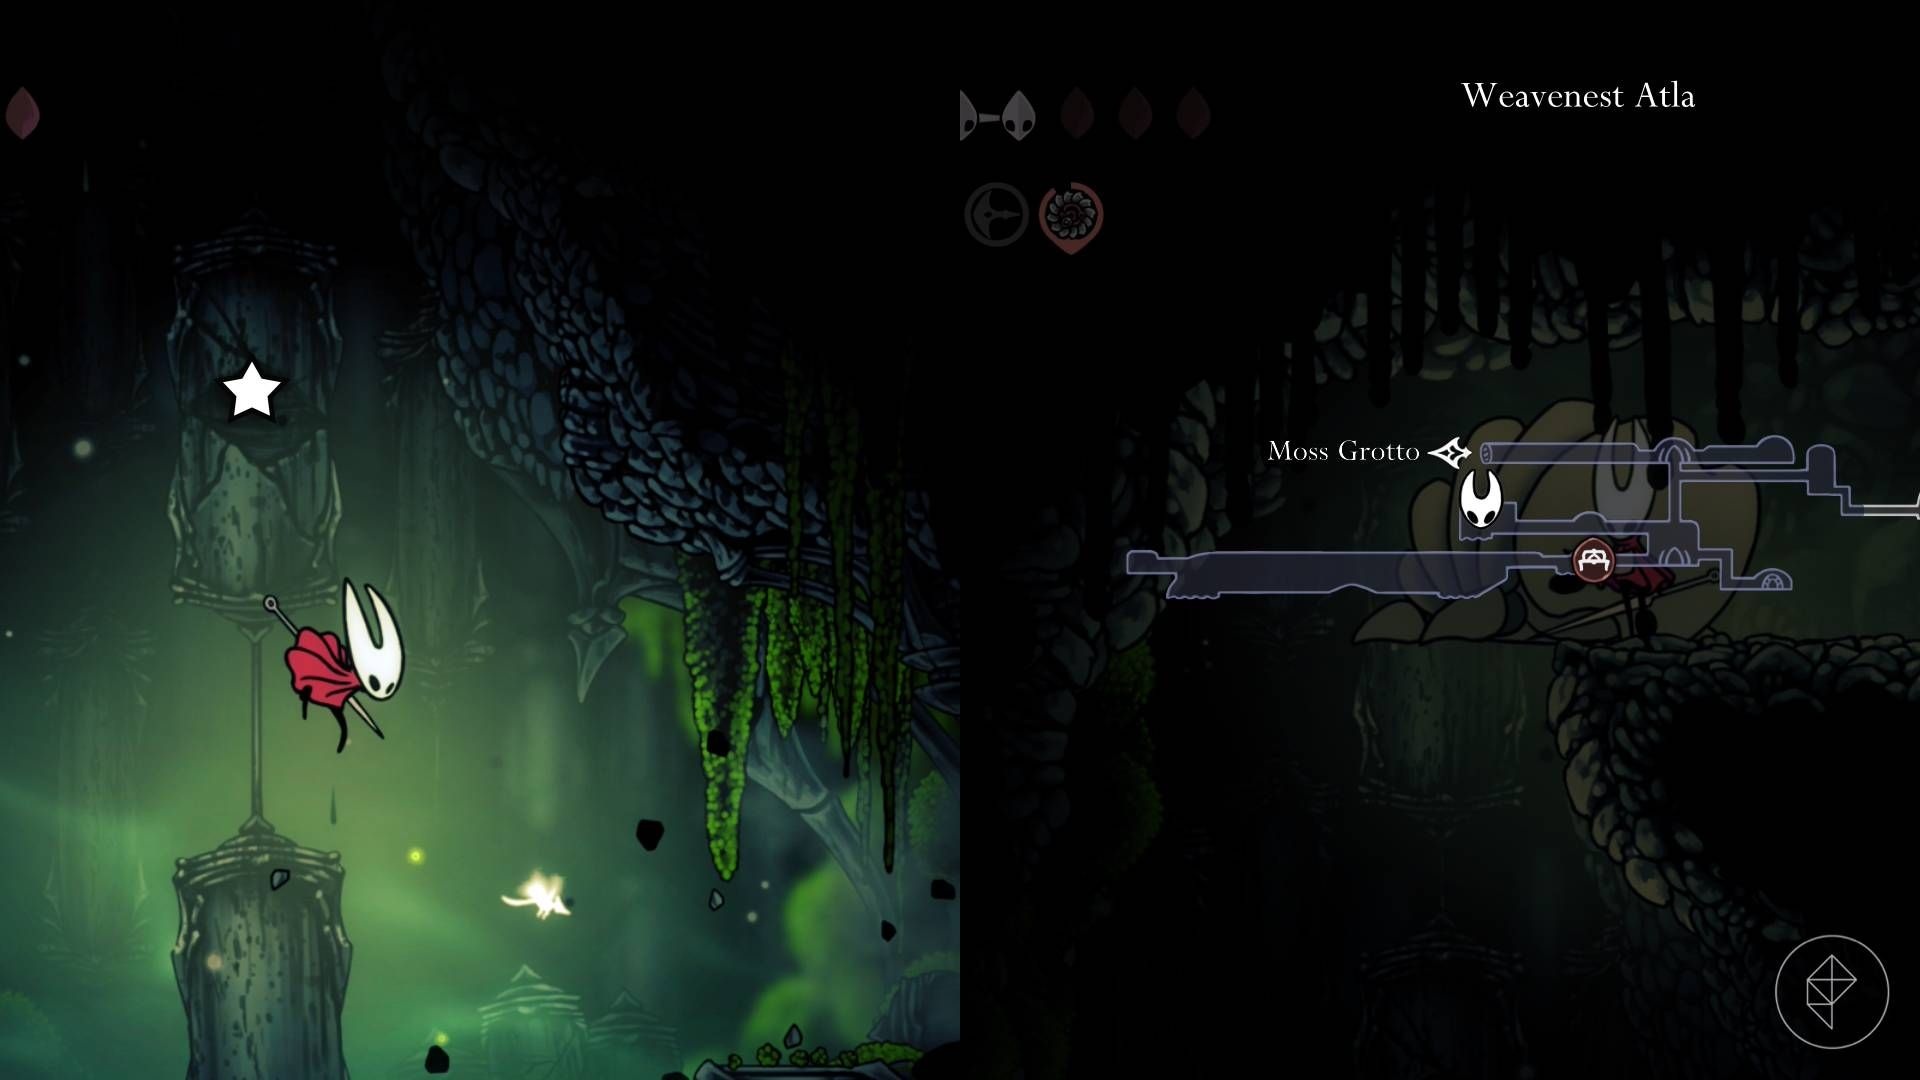
Spool fragment #5 — Weavenest Atla
Use the Needolin to open the Weaver door at Mosshome’s eastern end and speak with Eva. After that conversation, teleport to the bottom of the nest, wall-jump onto the ledge above the elevator, go left, clear or avoid large enemies, and find the fragment above the water.
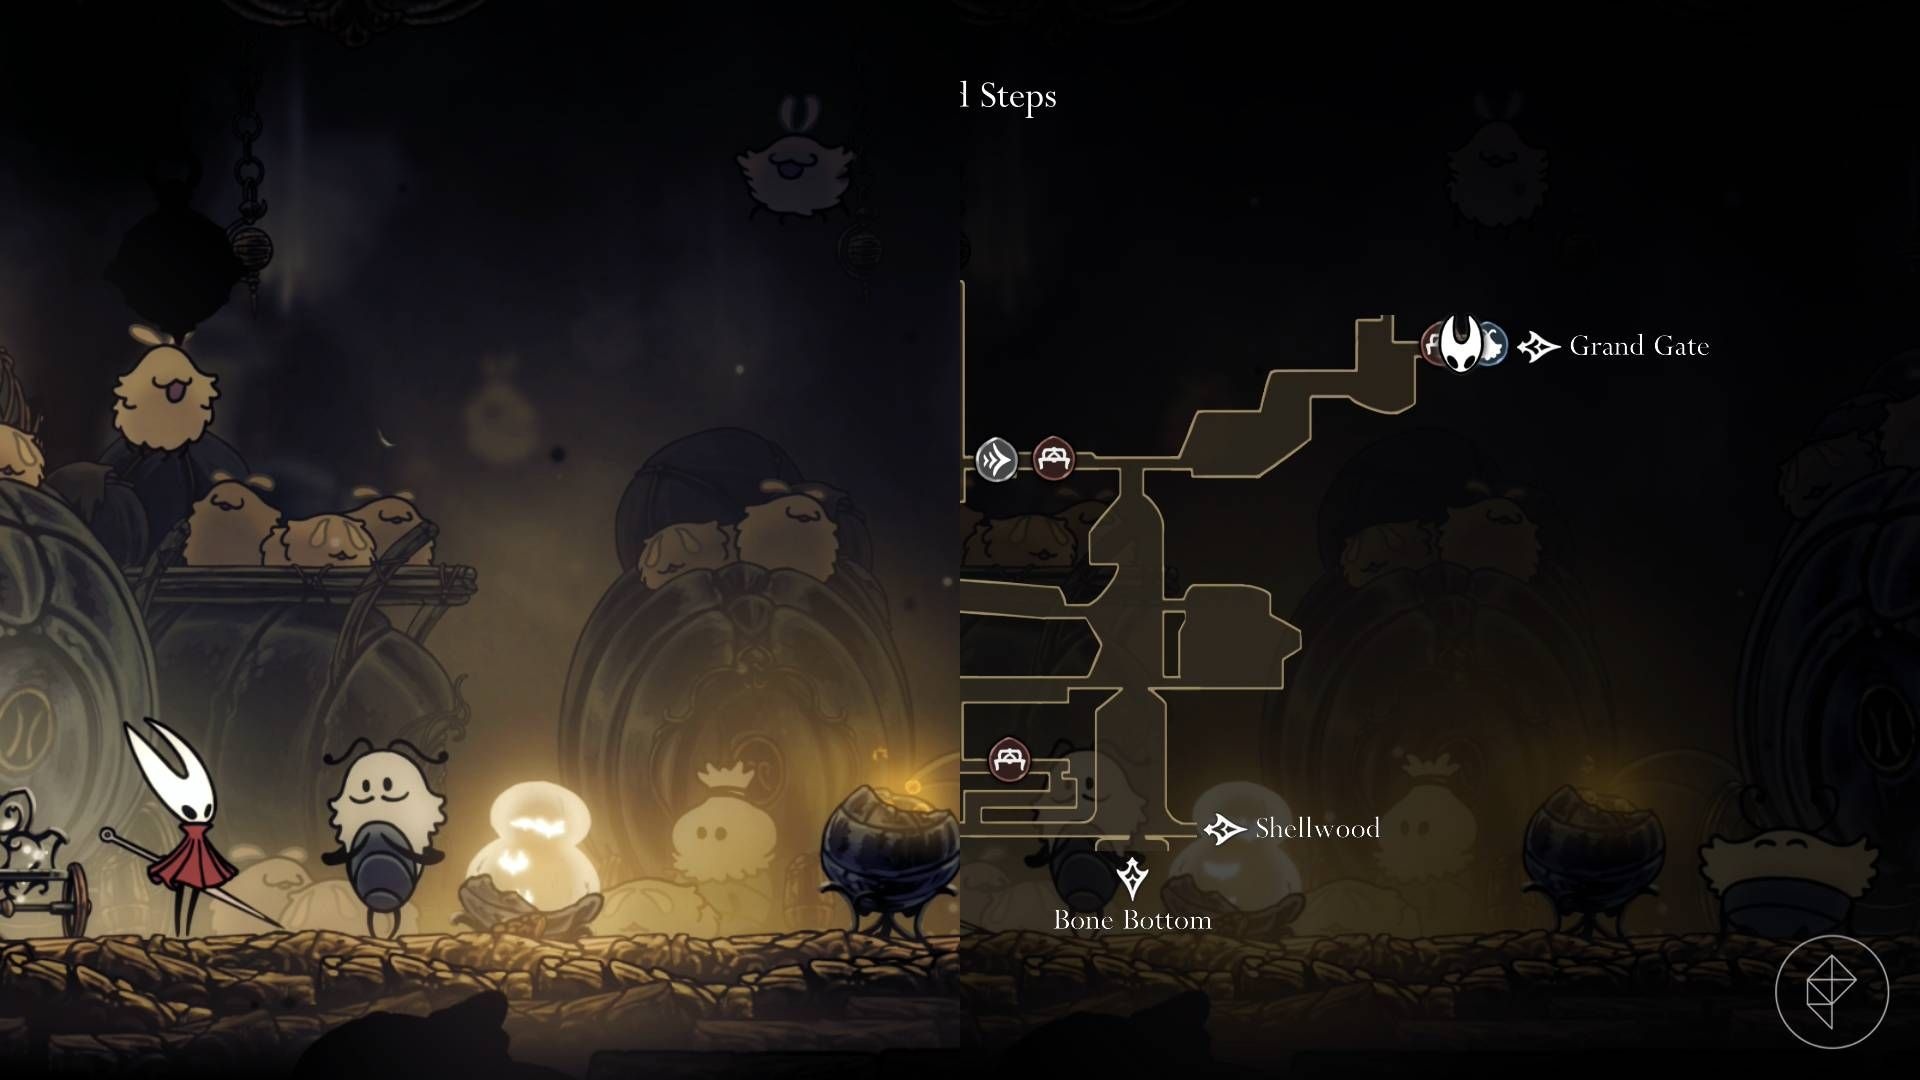
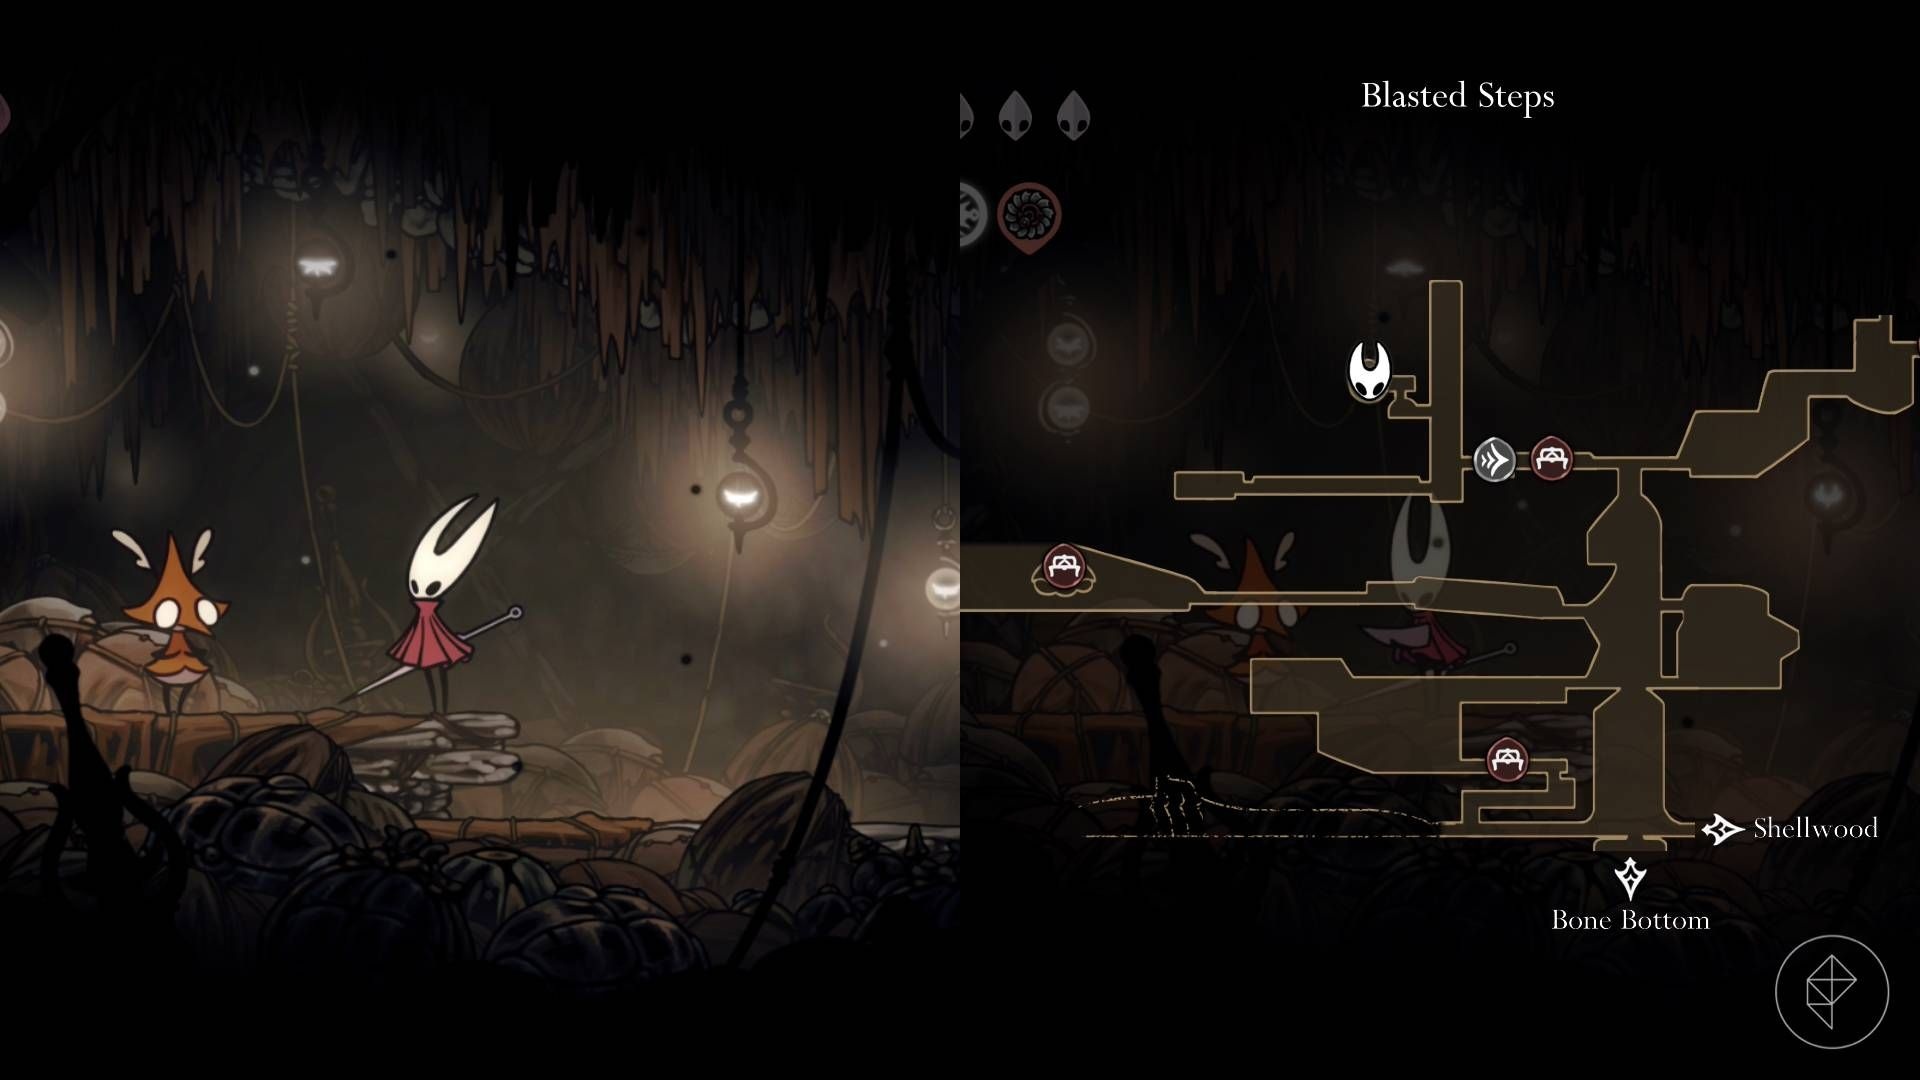
Spool fragment #6 — Flea caravan in Blasted Steps
Mooshka the Fleamaster rewards a spool fragment once the flea caravan moves from Greymoor to the Blasted Steps. To trigger that move you must find a total of 14 fleas, and the caravan relocation happens after you enter the Citadel and begin Act 2.
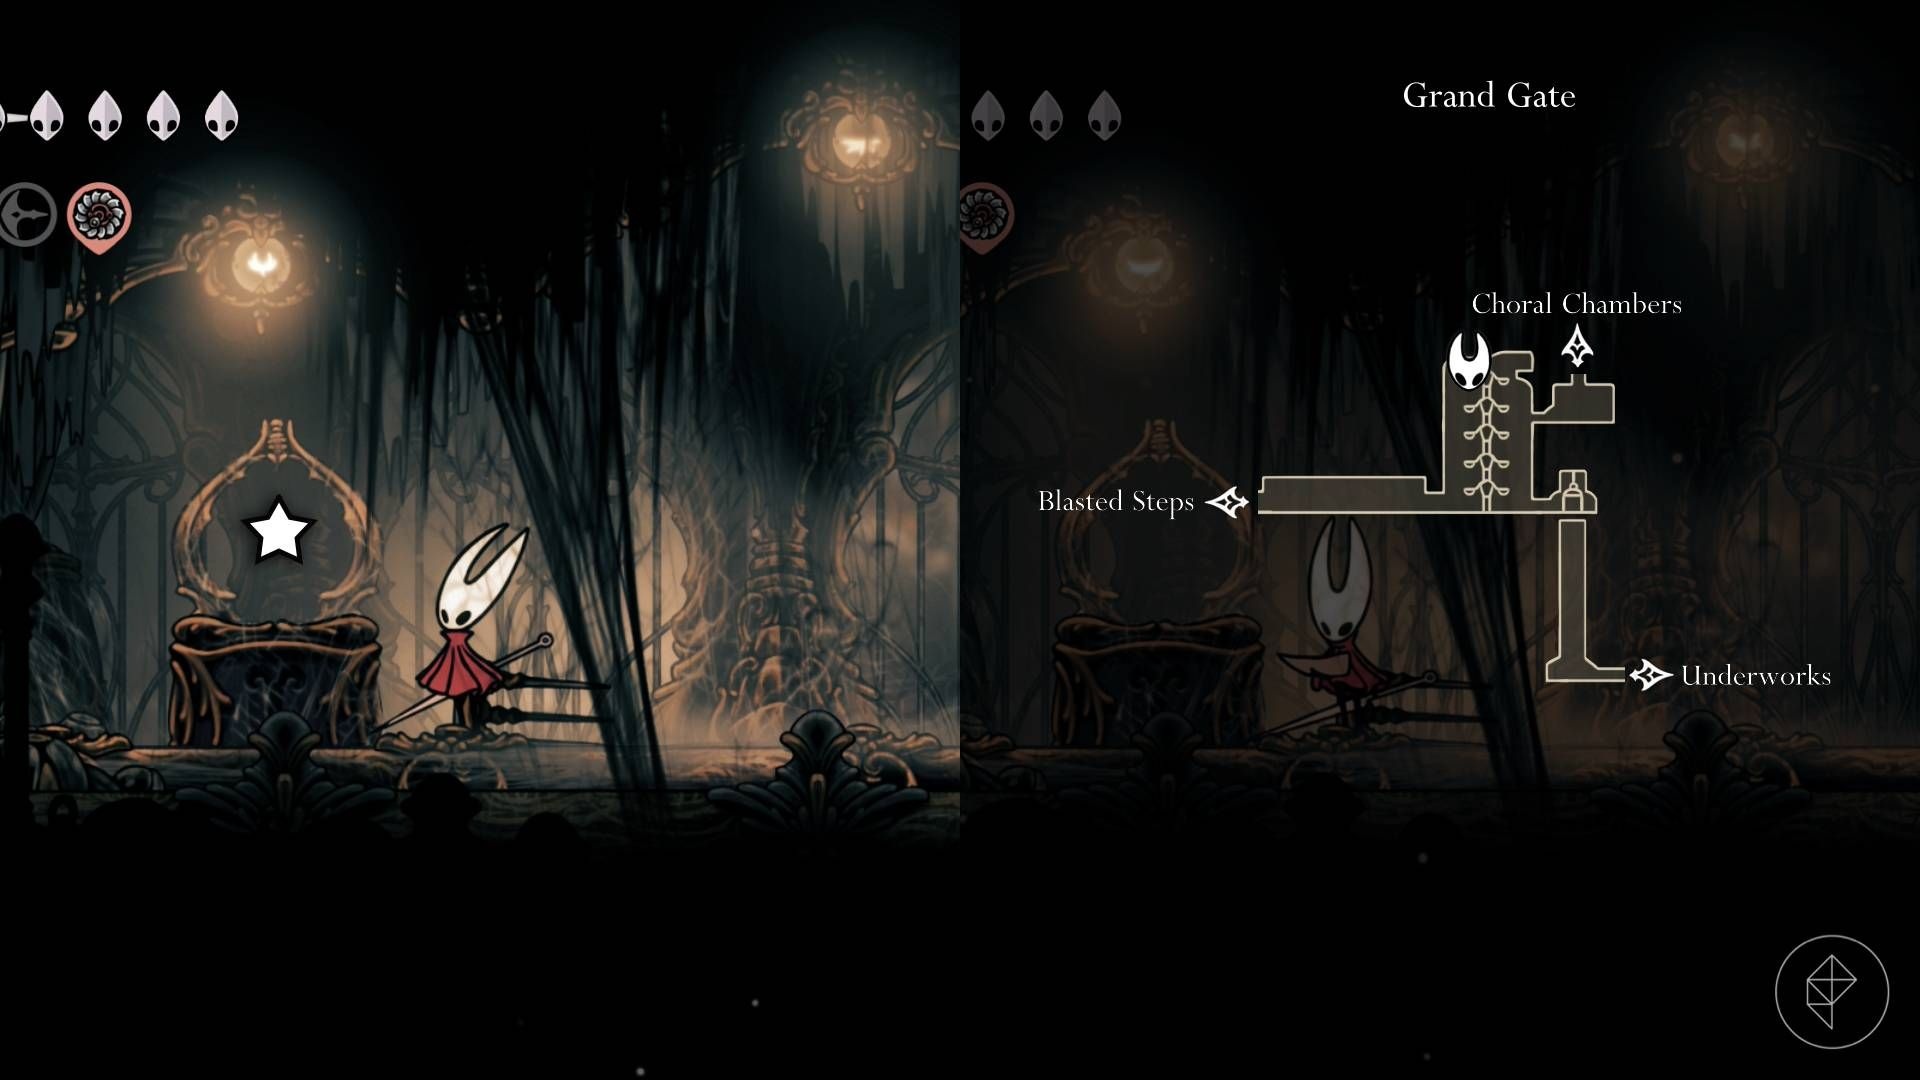
Spool fragment #7 — Grand Gate
Climb to the Grand Gate’s upper-left corner using platform timing (you can hit platforms from below to adjust them). In a small upper chamber you’ll find the fragment; the platform manipulation is the key to access.
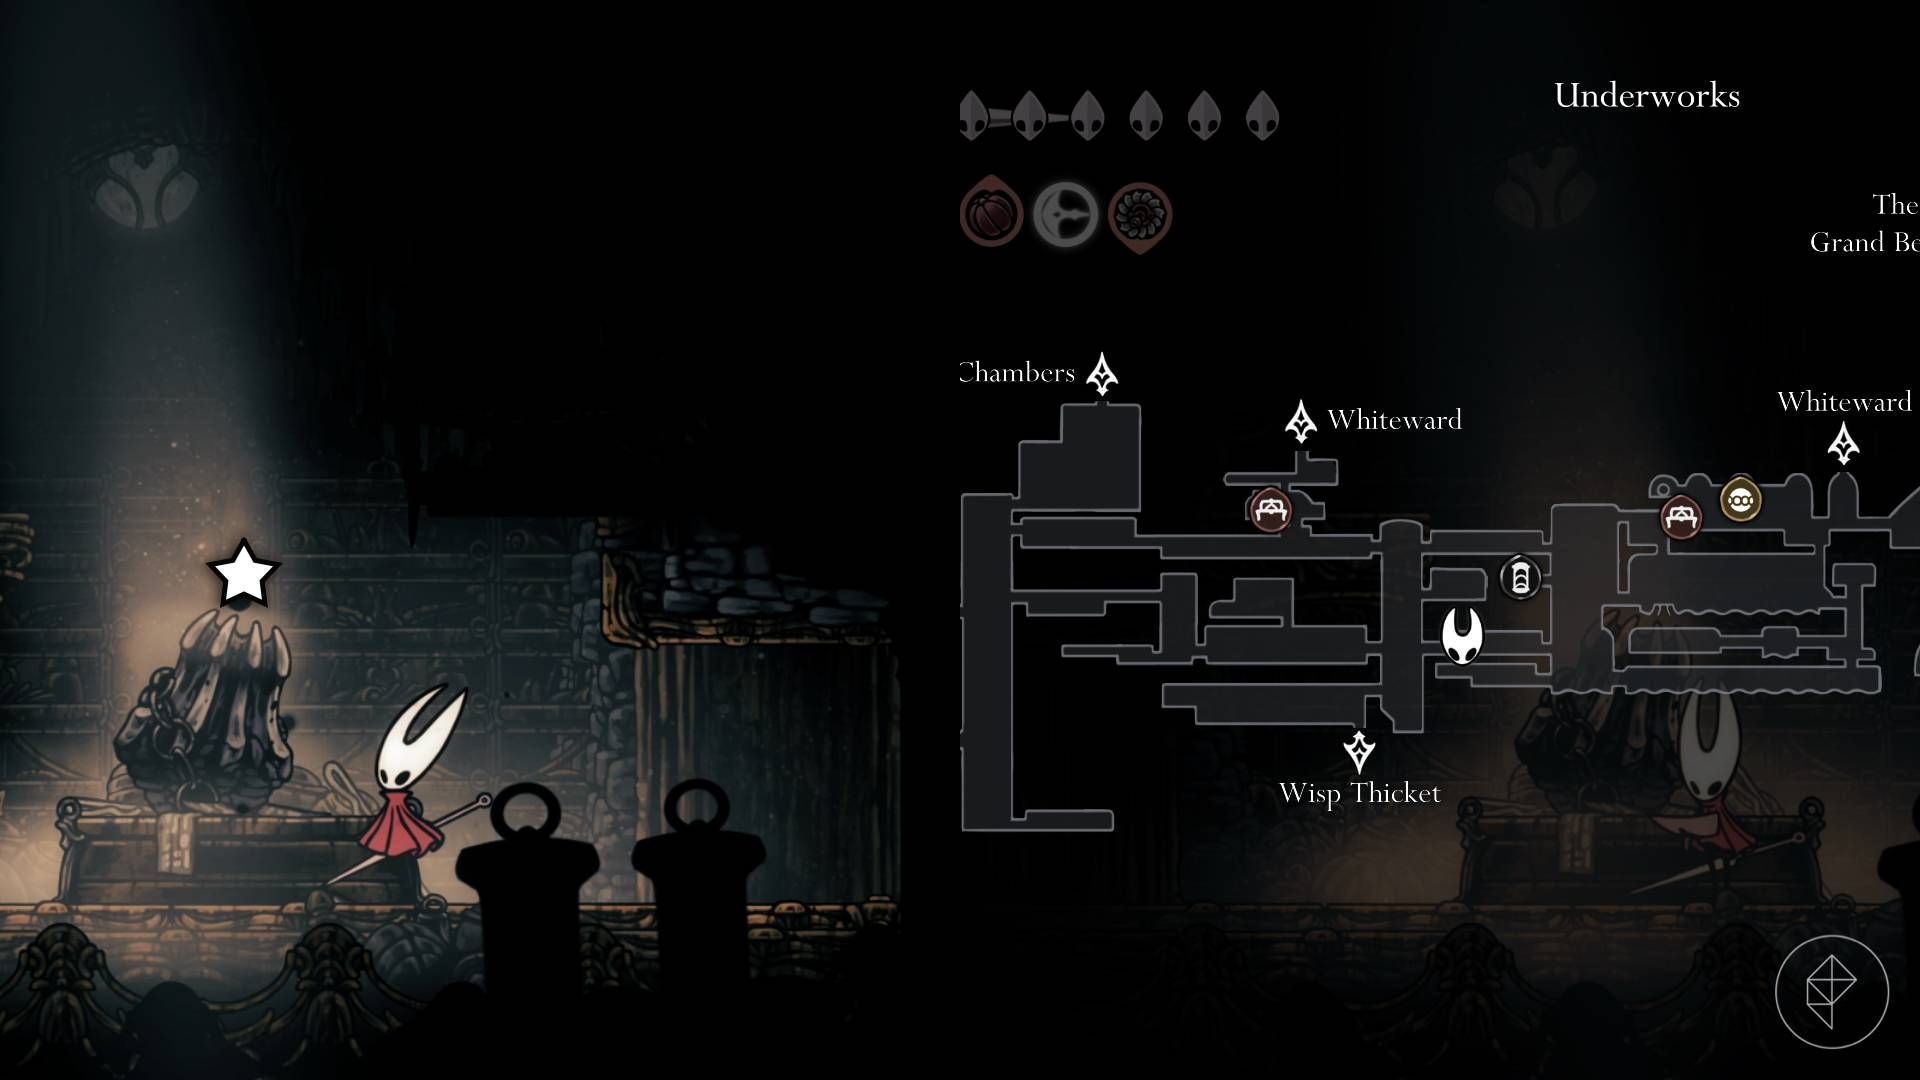
Spool fragment #8 — Below the Ventrica in the Underworks
Exit the Ventrica station in the Underworks and drop down while avoiding steam vents. Enter the left room below; it contains the fragment and acts as a shortcut to the western Underworks.
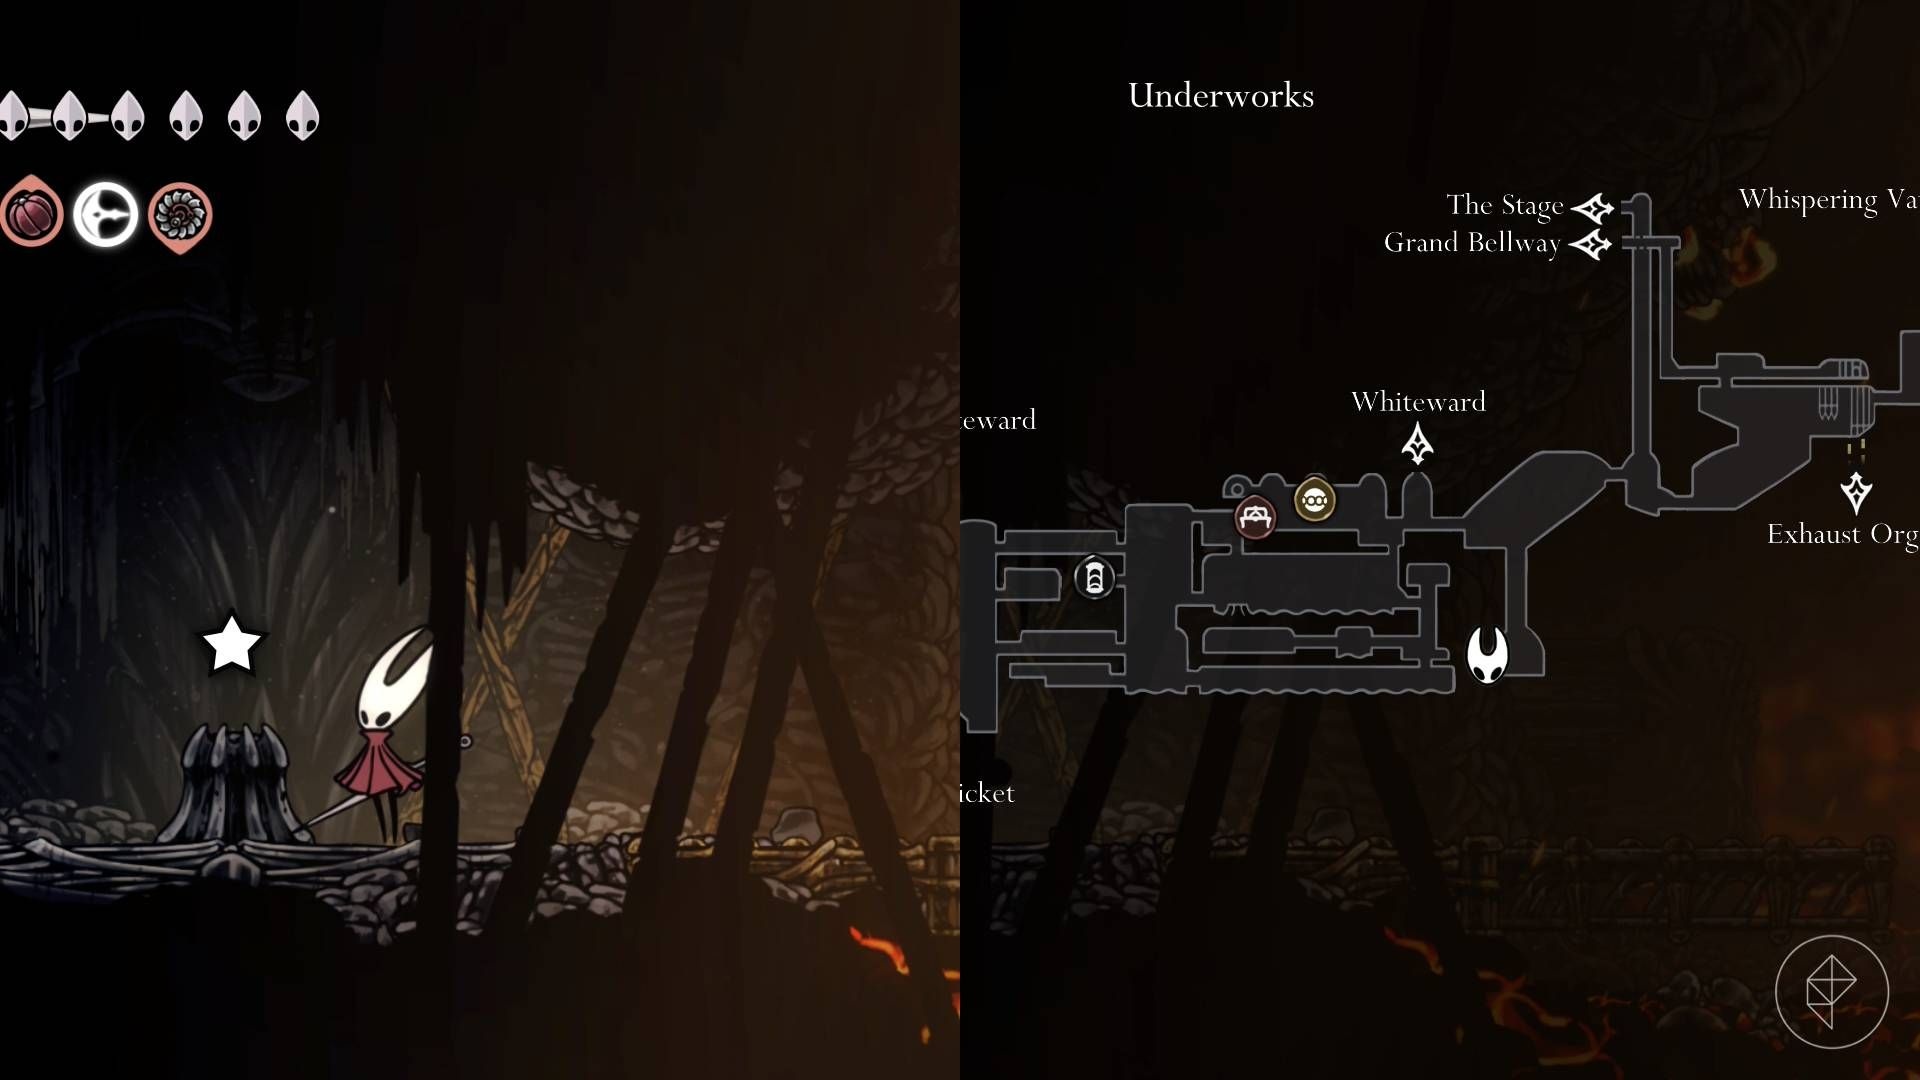
Spool fragment #9 — Below the spikes in the Underworks
From The Stage elevator where you fought Trobbio, go left and carefully traverse above spikes. Find an opening in the floor, hover into it, then follow a small walkway into the rock to reach the fragment at the end.
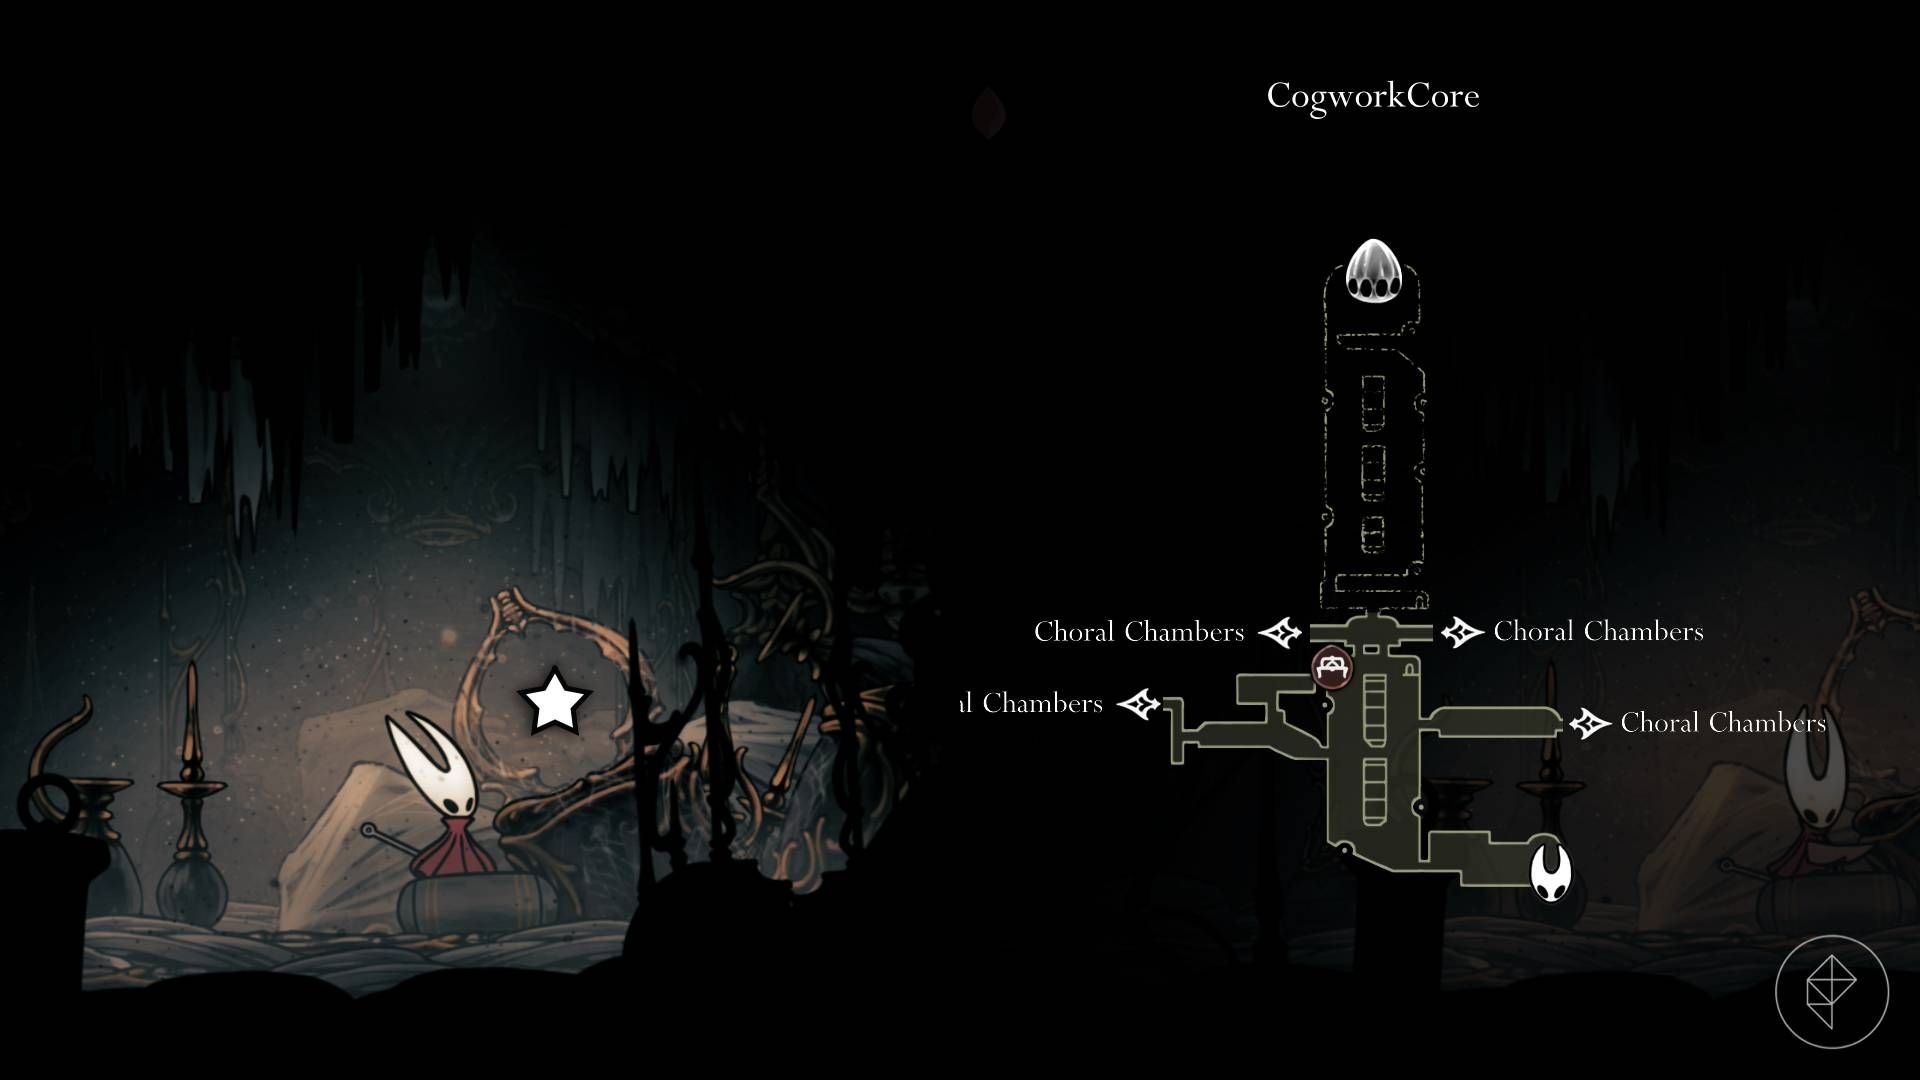
Spool fragment #10 — Cogwork Core
You can get this without the Faydown Cloak, but the cloak makes platforming easier. From the Cogwork Core bench drop to the bottom, hop right to the bottom-right room, wall-jump up the shaft, and hit a lever repeatedly to open a door. Ignore the spawned clockwork enemy, go down the newly opened path, hit the next lever to open a trapdoor, then follow the tunnel to the fragment.
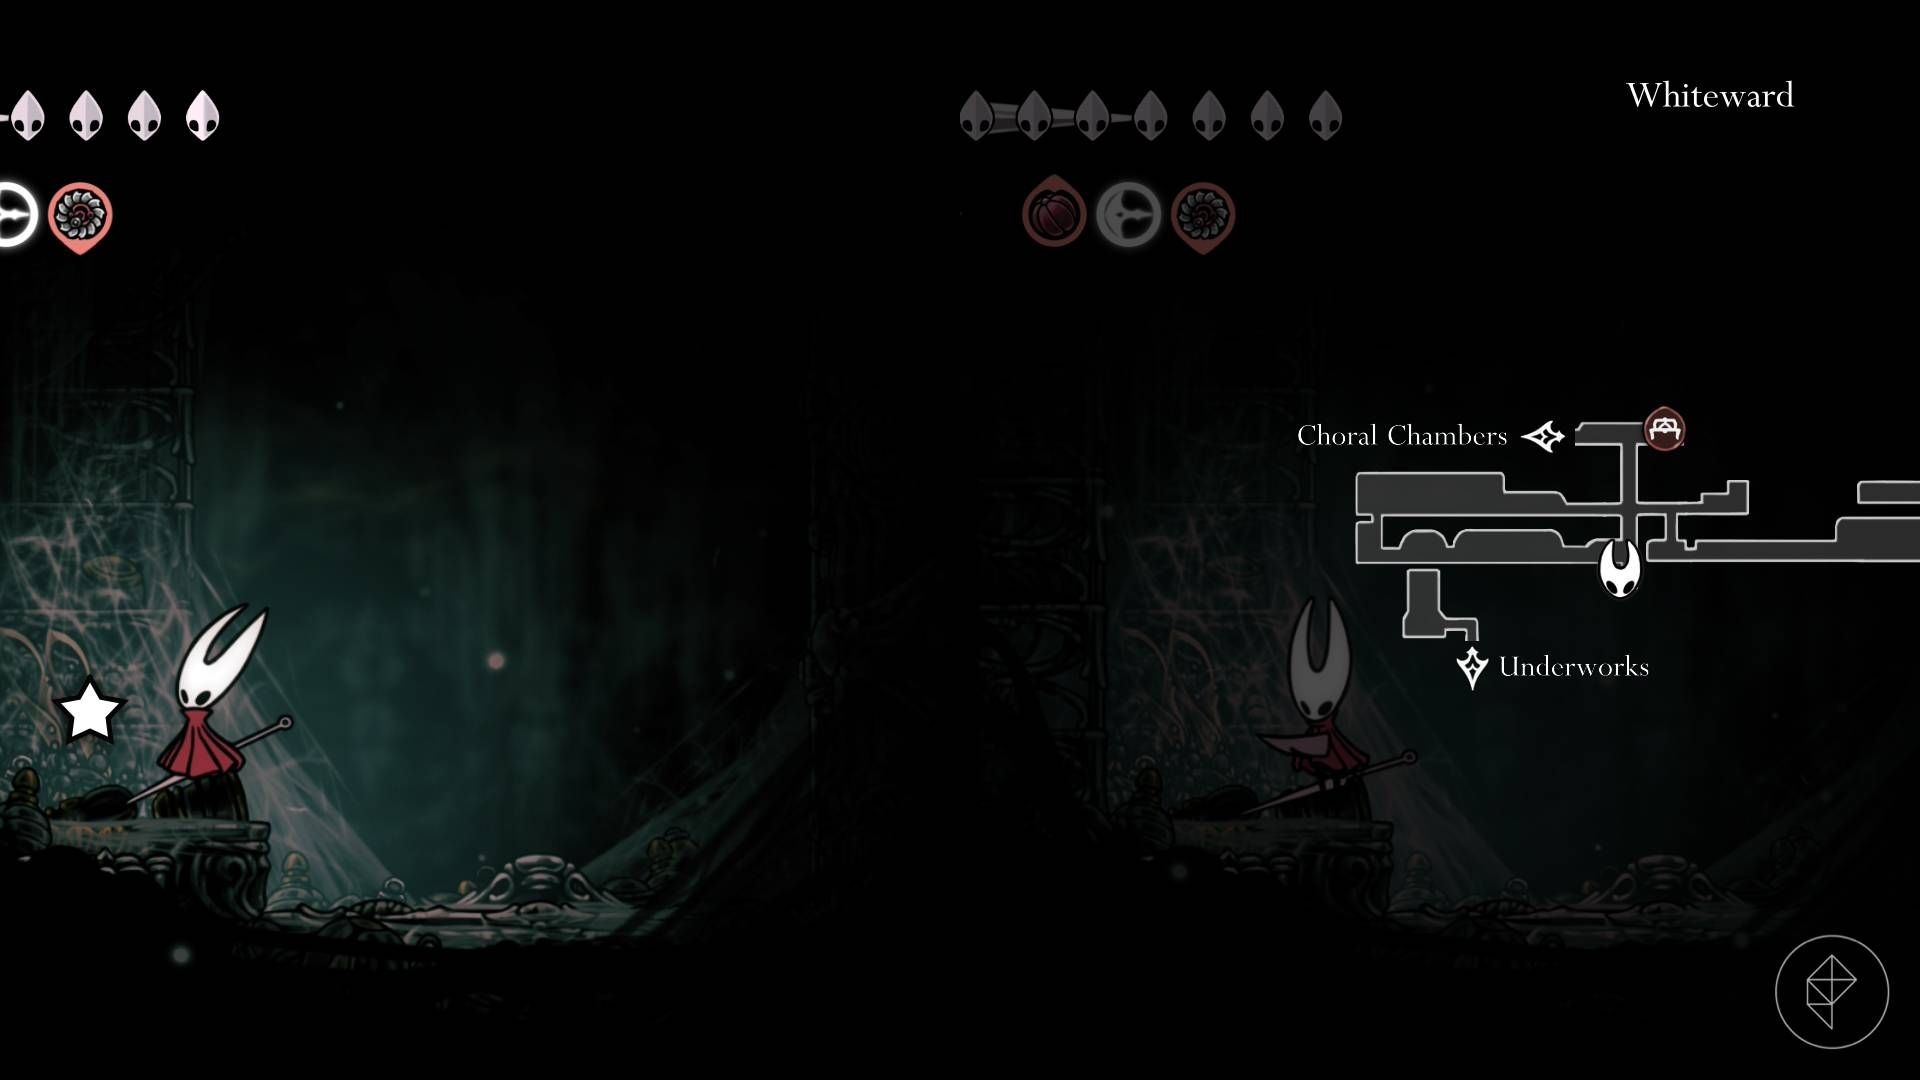
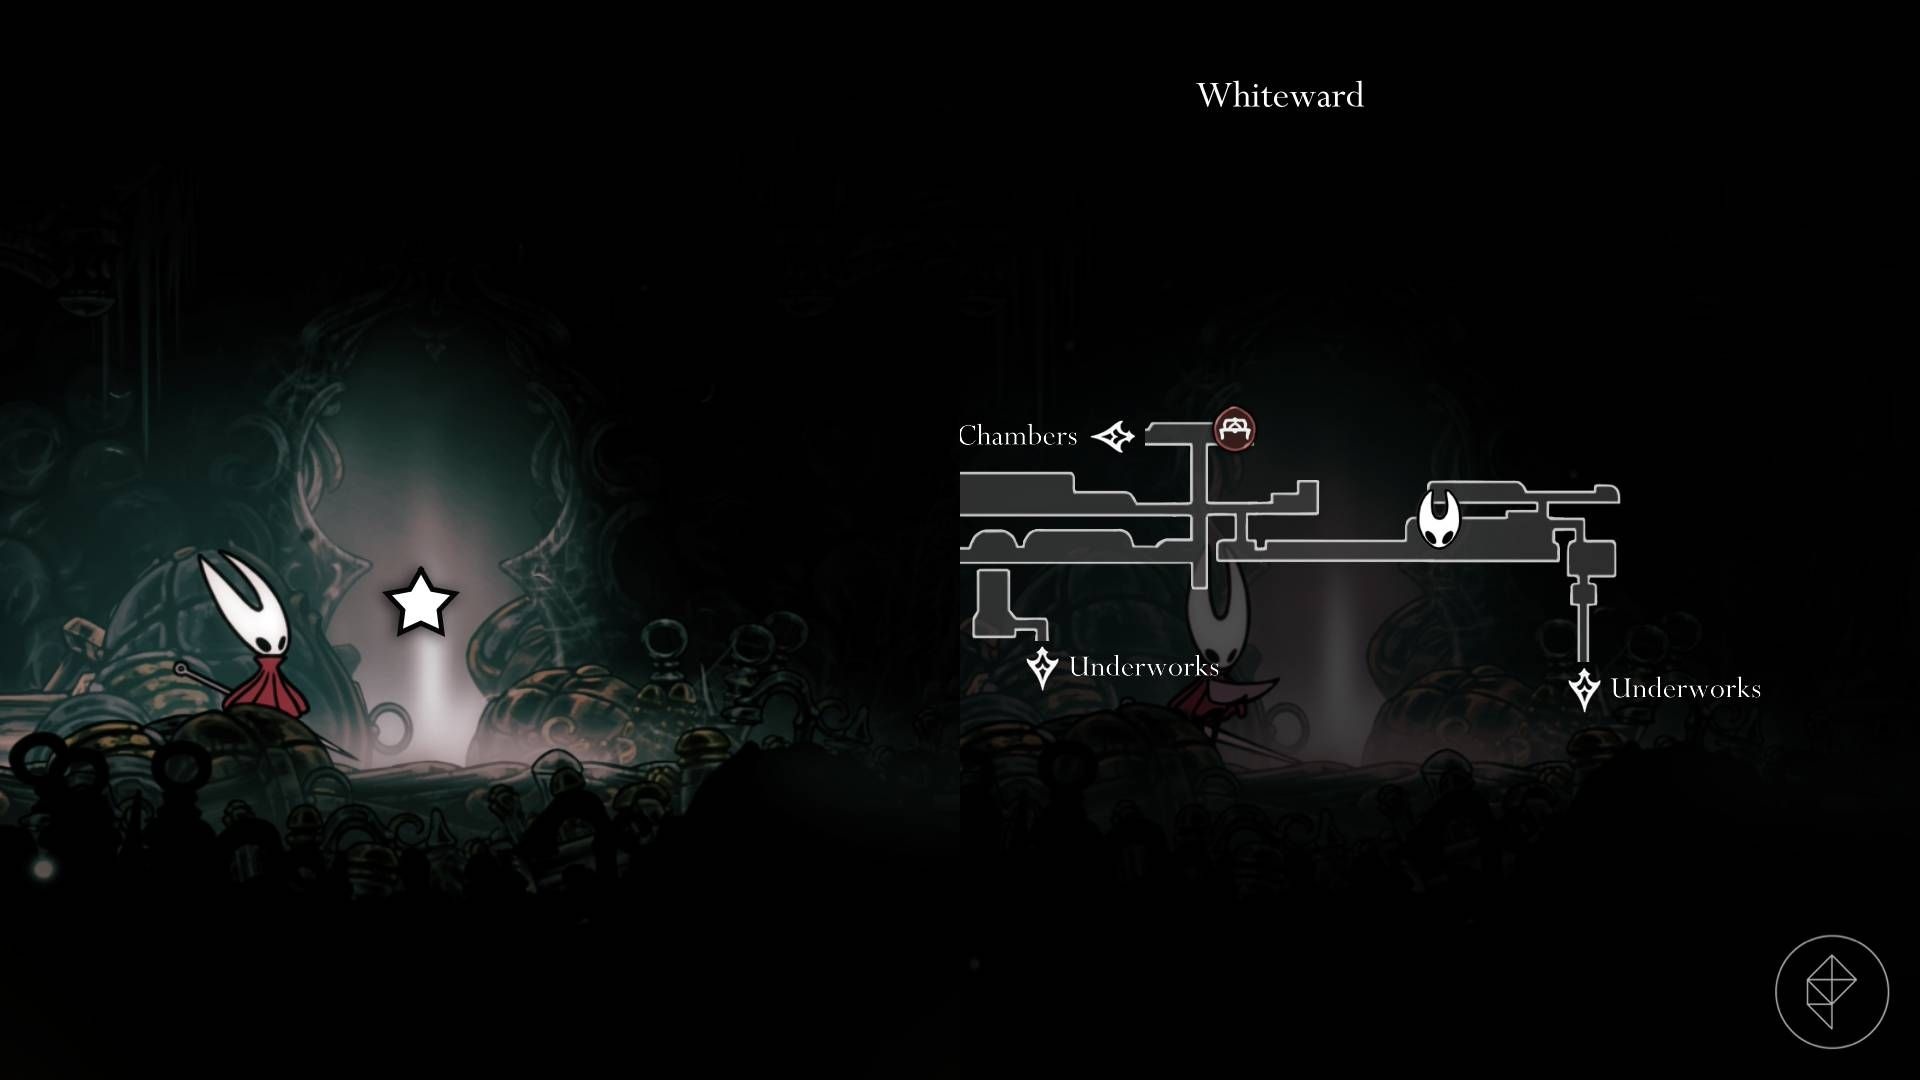
Spool fragment #11 — Under the elevator in Whiteward
This one hides at the bottom of an elevator shaft normally covered by the lift carriage. Take the Whiteward elevator down, proceed left until a corridor loops back to an opening onto the shaft, wall-jump up, stand on the button to call the elevator, immediately drop back down into a side corridor, wait for the elevator to pass, then drop to the bottom and grab the fragment.
Spool fragment #12 — “Balm for the Wounded” quest in Whiteward
Sherma winds up in Songclave and later in Whiteward after certain story steps. Complete “Building Up Songclave” by donating 300 rosary beads at the First Shrine’s wish wall, rest at a bench, then speak with Sherma. After he leaves, accept the new “Balm for the Wounded” wish on the wish board. Sherma will be in a room above the mortician enemies in Whiteward; clear three enemy waves there and he rewards you with the fragment.
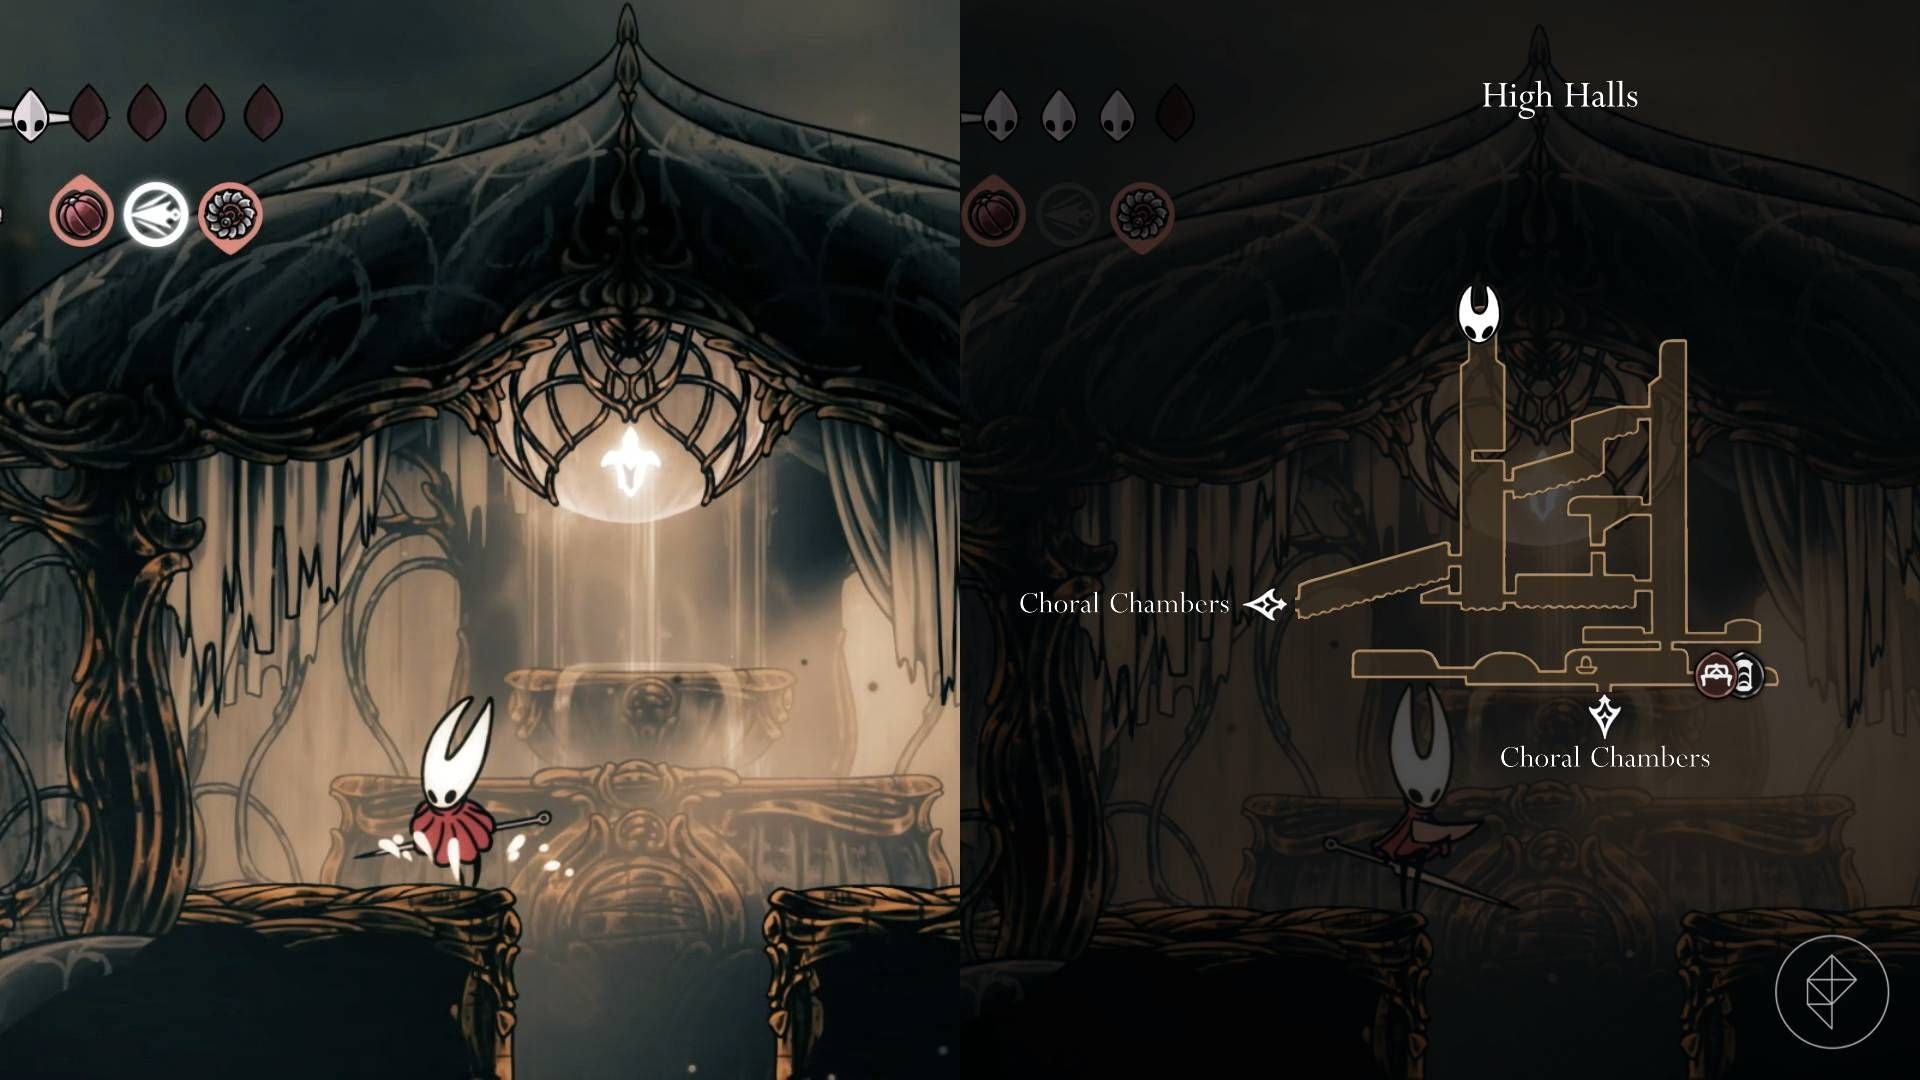
Spool fragment #13 — High Halls
Climb the first waterway to the vertical chamber that lets you go up or down. For this fragment head up, use the Faydown Cloak’s double jump, and use Clawline to latch rotating rings. Avoid or fight ministers as needed, then break the glass dome at the top to take the fragment.
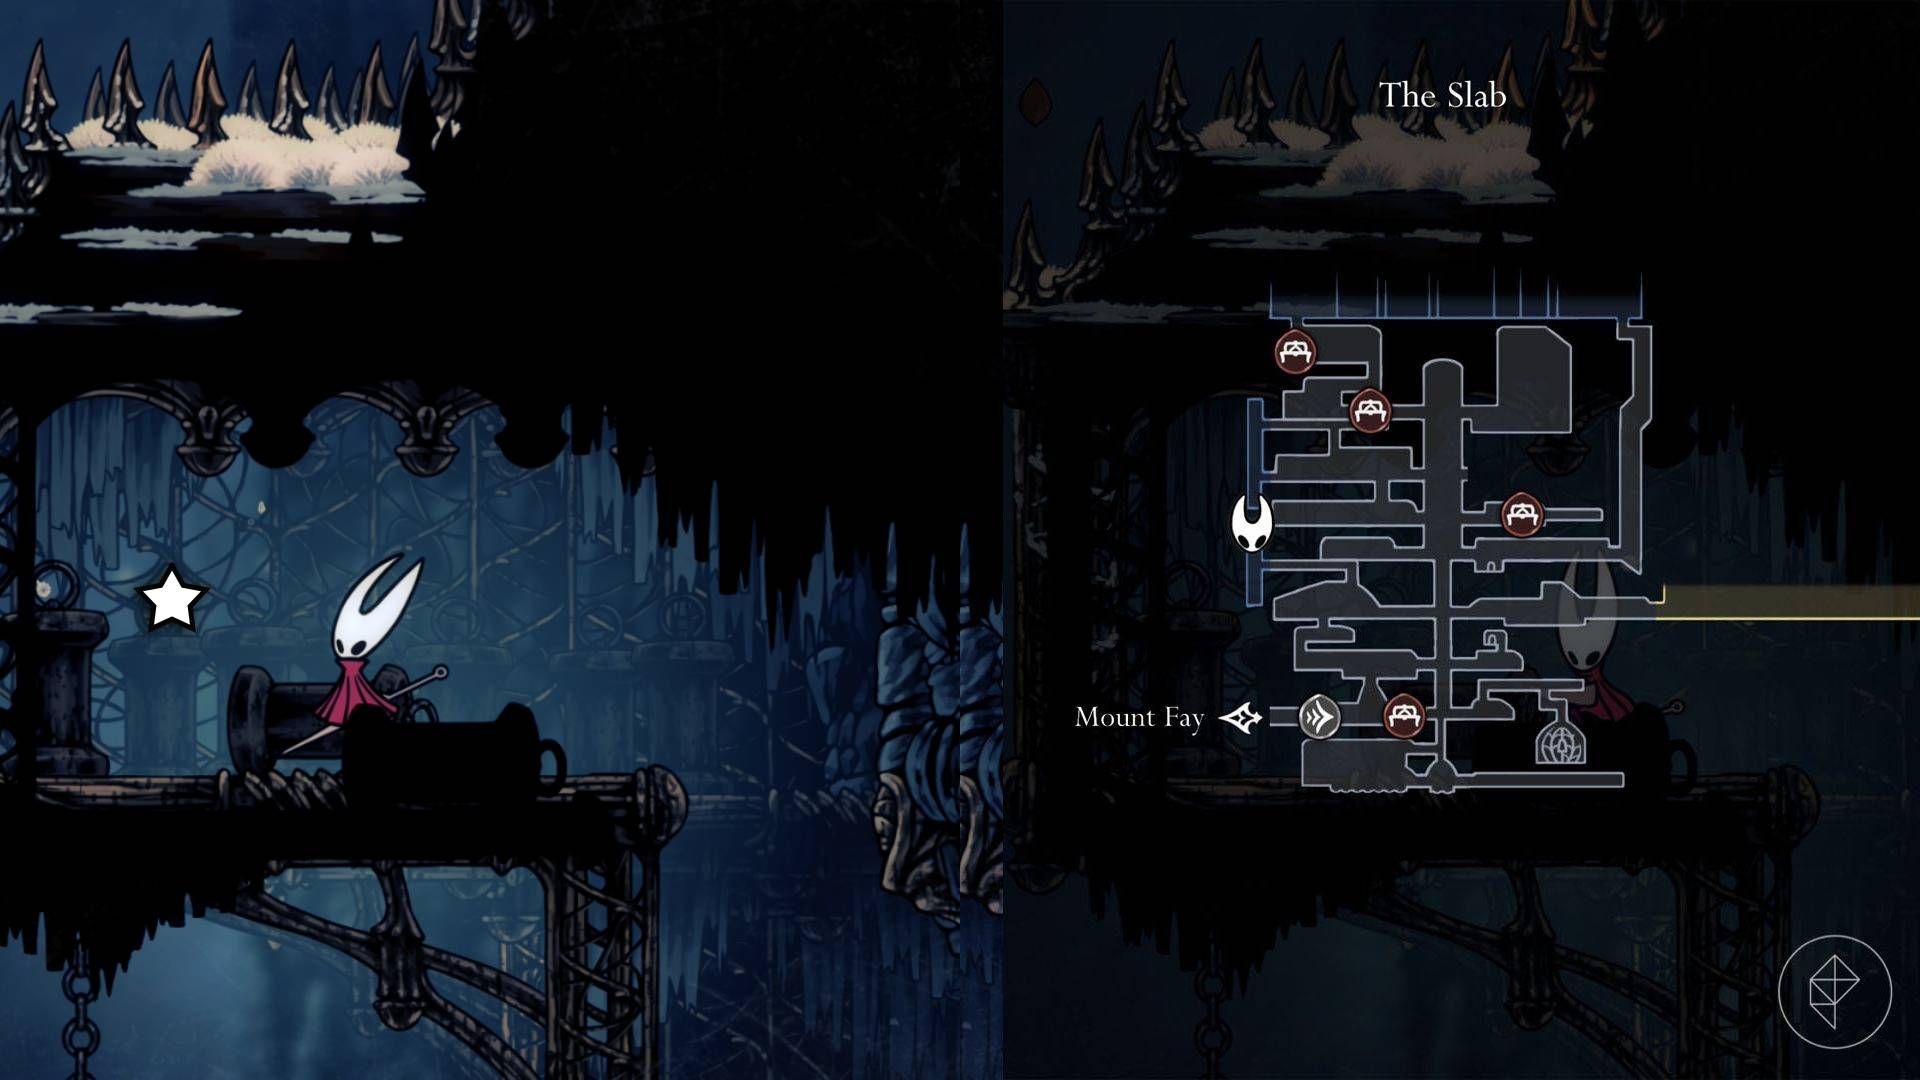
Spool fragment #14 — Mount Fay
This fragment is visible from Mount Fay’s main area but counts as part of The Slab for accessibility. From the Bellway station go up and enter a roof duct; that narrow corridor leads left and spits you out at the fragment. If you lack the Apostate Key from the Putrified Ducts, access it via The Slab’s Choral Chambers entrance instead.
Spool fragment #15 — Songclave
After completing “The Wandering Merchant” wish and donating 500 rosary beads to strengthen Songclave, Jubilana disappears. Accept “The Lost Merchant” wish and find her in Memorium. Once she’s back in Songclave, she sells a spool fragment for 500 rosary beads.
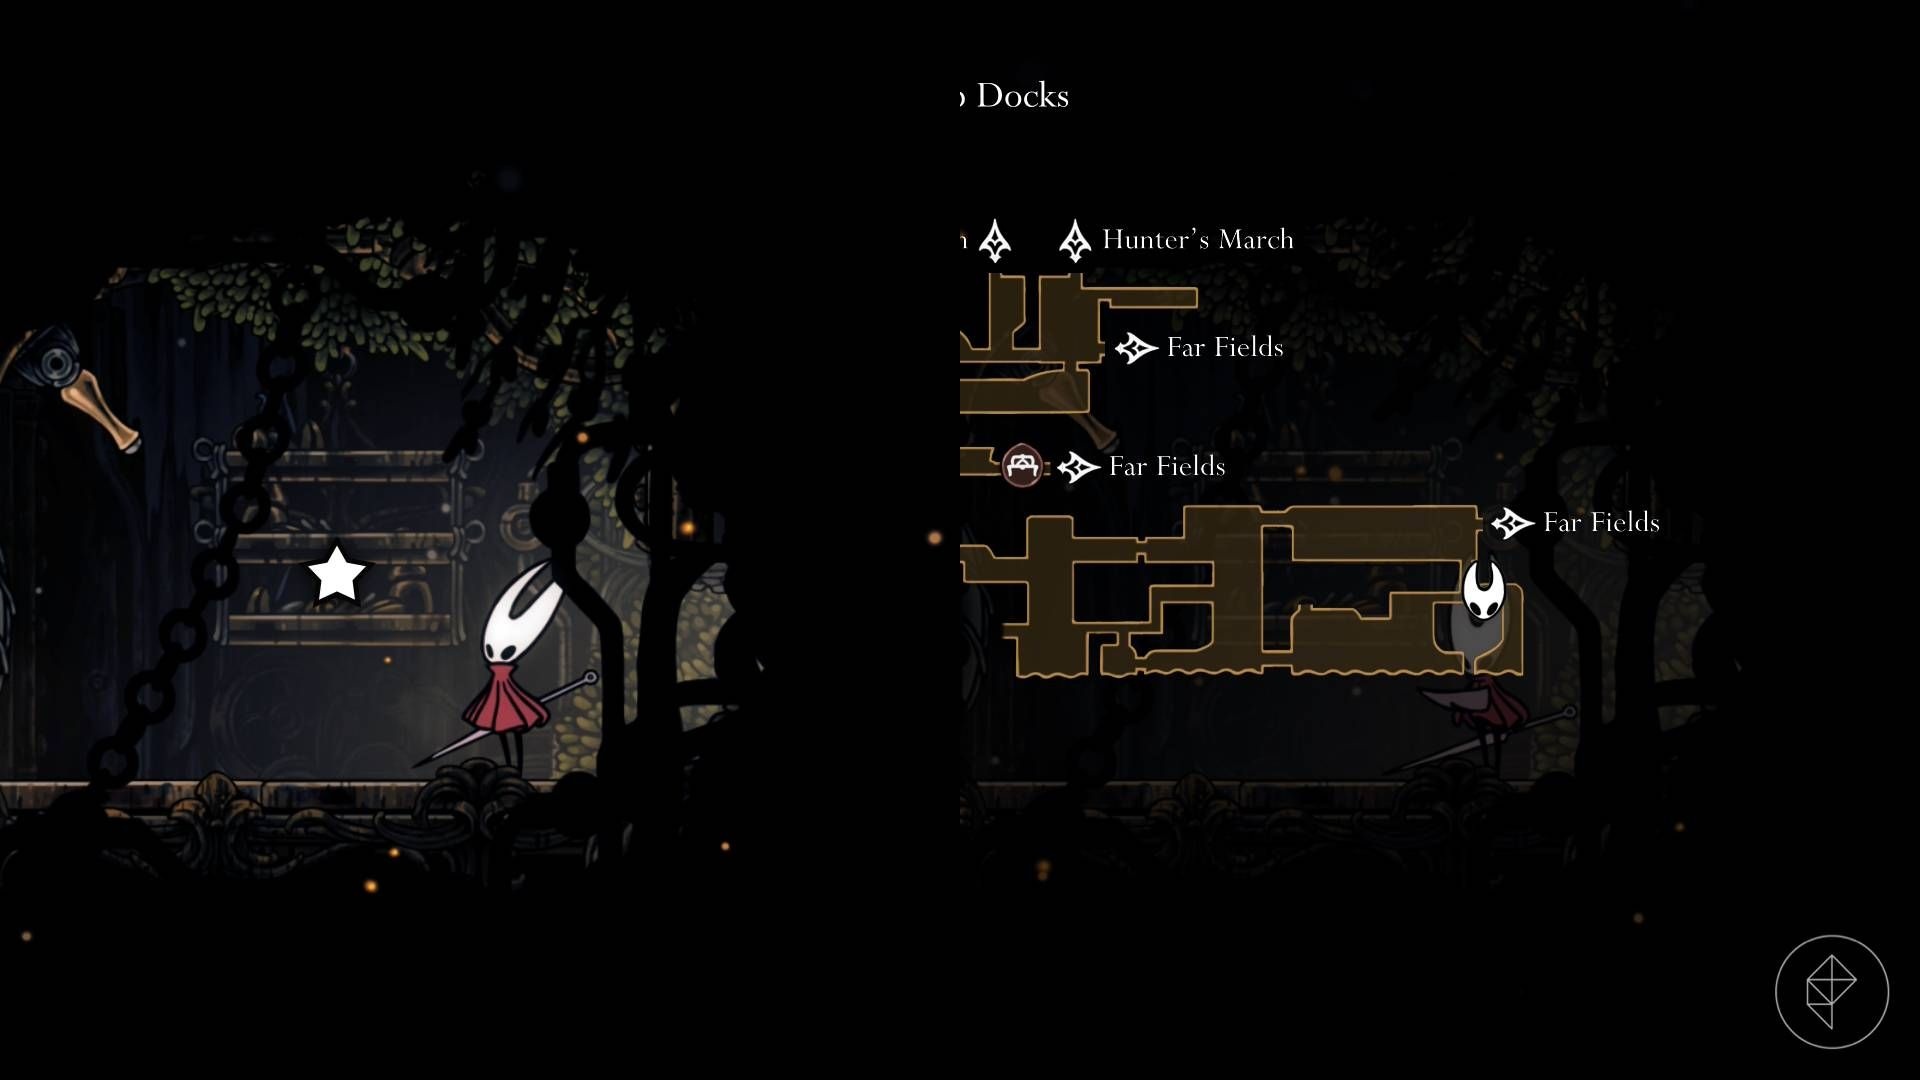
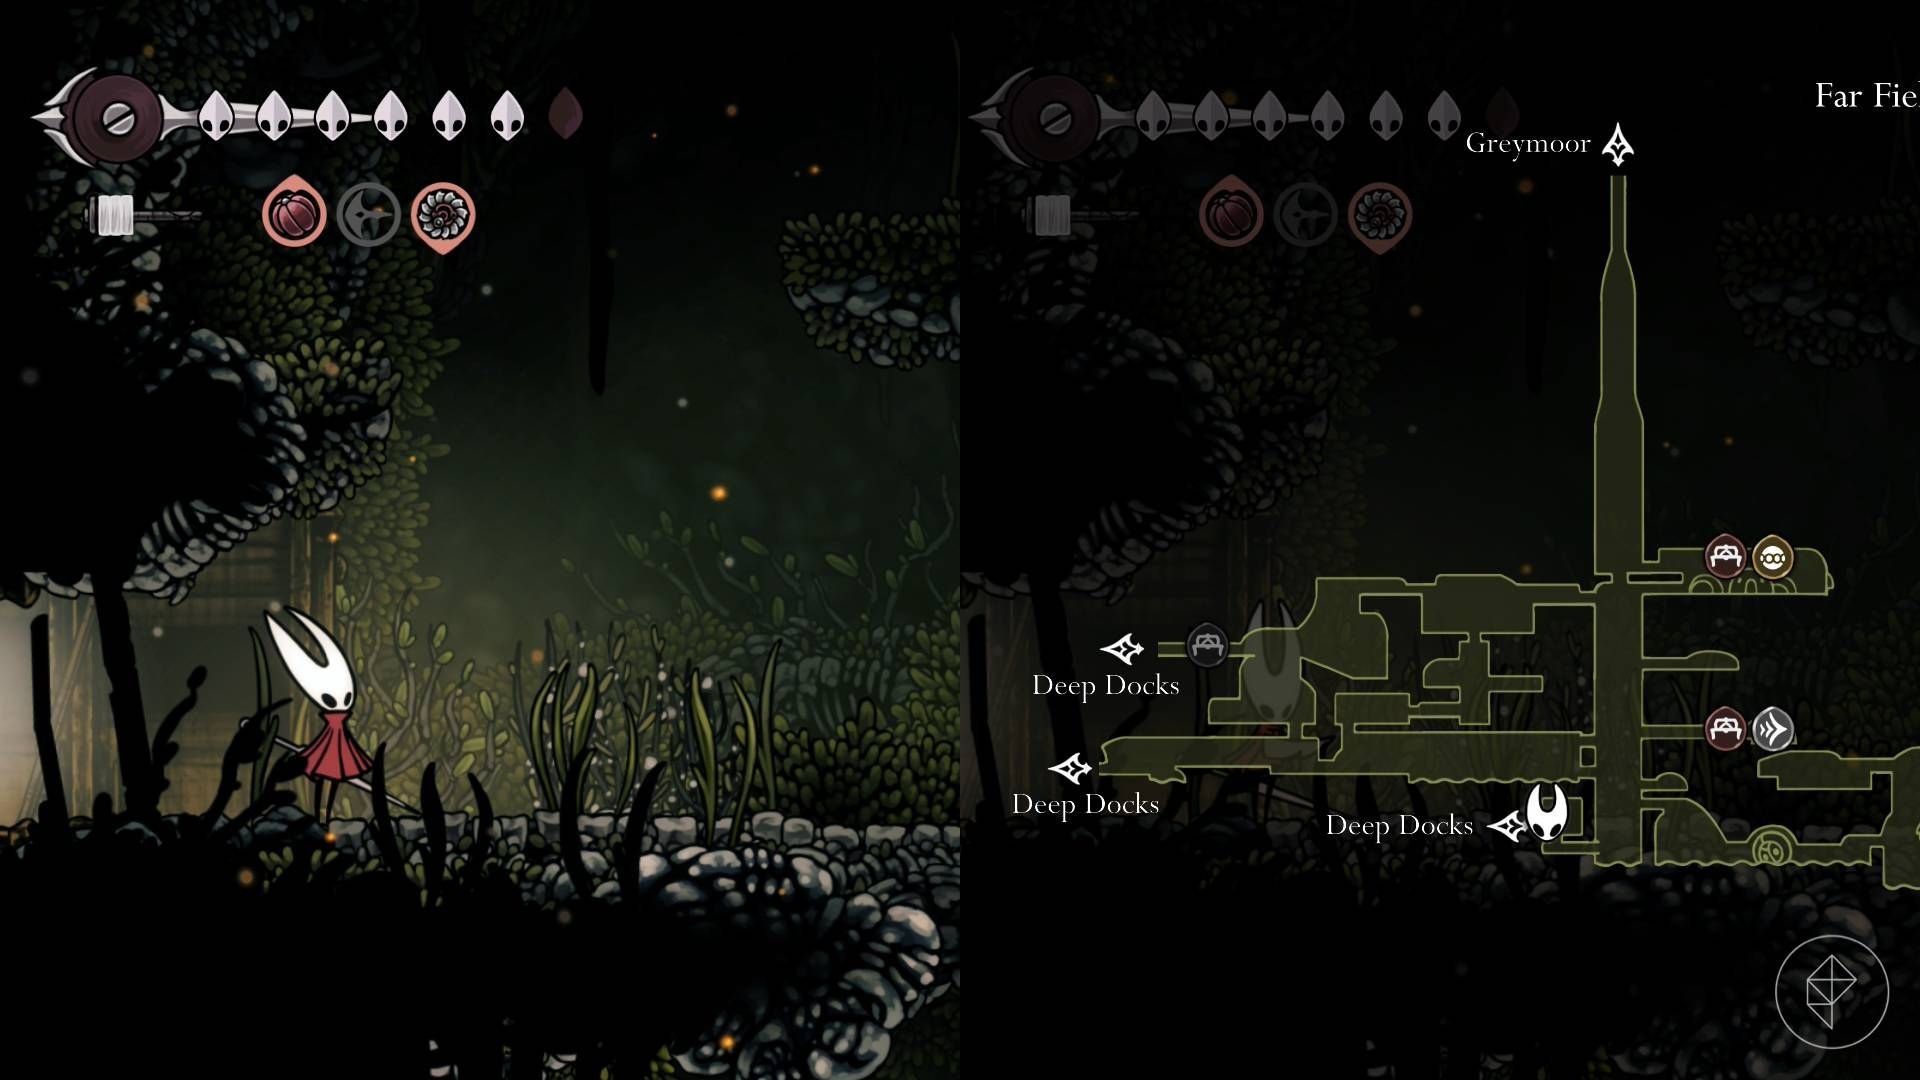
Spool fragment #16 — Hidden cave in the Deep Docks
This one requires Clawline and is easier with the Faydown Cloak. Enter Deep Docks via the breakable wall in Far Fields’ bottom-left corner, drop down into the large chamber, then carefully descend toward lava and land on the right-most platform. Use Clawline, Cling Grip, and careful pogoing off red blossoms to make your way through spikes and glowing interaction points. Eventually you’ll be dropped out at the fragment.
Spool fragment #17 — Grindle in Blasted Steps
Grindle sells a fragment for 680 rosary beads. Note that the Faydown Cloak is required to reach the room where Grindle trades, since you cannot climb the wall to his stall without it.
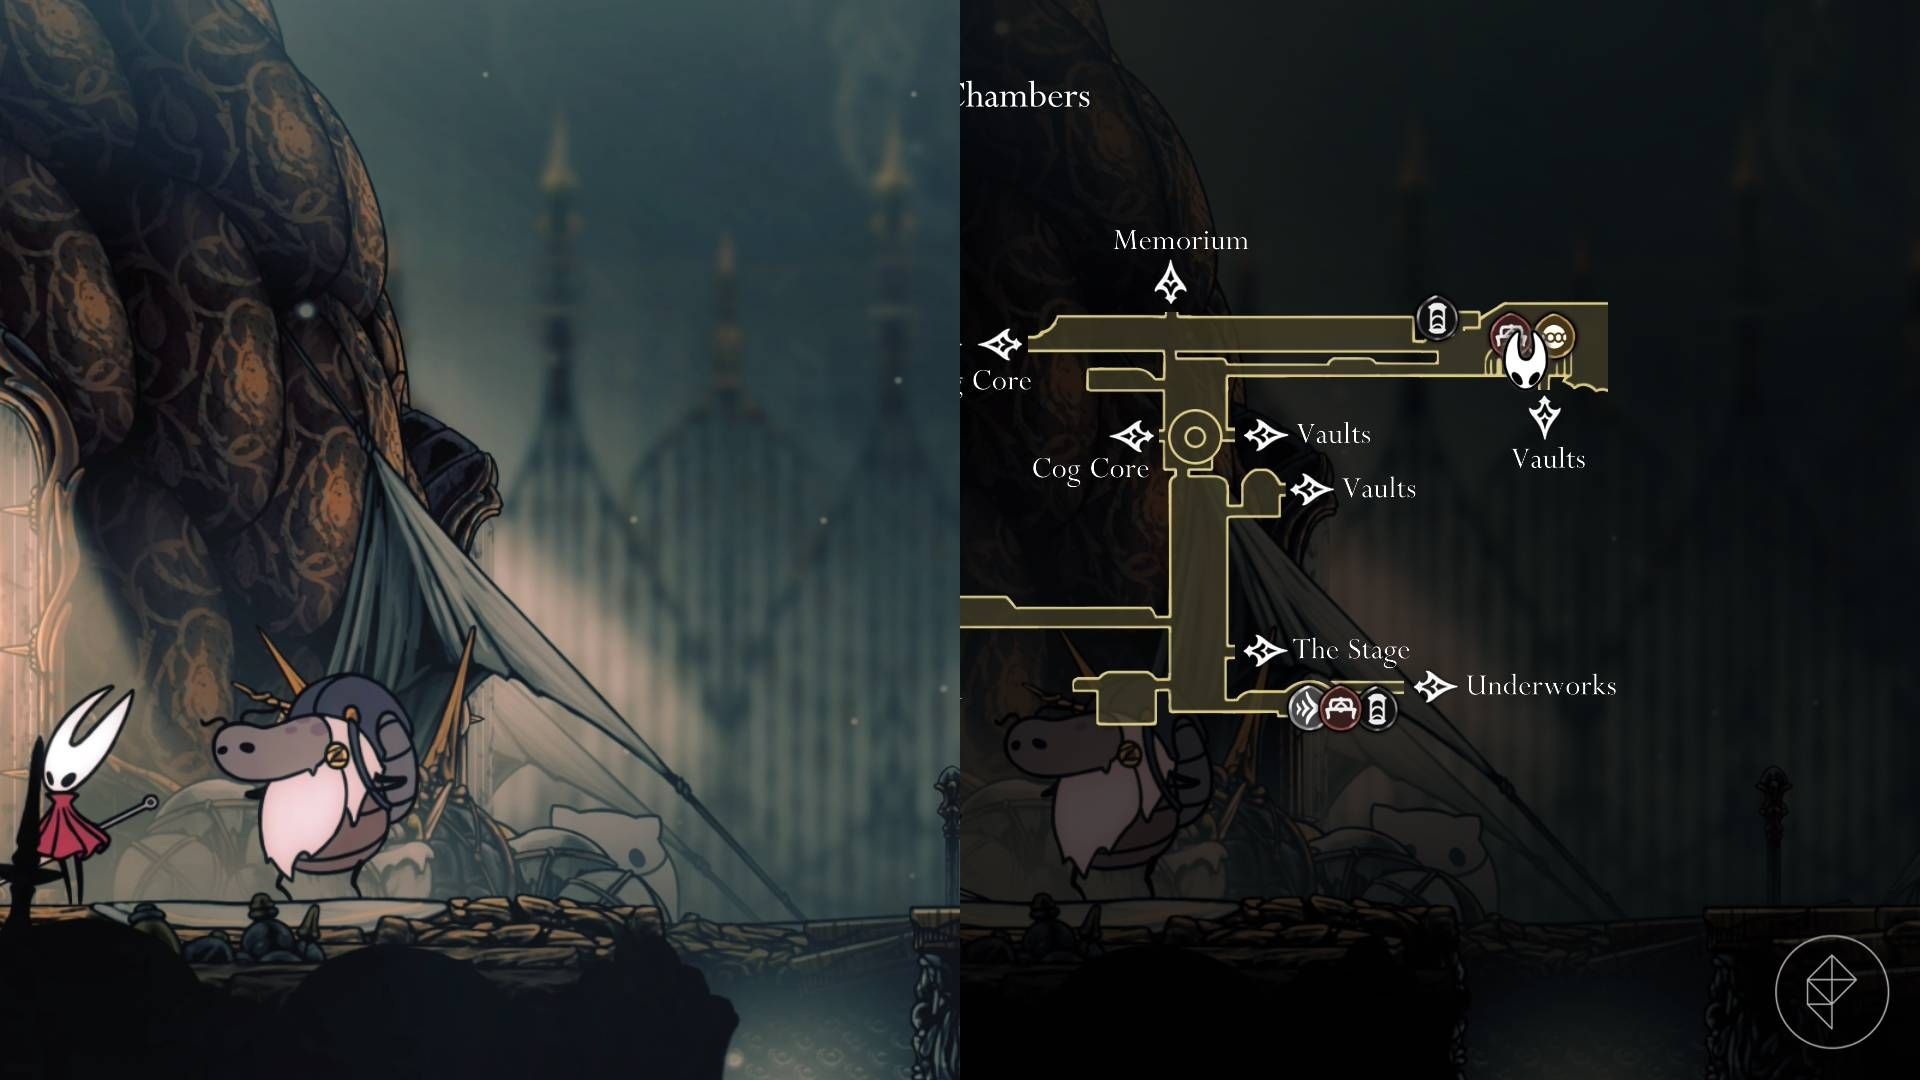
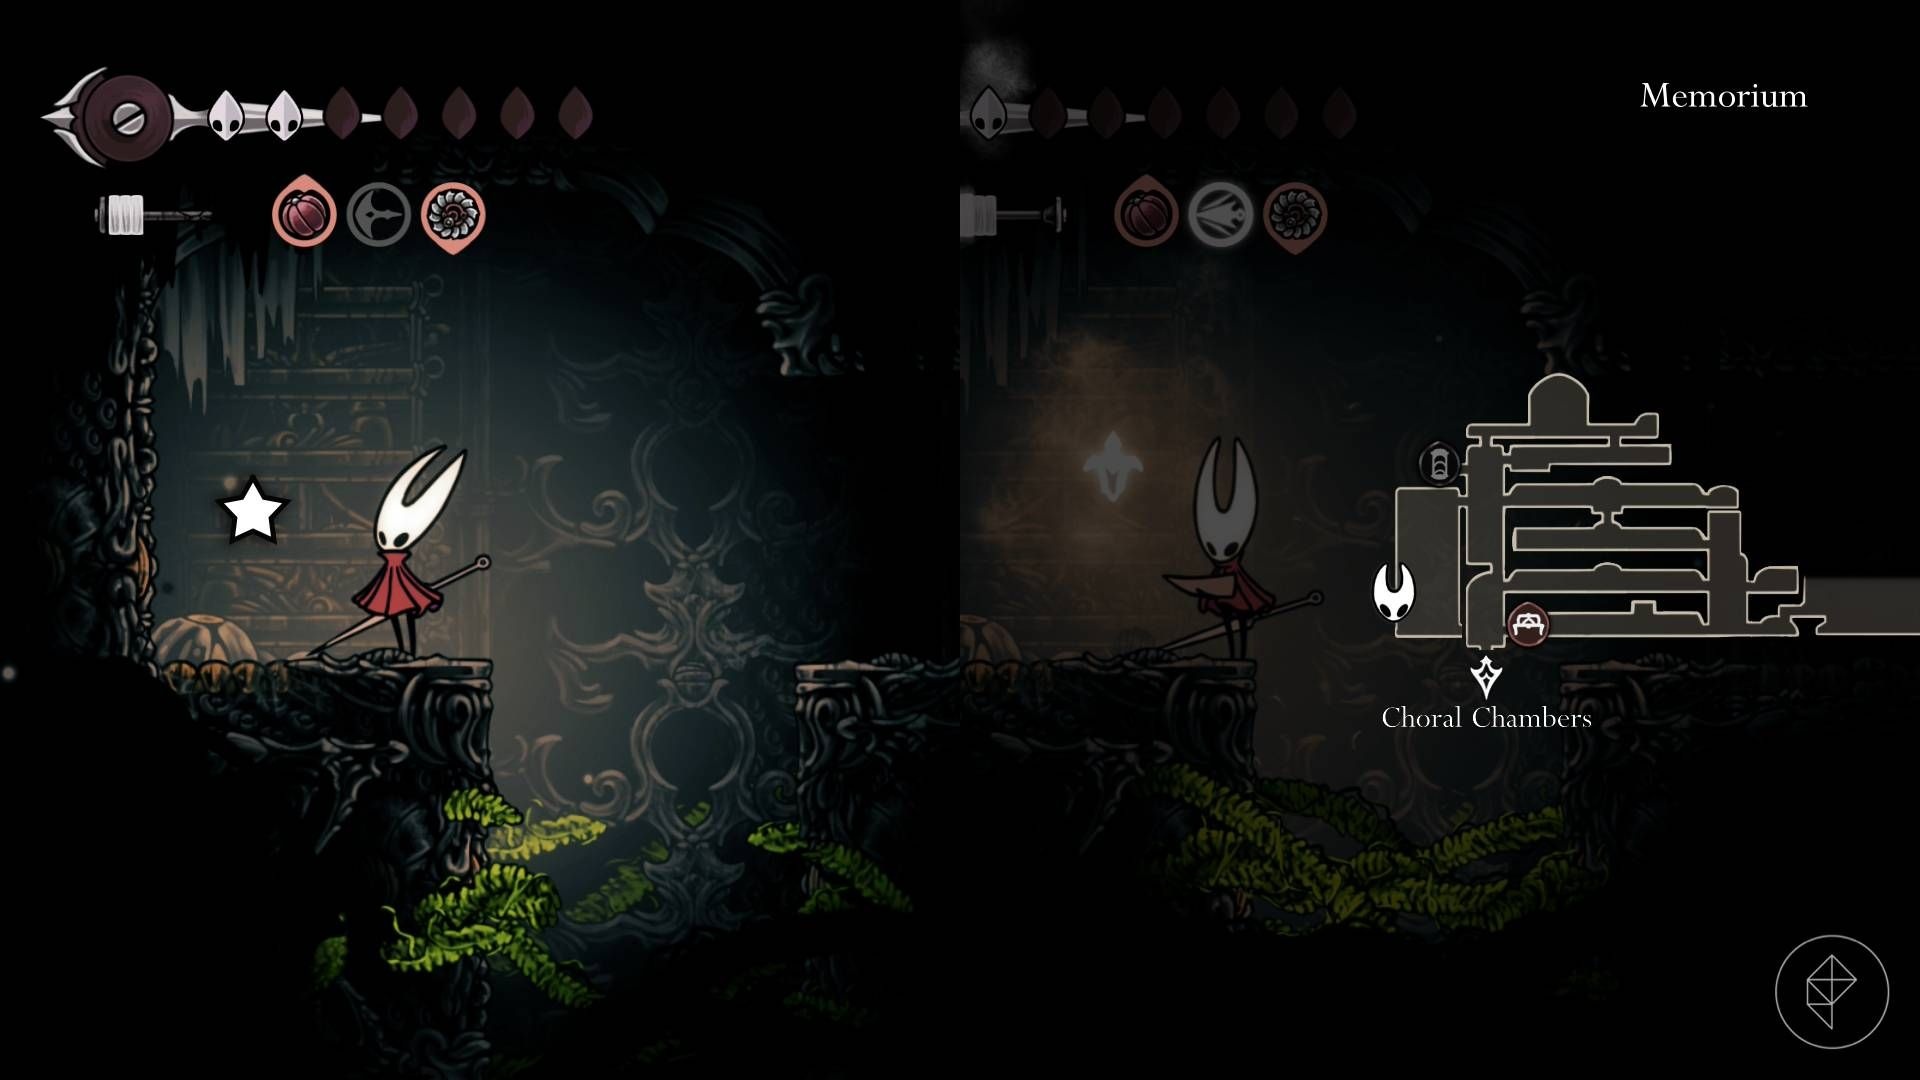
Spool fragment #18 — Memorium
The Memorium fragment sits behind a vertical platforming gauntlet. Navigate the region to a vertical chamber, enter below the Ventrica station, drop the shaft, and activate the Drifter’s Cloak before reaching the bottom to avoid thorns. Enter the right-hand room, then use double jump or Clawline and careful wall dashes to traverse thorn-filled passages and reach the fragment.
Collecting all 18 pieces raises Hornet’s silk capacity significantly, which helps both exploration and boss fights. For planning, note which fragments are purchasable and which require specific abilities so you can prioritize routes efficiently.


