Find Every Amphoreus Chest: Complete Honkai: Star Rail Map with All Spirithief Locations
Amphoreus is the fourth planet in Honkai: Star Rail, and it’s packed with treasure chests, puzzles, and the new Spirithief encounters that can swipe your loot. Below you’ll find a clear, factual rundown of how the chest system works, where key chests and Spirithiefs appear across major maps, and a few puzzle notes so you don’t miss anything important.
- How Amphoreus treasure chests work
- ‘Eternal Holy City’ Okhema chest locations
- ‘Bloodbathed Battlefront’ Castrum Kremnos chest locations
- ‘Strife Ruins’ Castrum Kremnos chest locations
- ‘Abyss of Fate’ Janusopolis chest locations
- Vortex of Genesis chest locations
- ‘Sanctum of Prophecy’ Janusopolis chest locations
- ‘Murmuring Woods’ Grove of Epiphany treasure chests
- ‘Demigod Council’ Dawncloud treasure chests
- ‘Dragonbone City’ Styxia treasure chests
- ‘Fortress of Dome’ Eye of Twilight treasure chests
- ‘Fallen Twilight City’ Okhema treasure chest locations
- ‘Lightless Chapel’ Dawncloud treasure chest locations
- ‘Cloudedge Bastion Ruins’ Eye of Twilight treasure chest locations
- ‘Aedes Elysiae’ treasure chest locations
- ‘Warbling Shores’ Styxia treasure chest locations
- ‘Radiant Scarwood’ Grove of Epiphany treasure chest locations
- ‘Universal Matrix’ Great Tomb of the Nameless Titan treasure chest locations
How Amphoreus treasure chests work
Chests on Amphoreus drop Celestial Ambrosia, which you can turn in at the Tides of the Basin in the Vortex of Genesis. In return, you level up the basin and claim rewards such as Stellar Jade and the item used to increase the Trailblazer’s Remembrance Eidolon. Moreover, the chest counter on each map only tracks chests that are not locked behind puzzles, powerful foes, or special events.
Also, Amphoreus introduces Spirithiefs. These spirits sometimes grab a chest (or other map objects) and may force a battle when you try to recover the loot. Importantly, many Spirithiefs give both a reward and a chest, so they can be counted twice in the on-map tracker. Finally, maps have dawn and evernight states; some chests and routes only appear in one state, so switch settings when you need to.
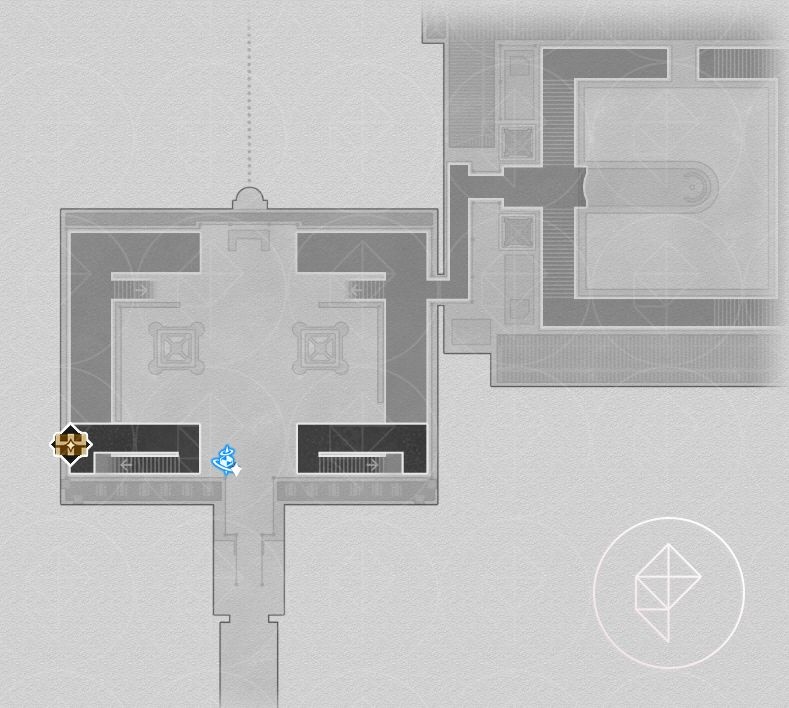
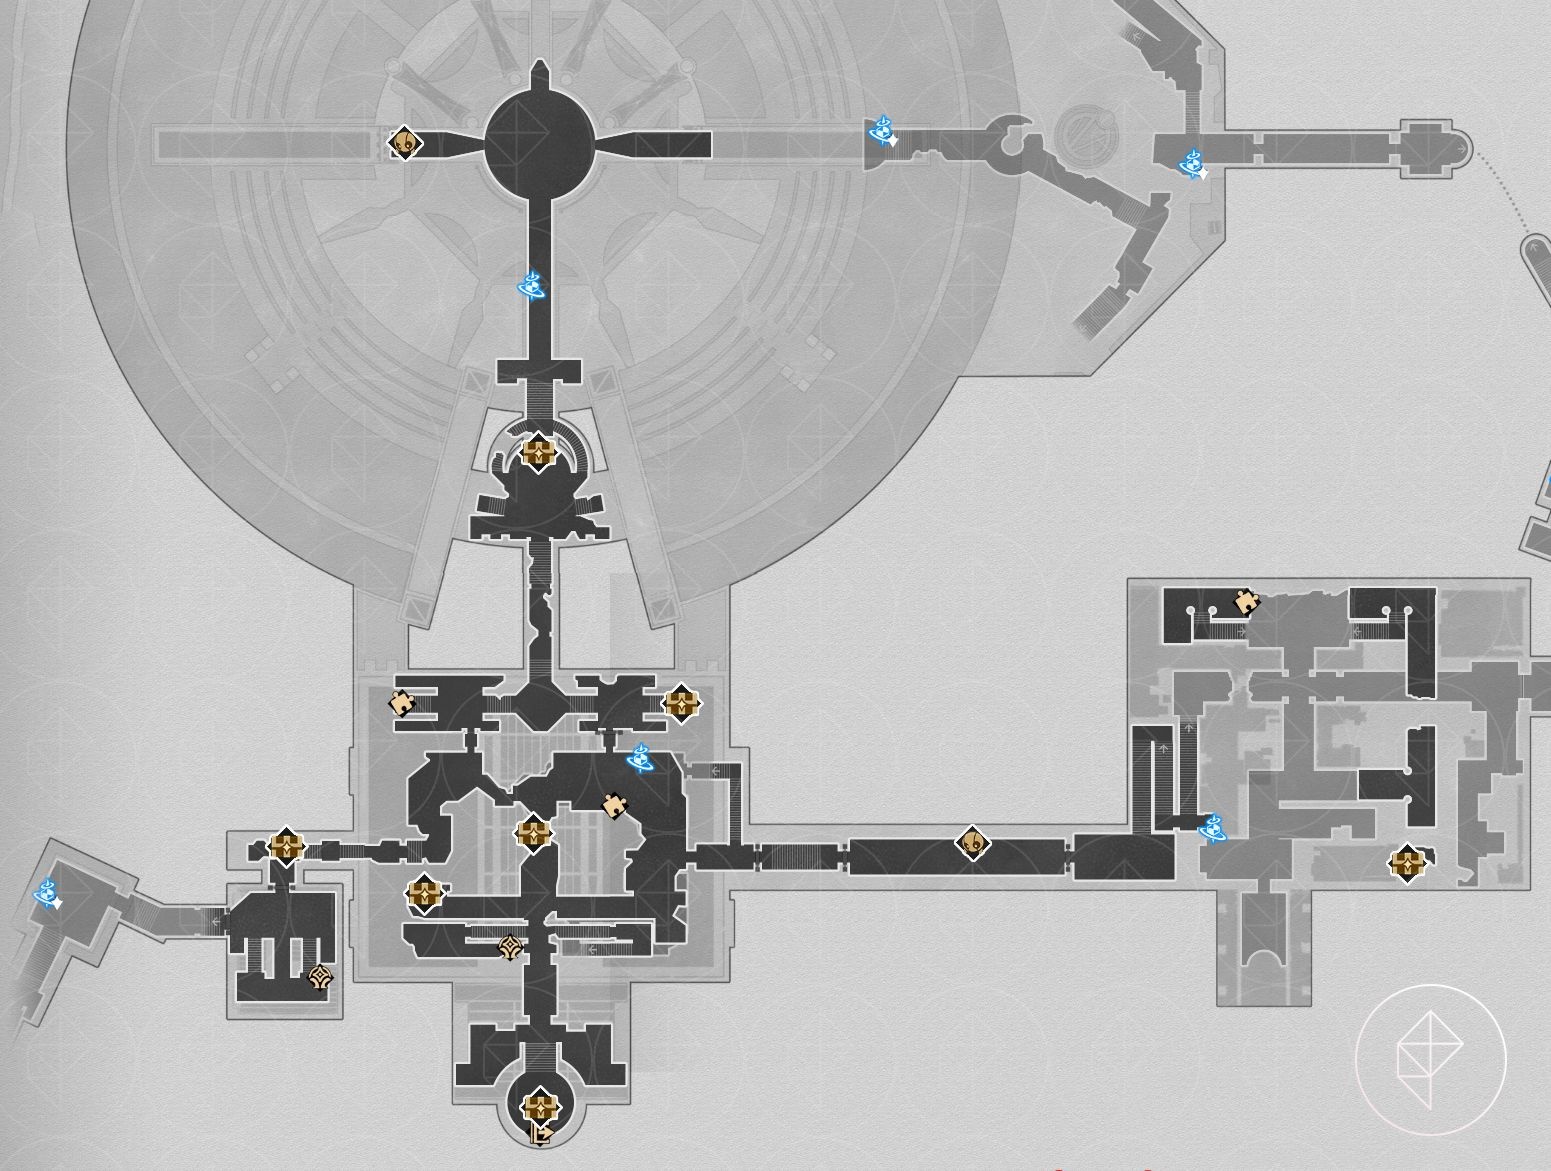
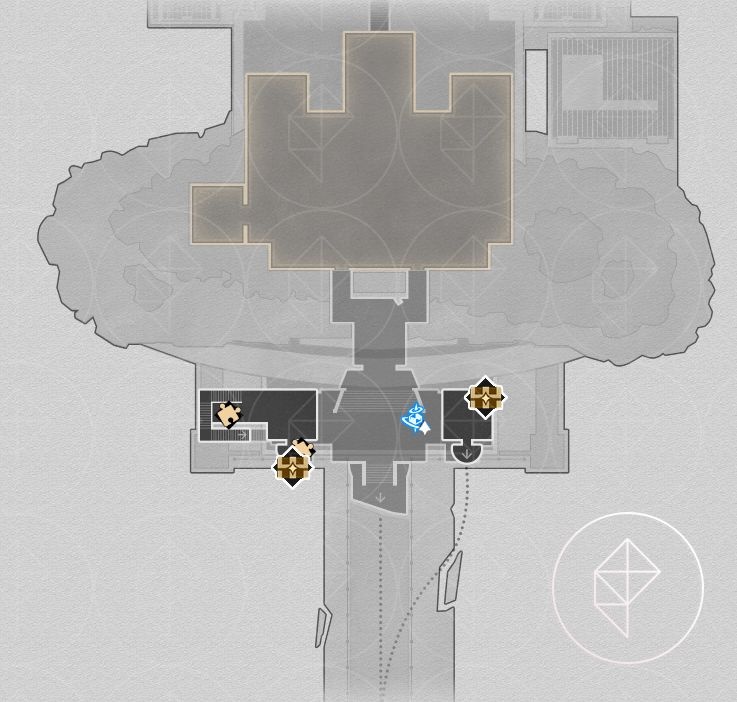
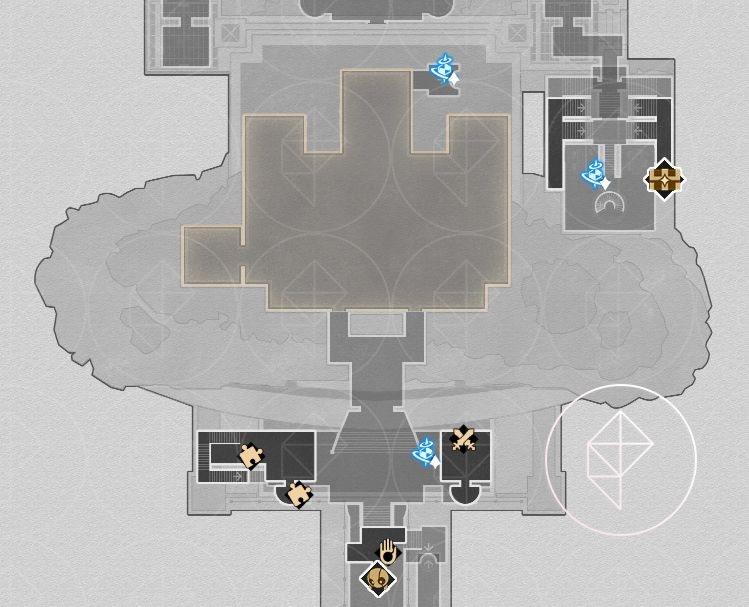
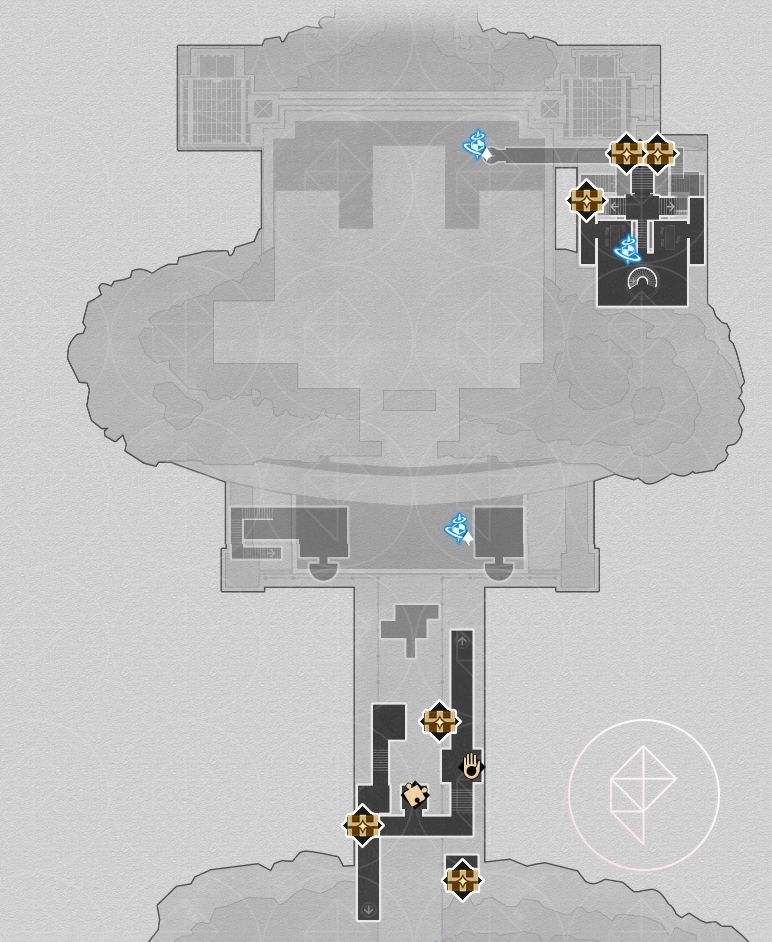
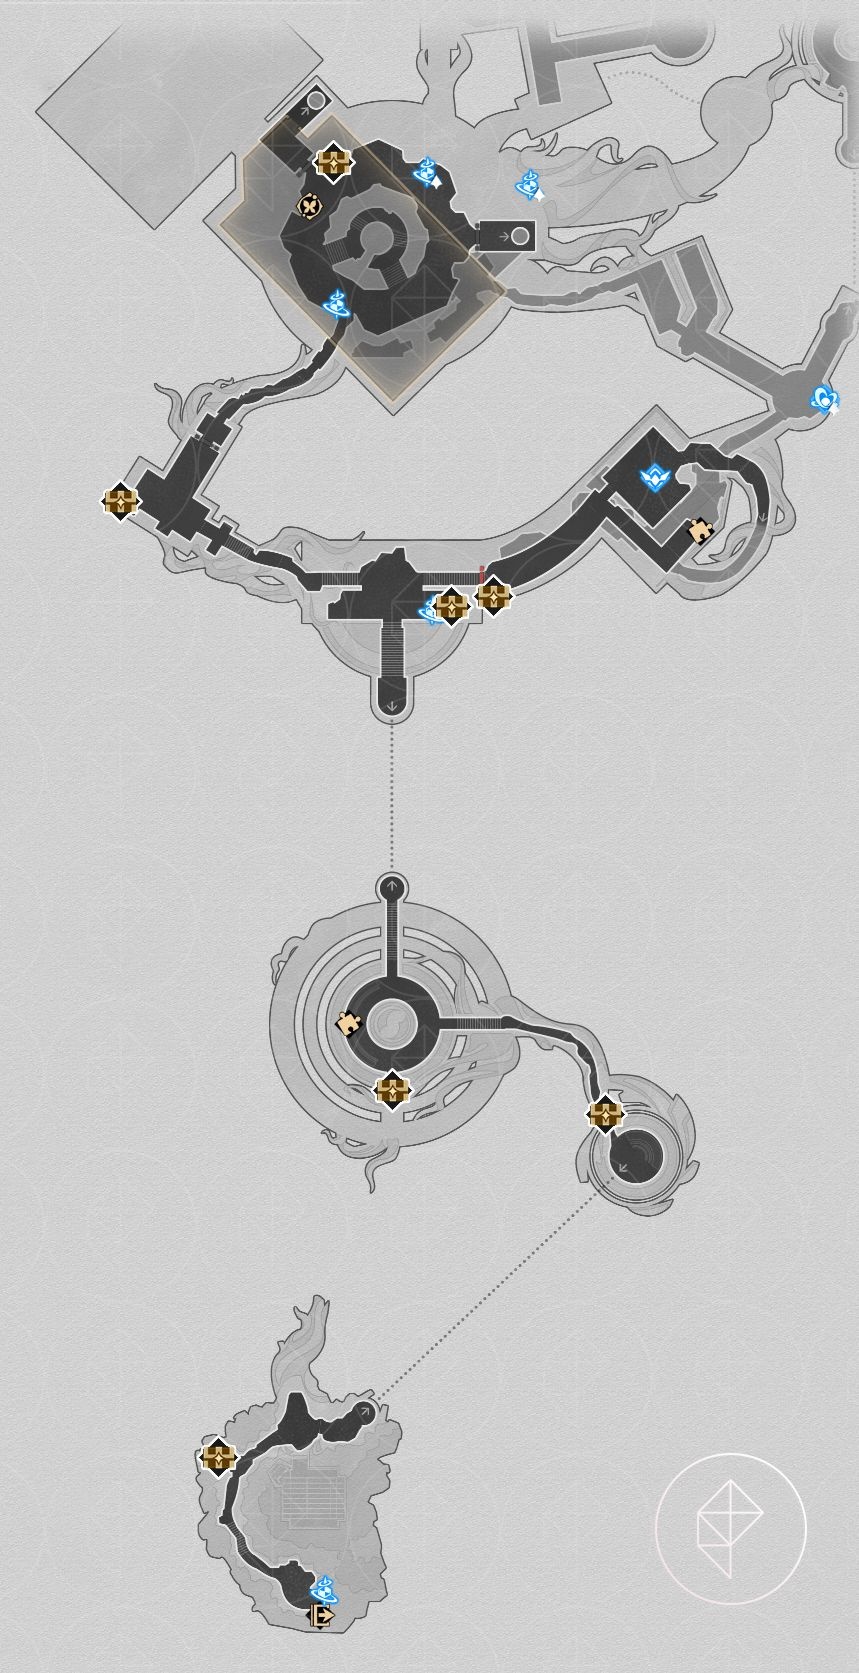
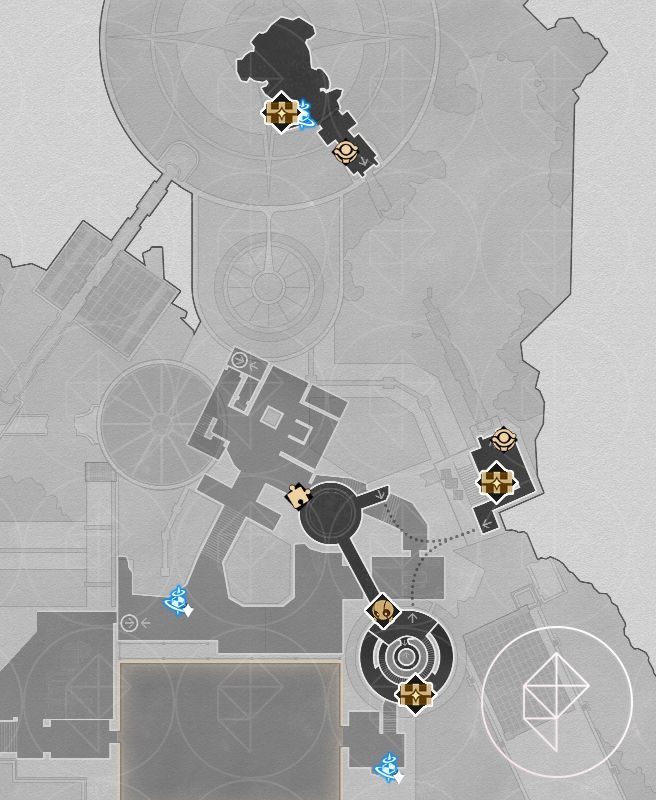
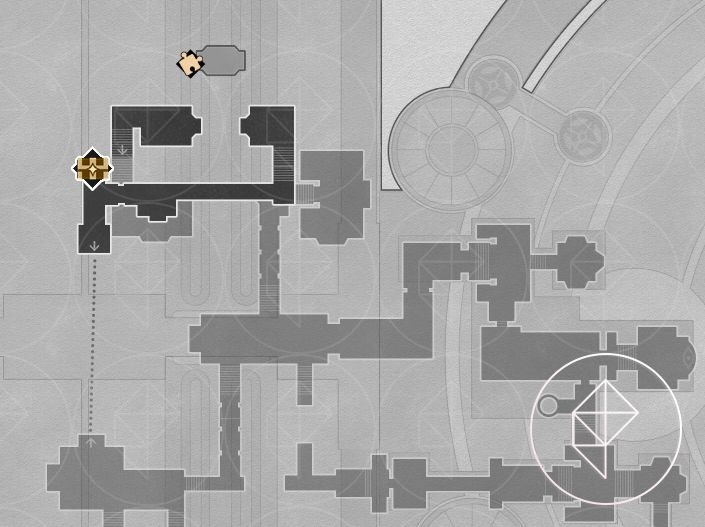
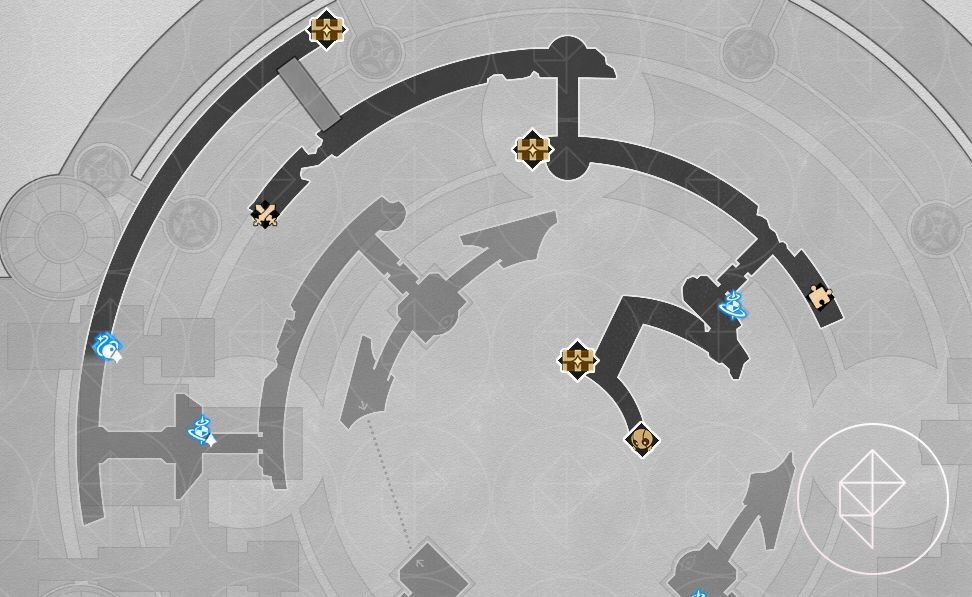
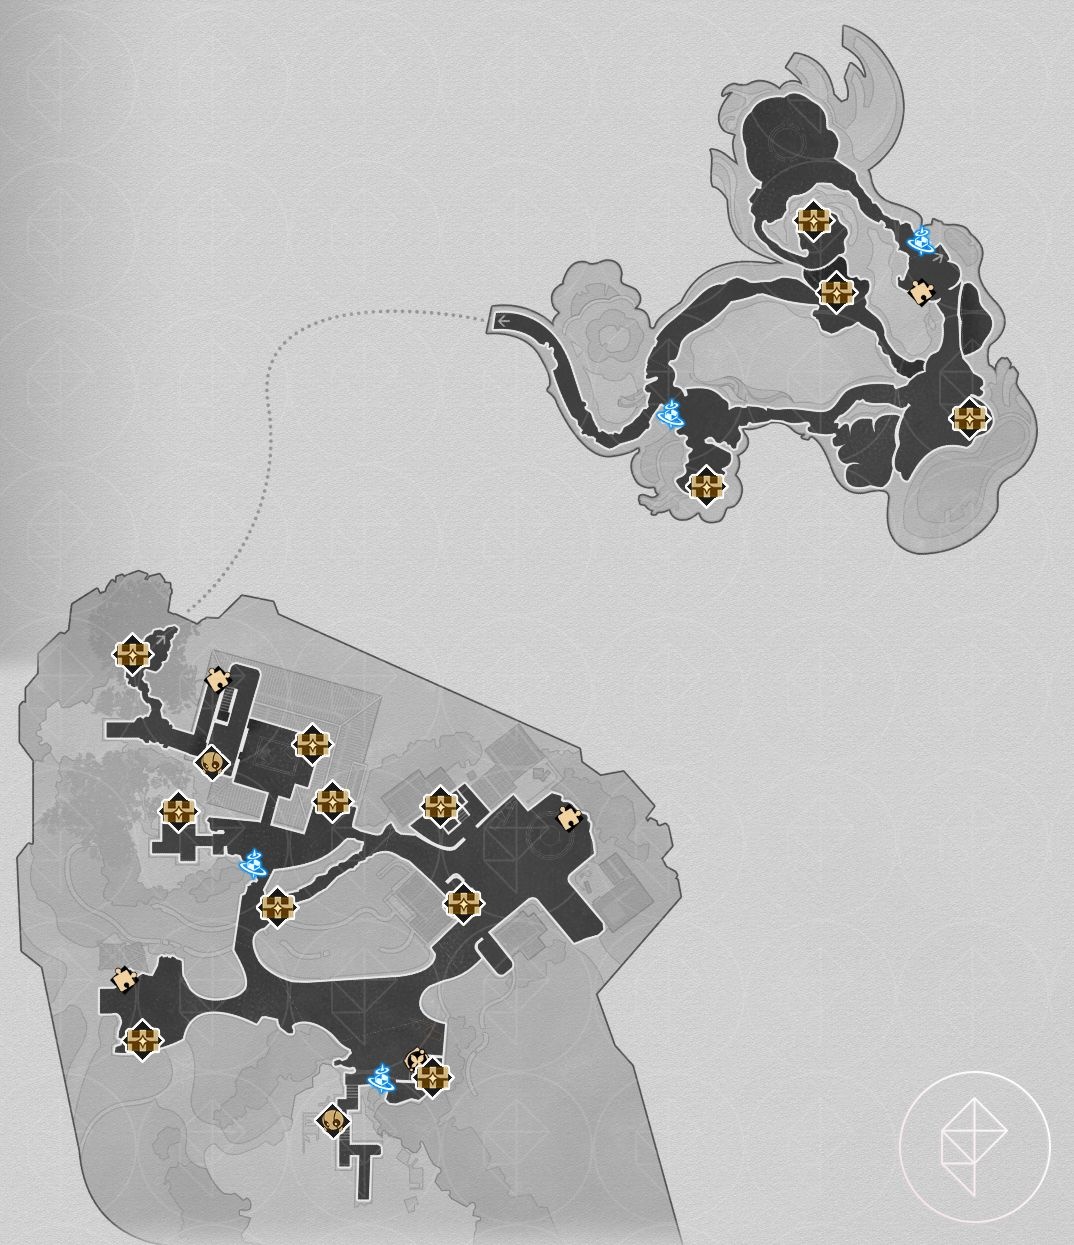
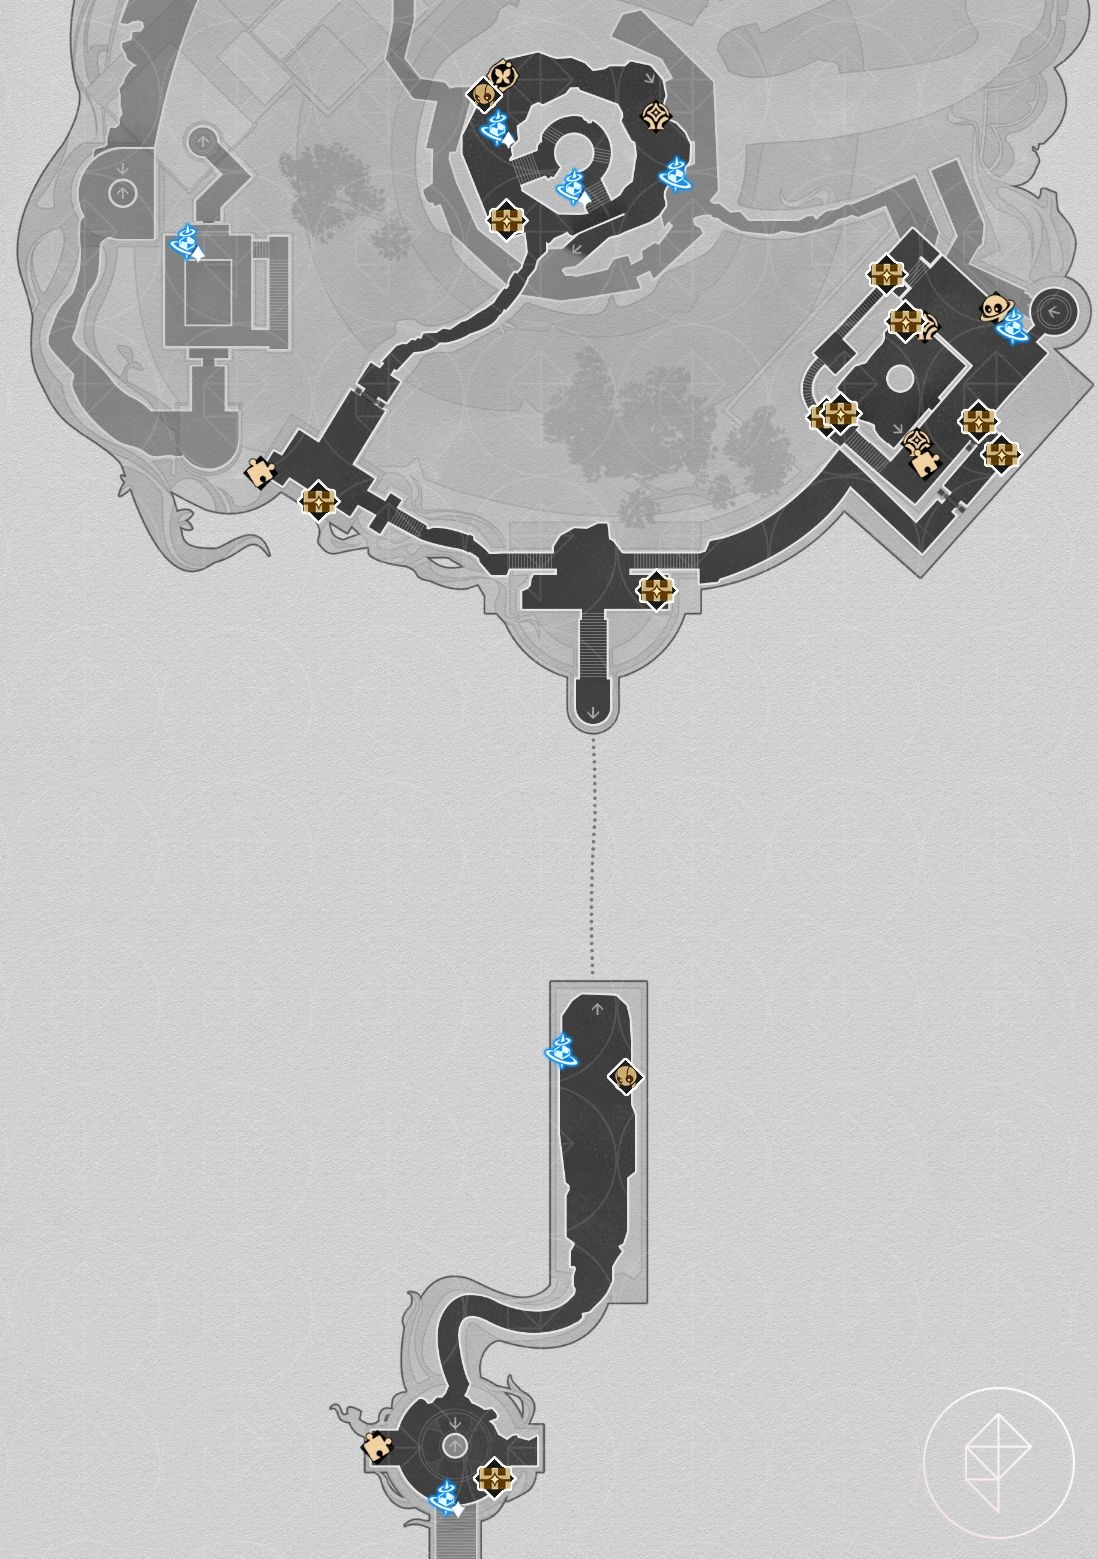
‘Eternal Holy City’ Okhema chest locations
Okhema is large and split into two primary zones: Marmoreal Palace (right) and Marmoreal Market (left). Explore both floors in dawn and evernight to reveal all chest locations.

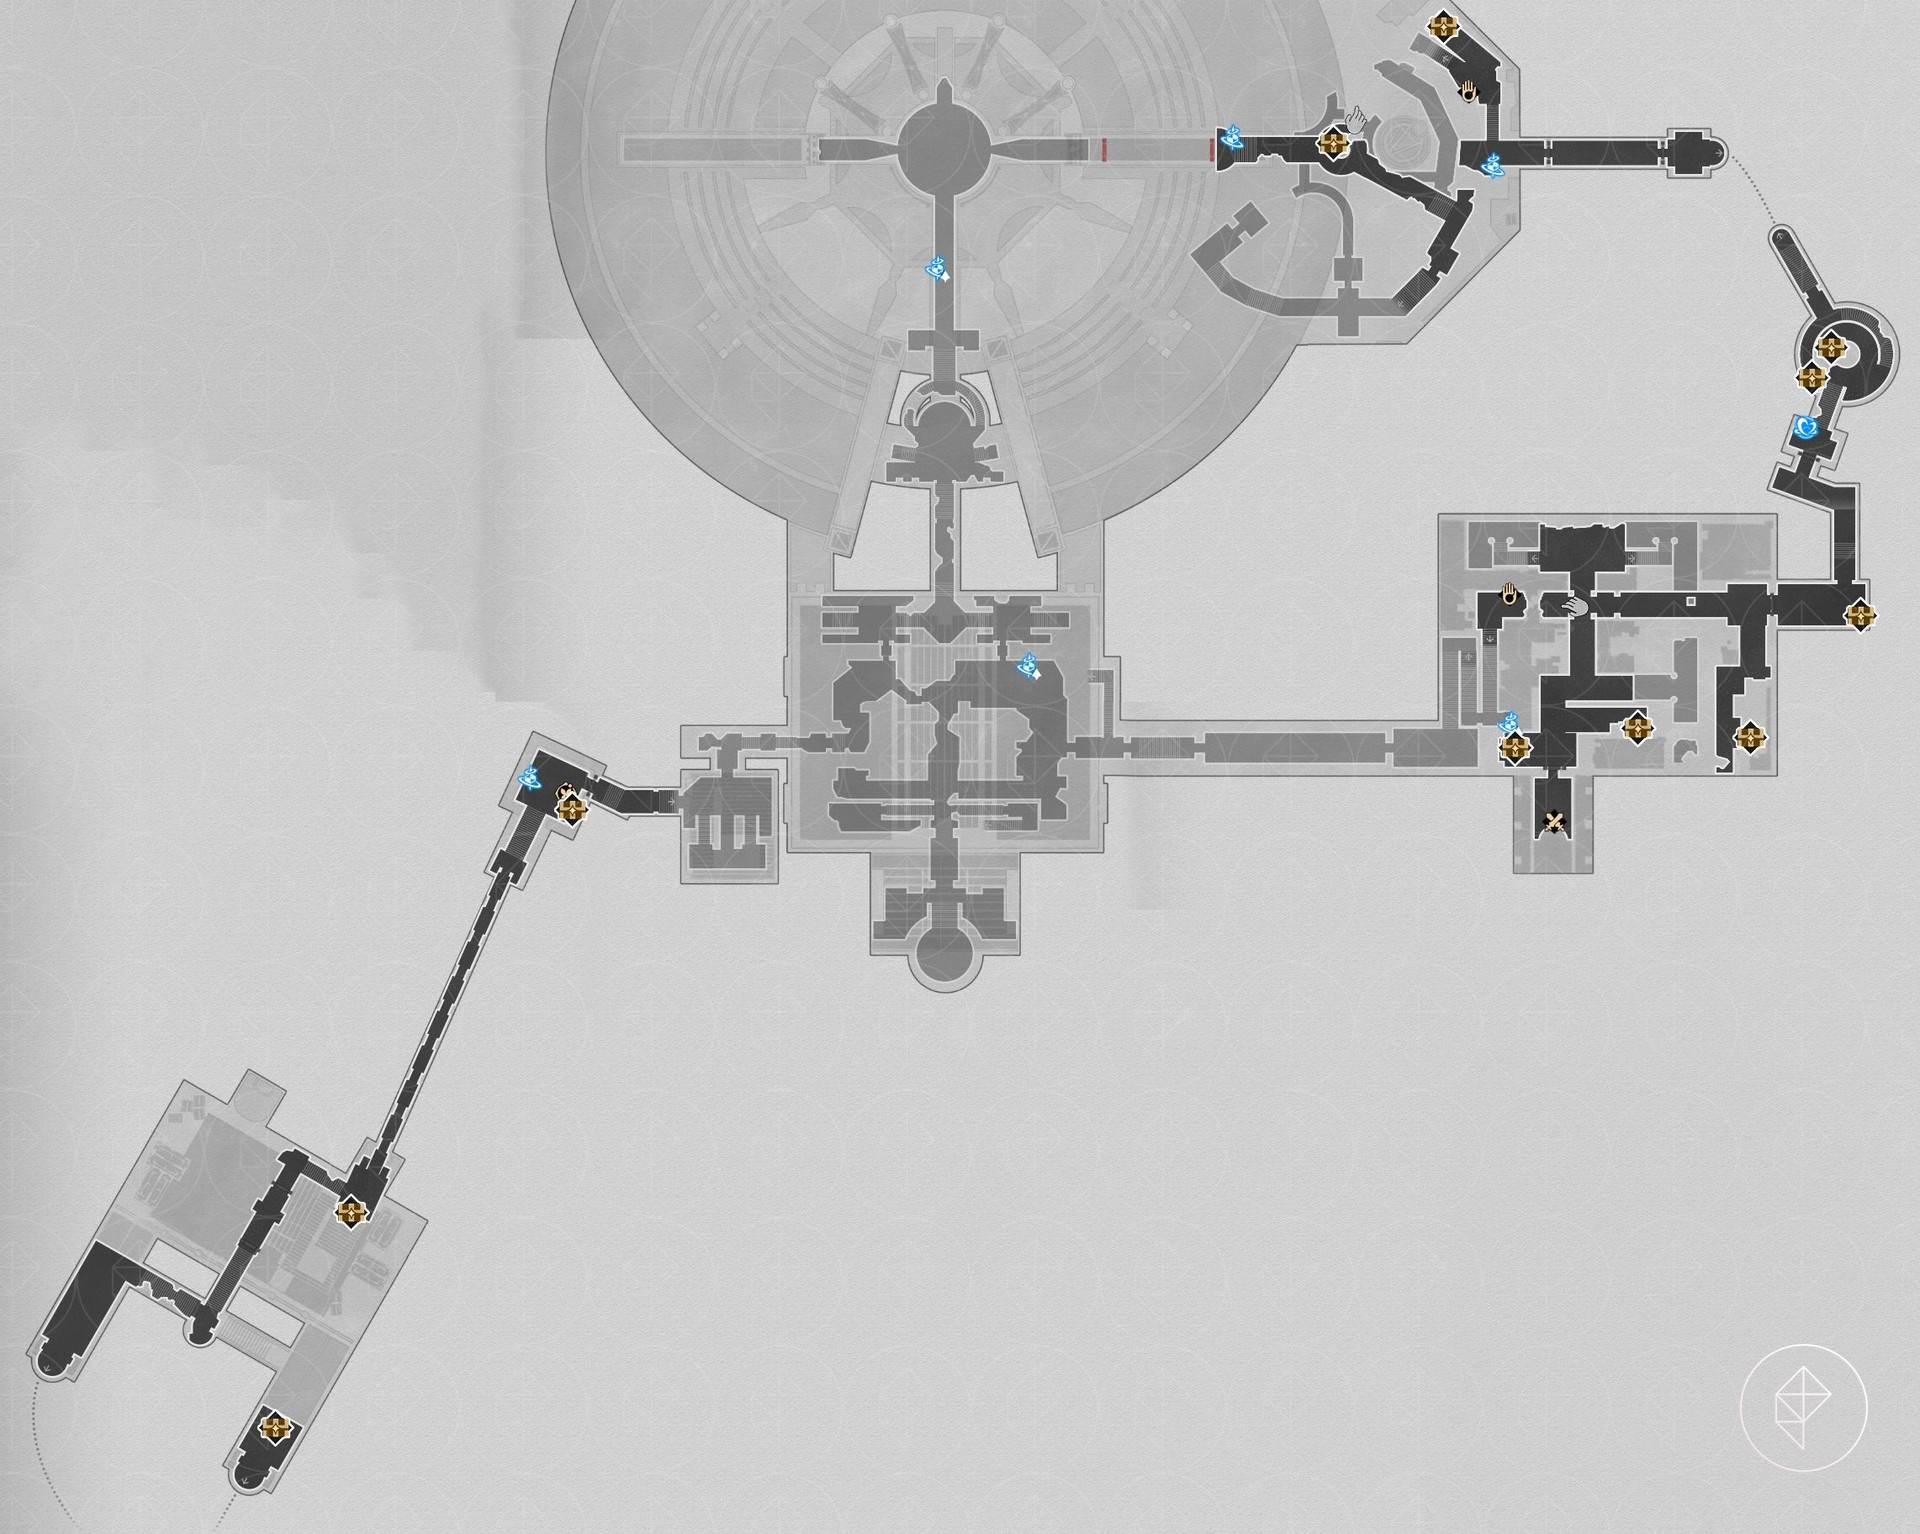
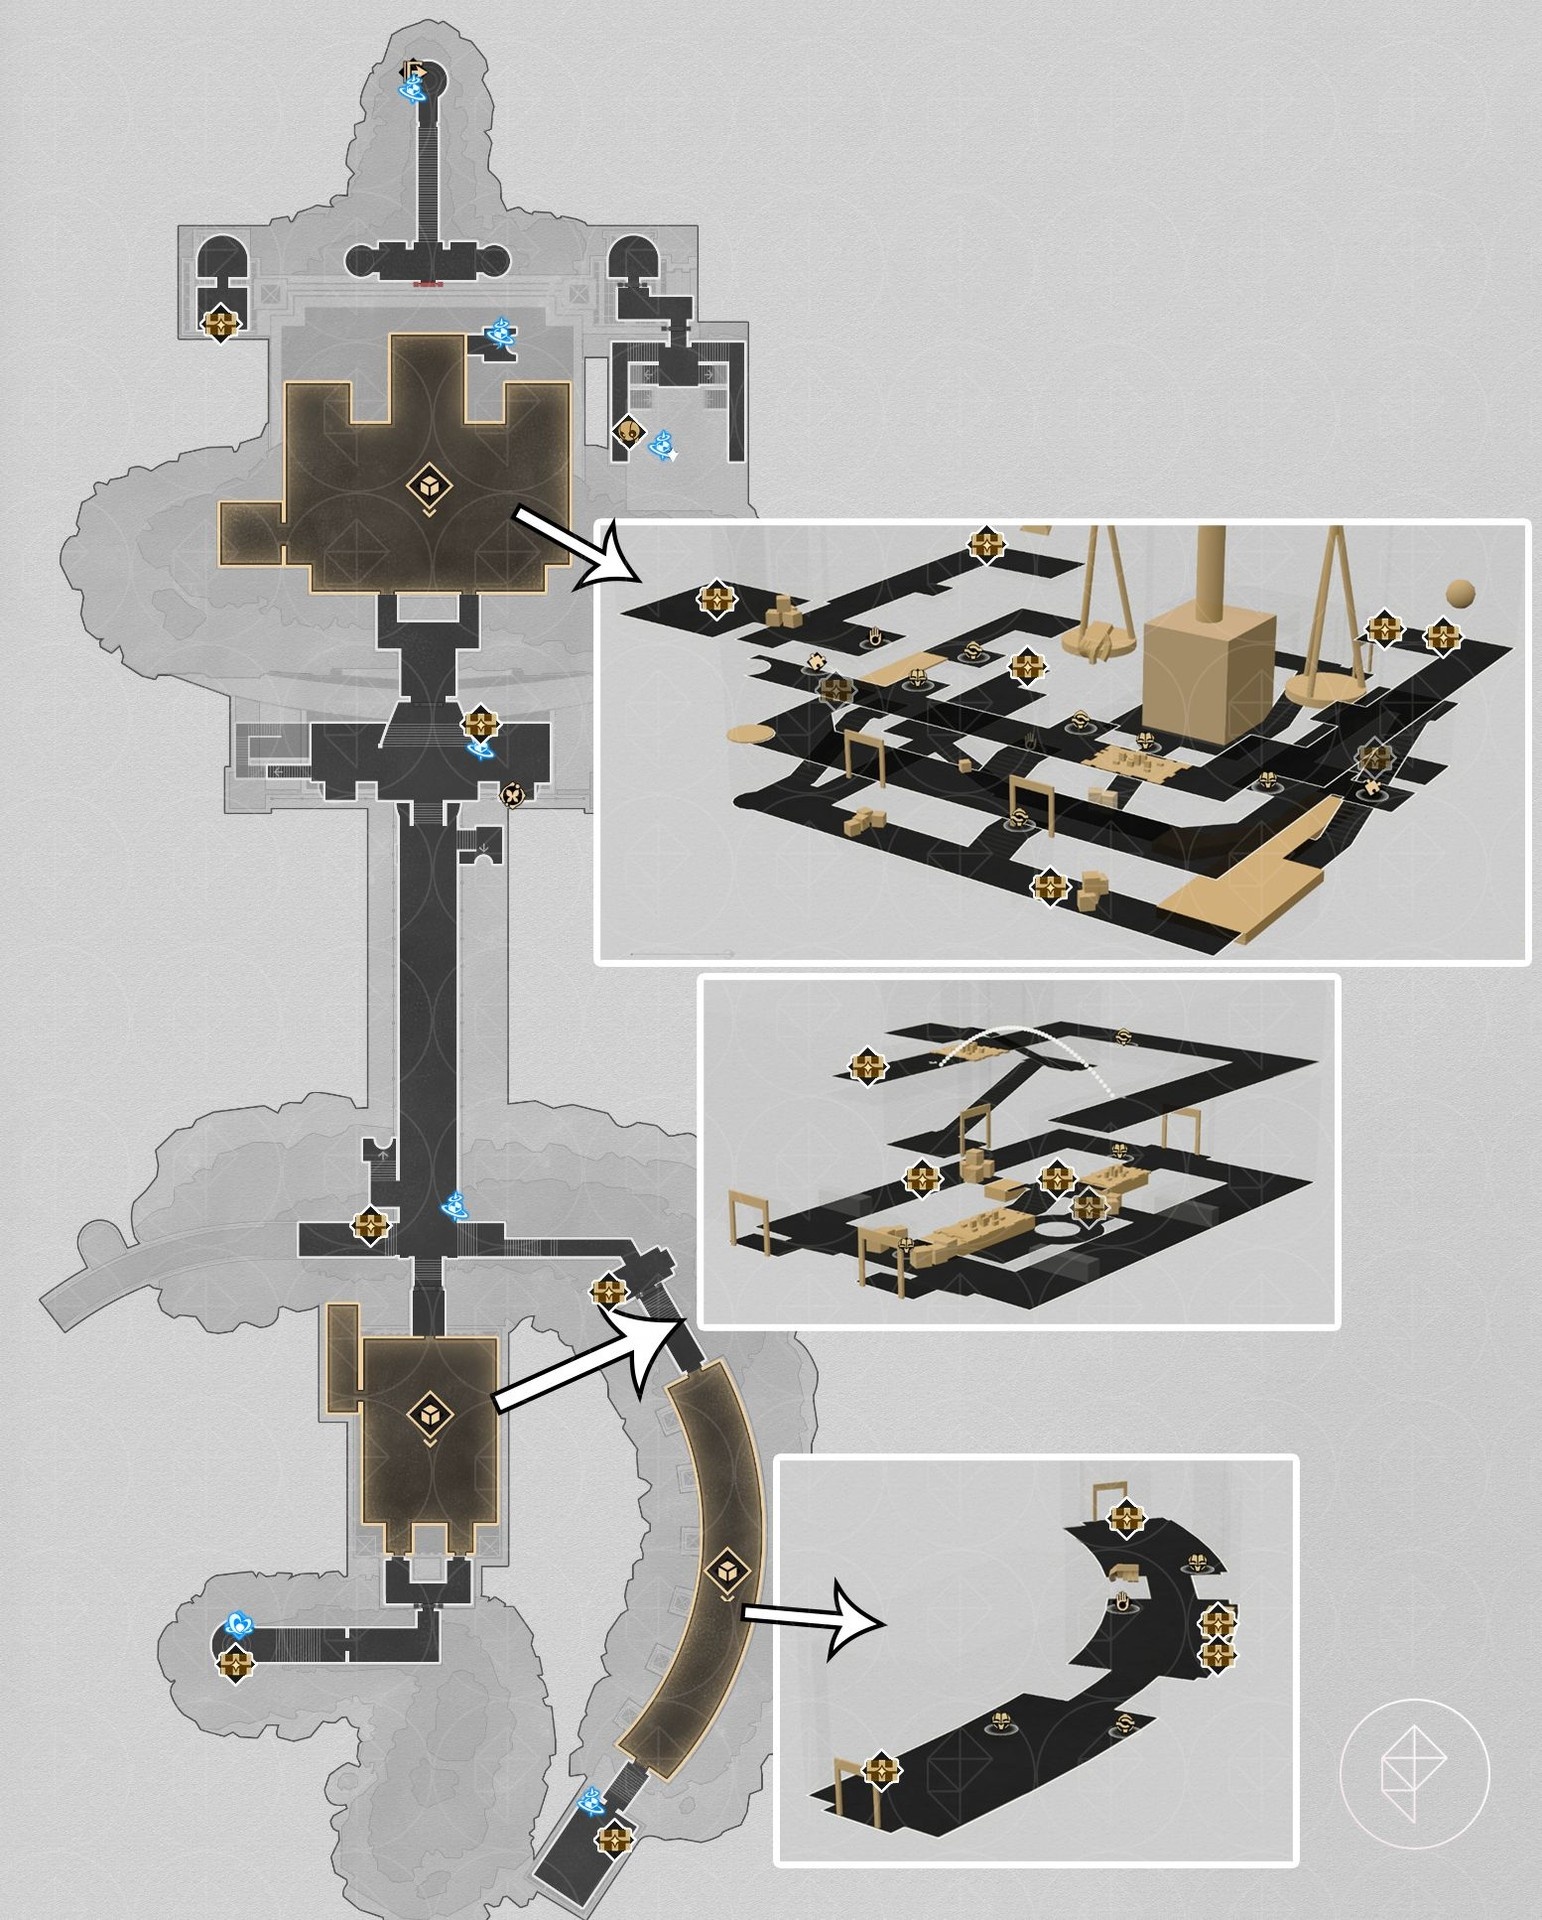
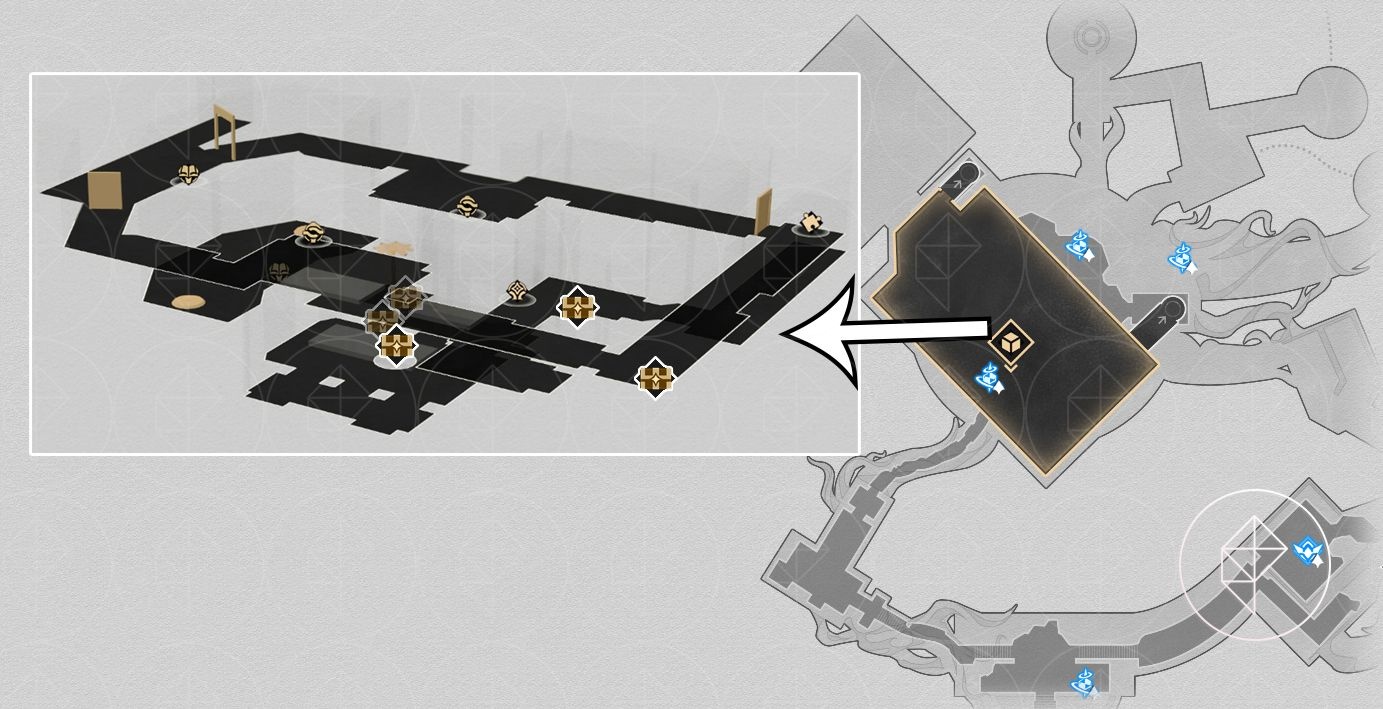
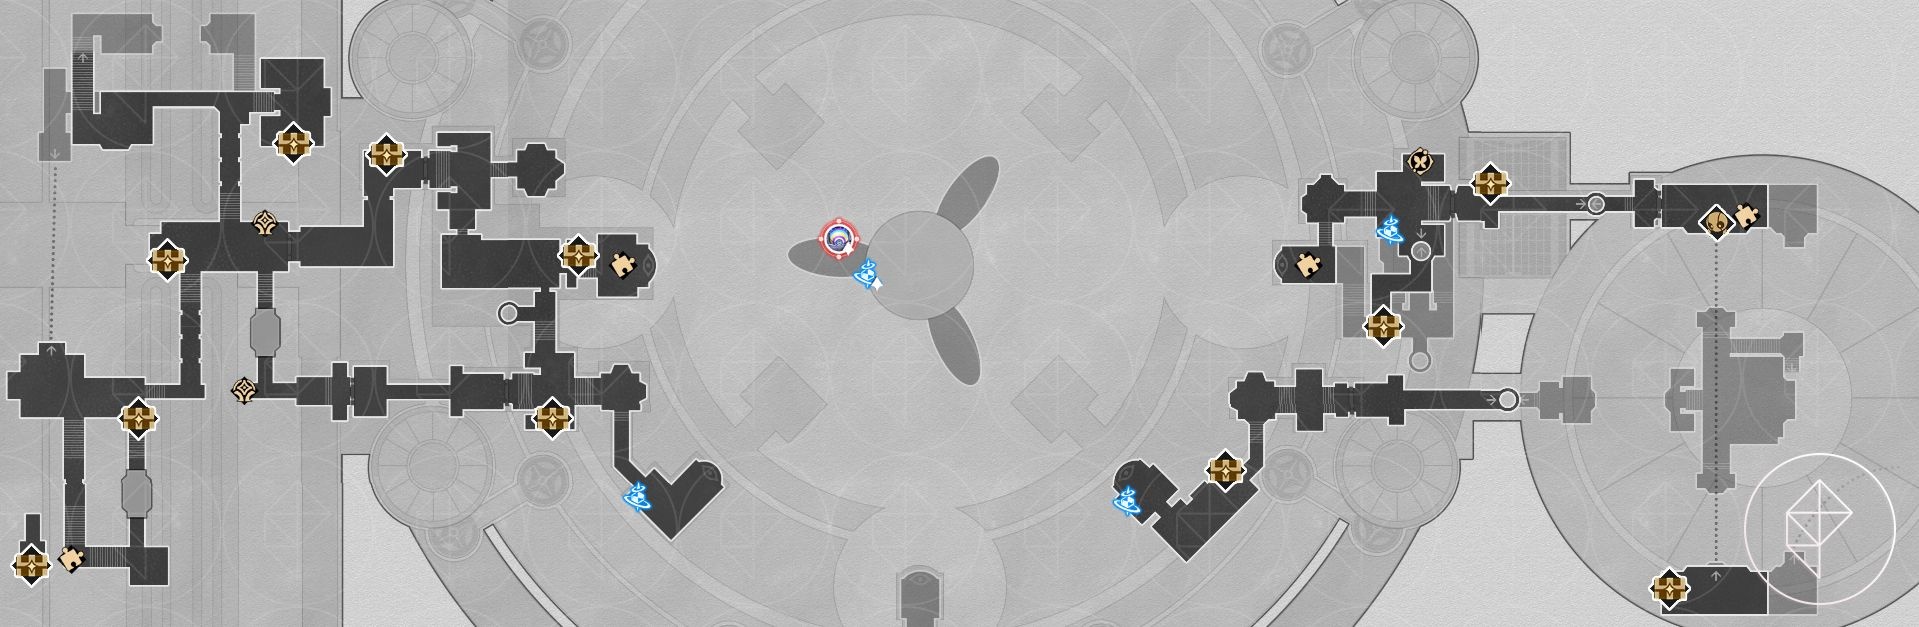
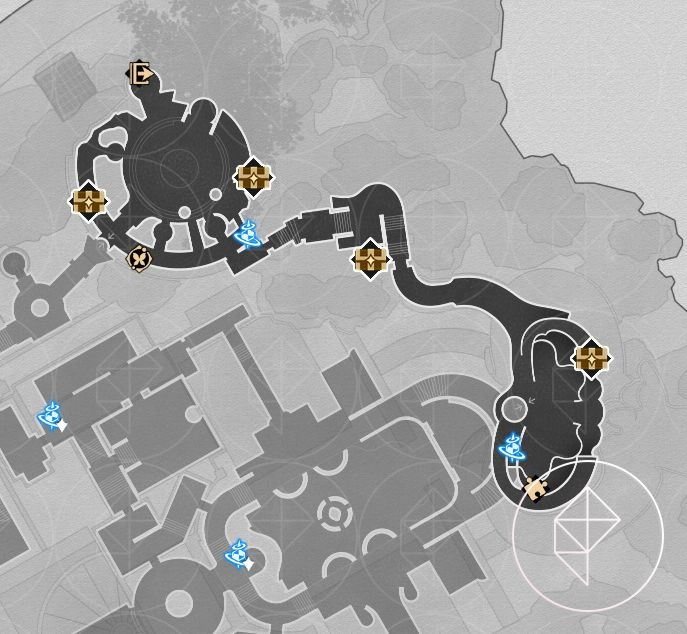
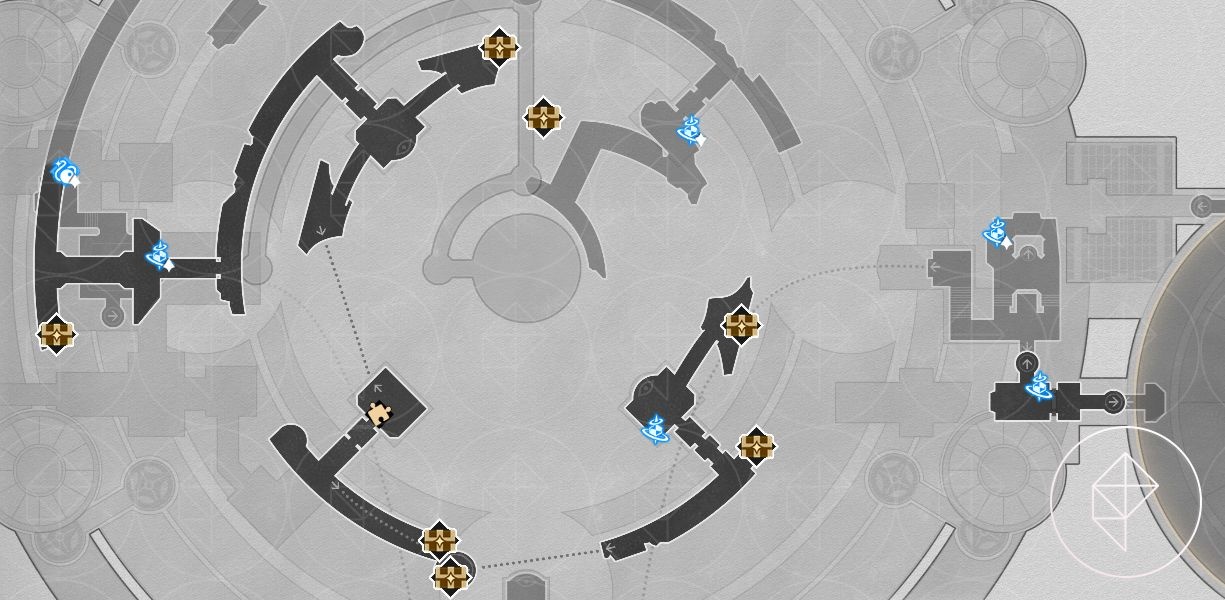
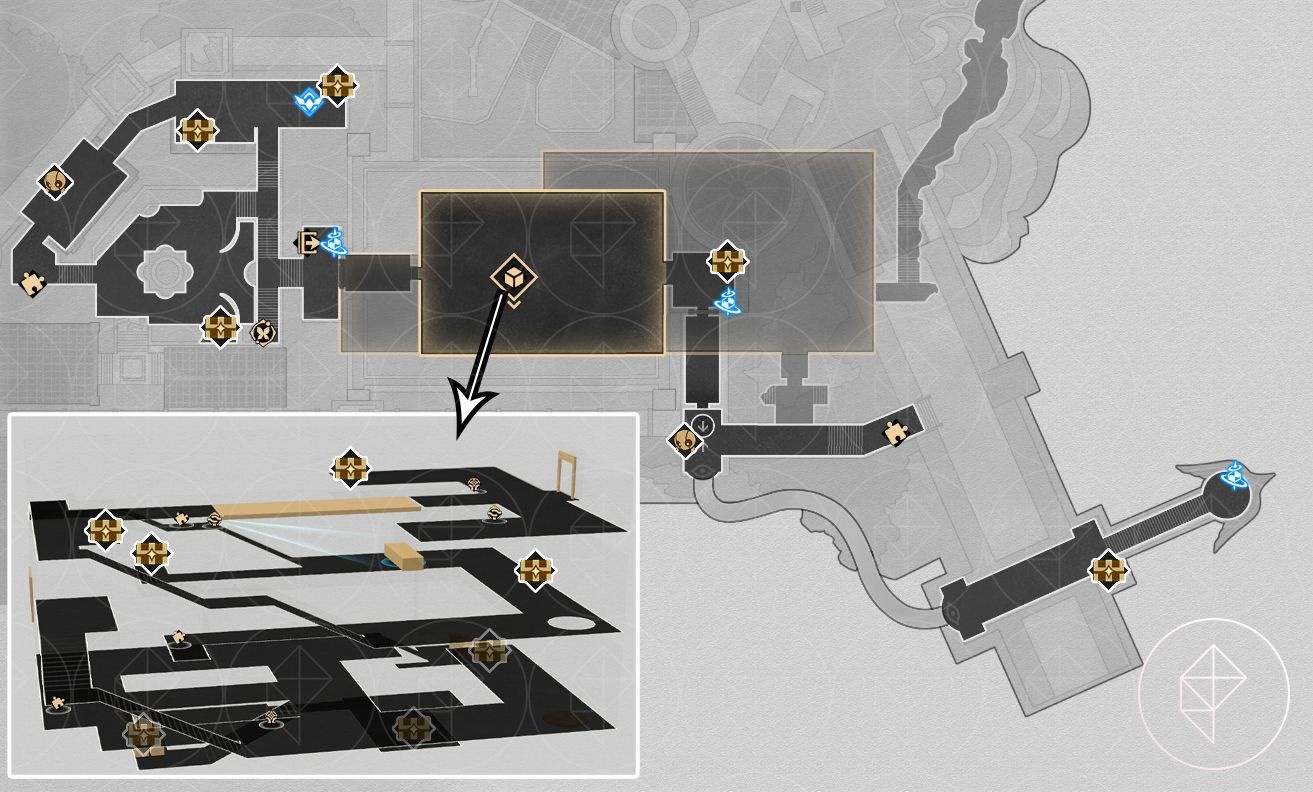
‘Bloodbathed Battlefront’ Castrum Kremnos chest locations
Chest placement is spread across multiple floors and some rooms use 3D mapping. Note that a Spirithief in the hall before the large 3D room does not appear as a chest; it activates after interacting with a nymph on the wall and will give rewards even though it doesn’t drop a chest.

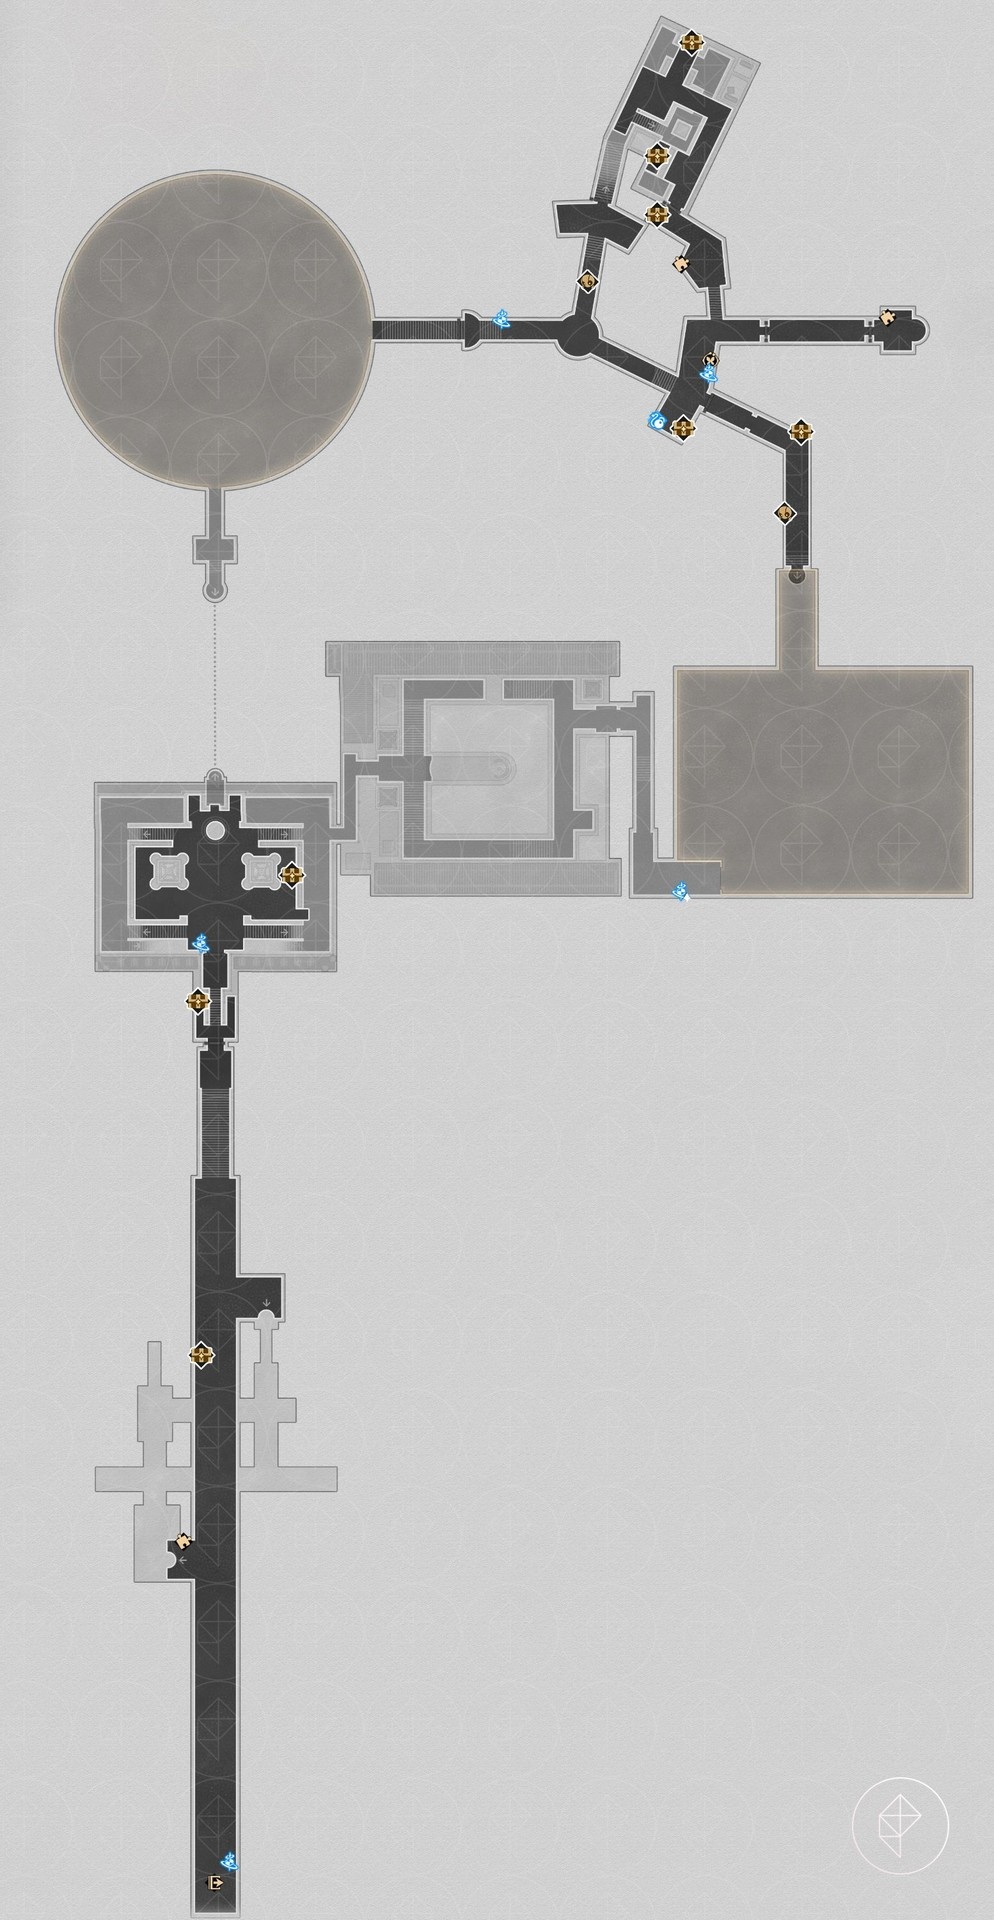
Additionally, the round 3D room in the north hides a secret elevator that reveals four chests (one center, three below). To open that elevator you must complete the side quest “I Once Was in Arcadia.” This is a required step if you want those chests.
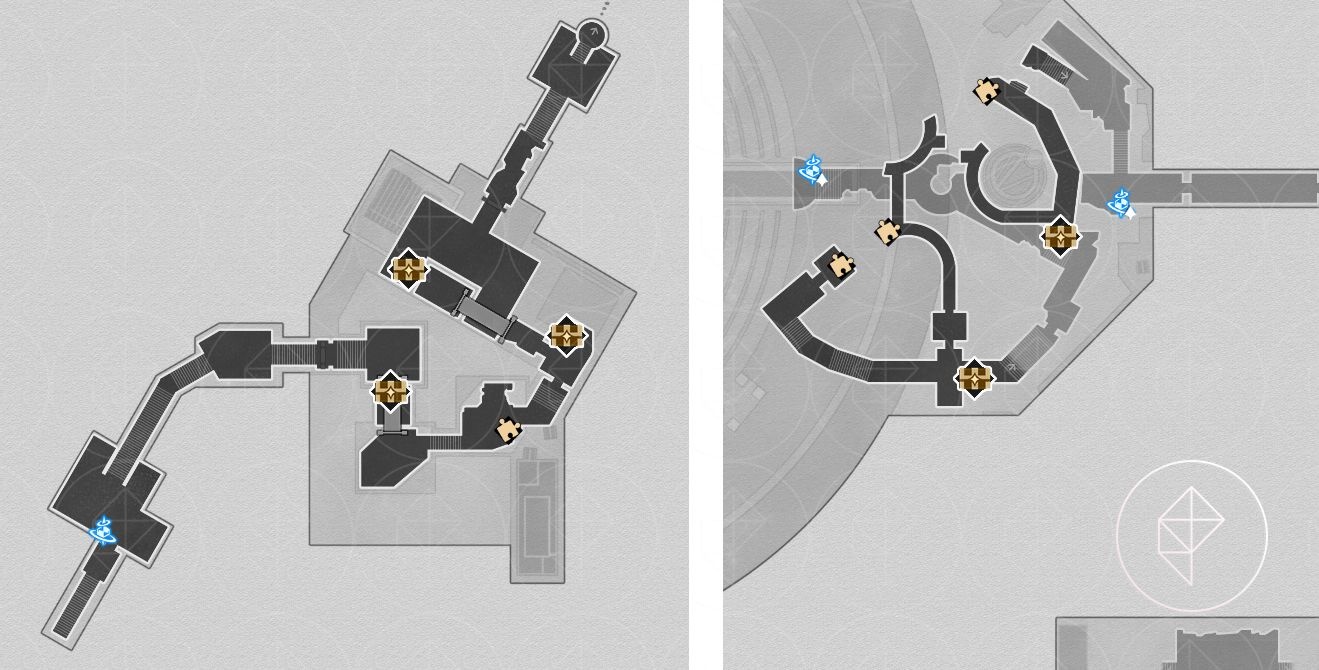
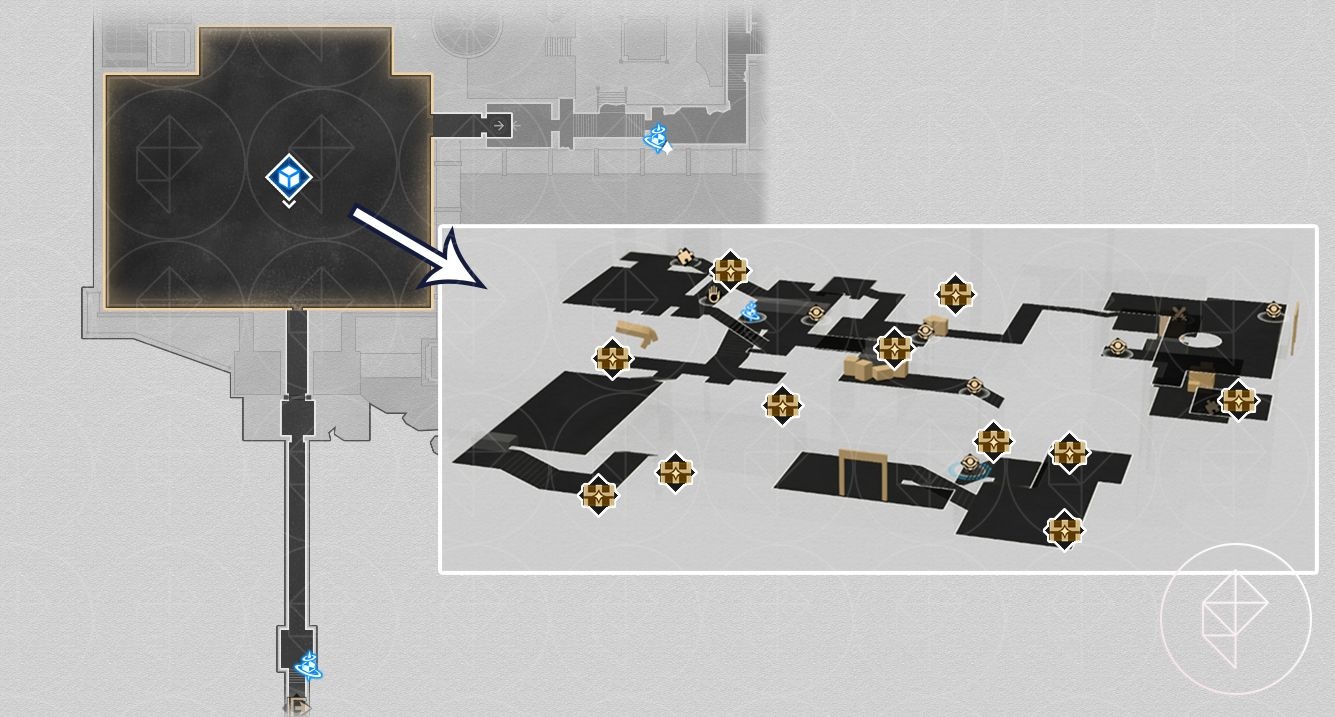
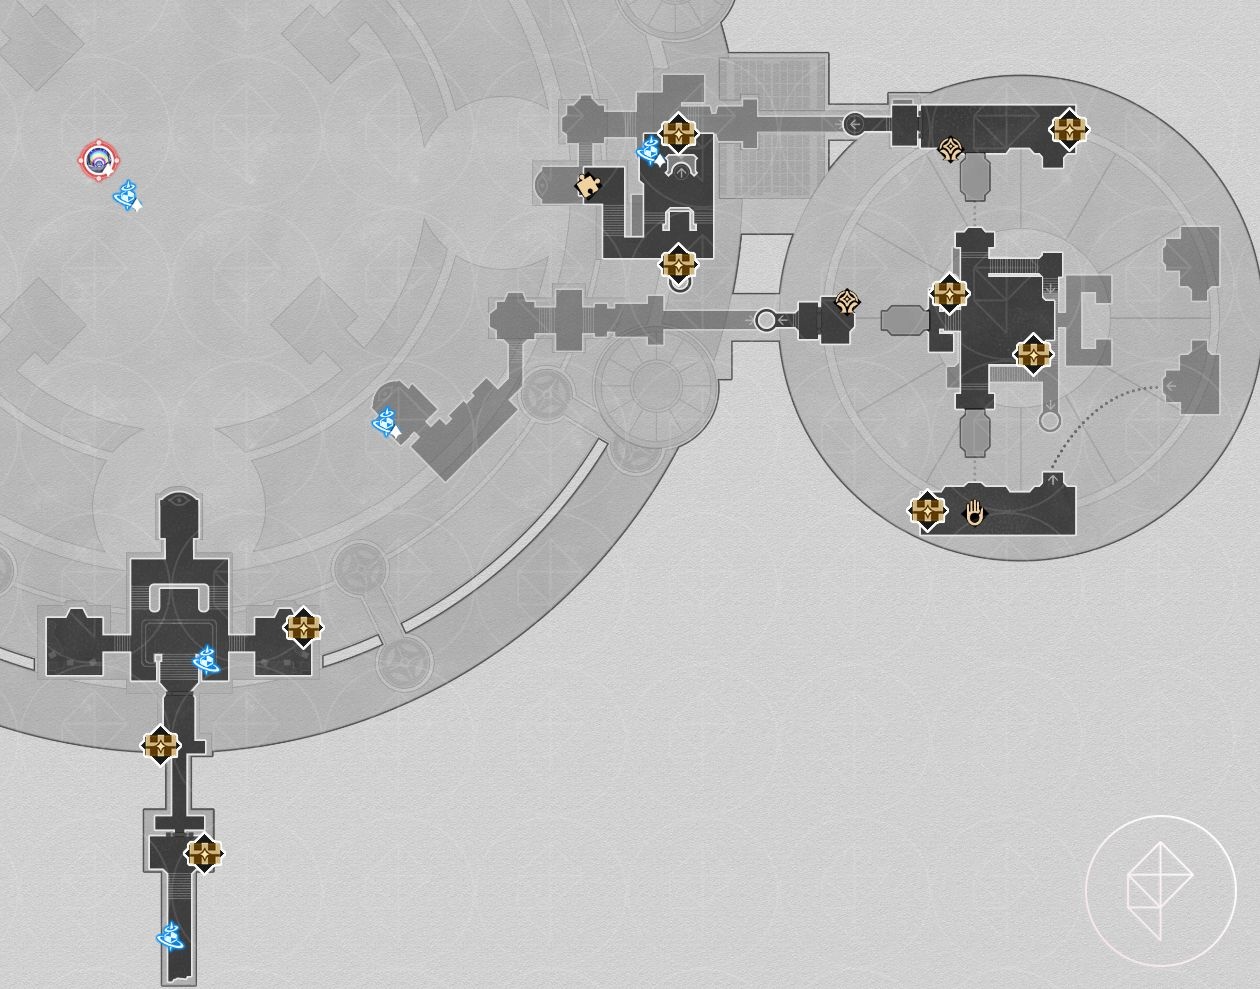
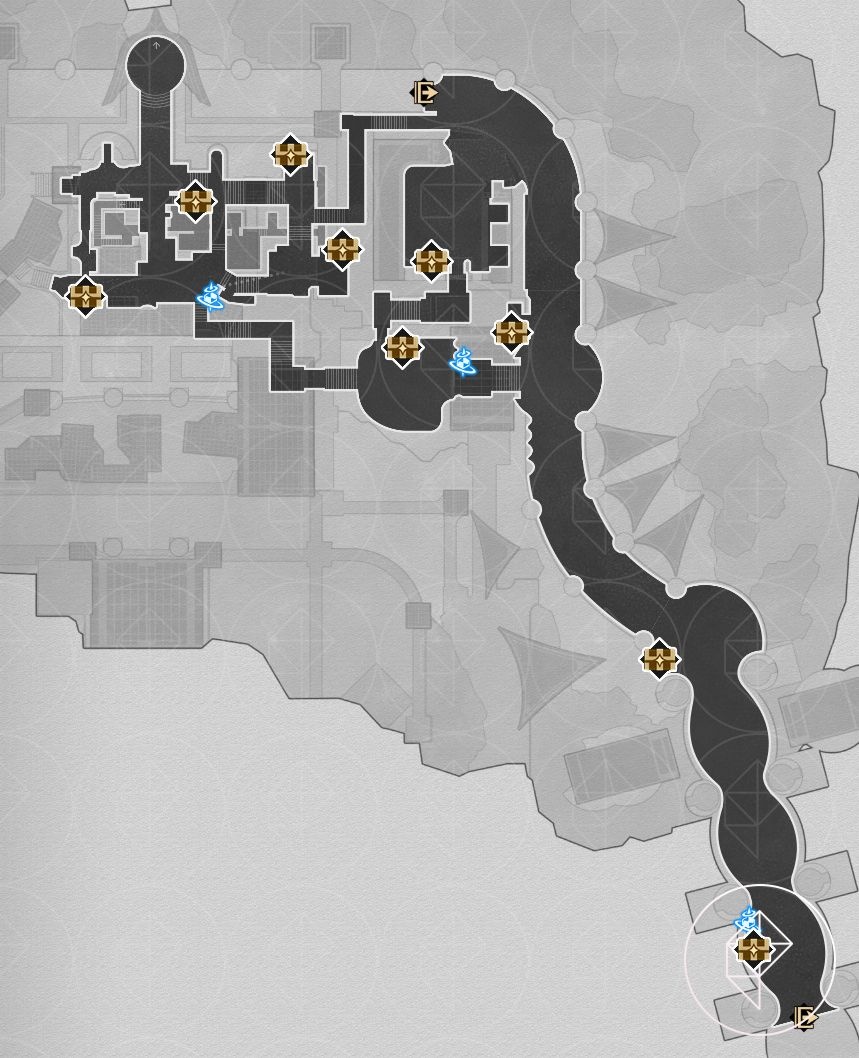
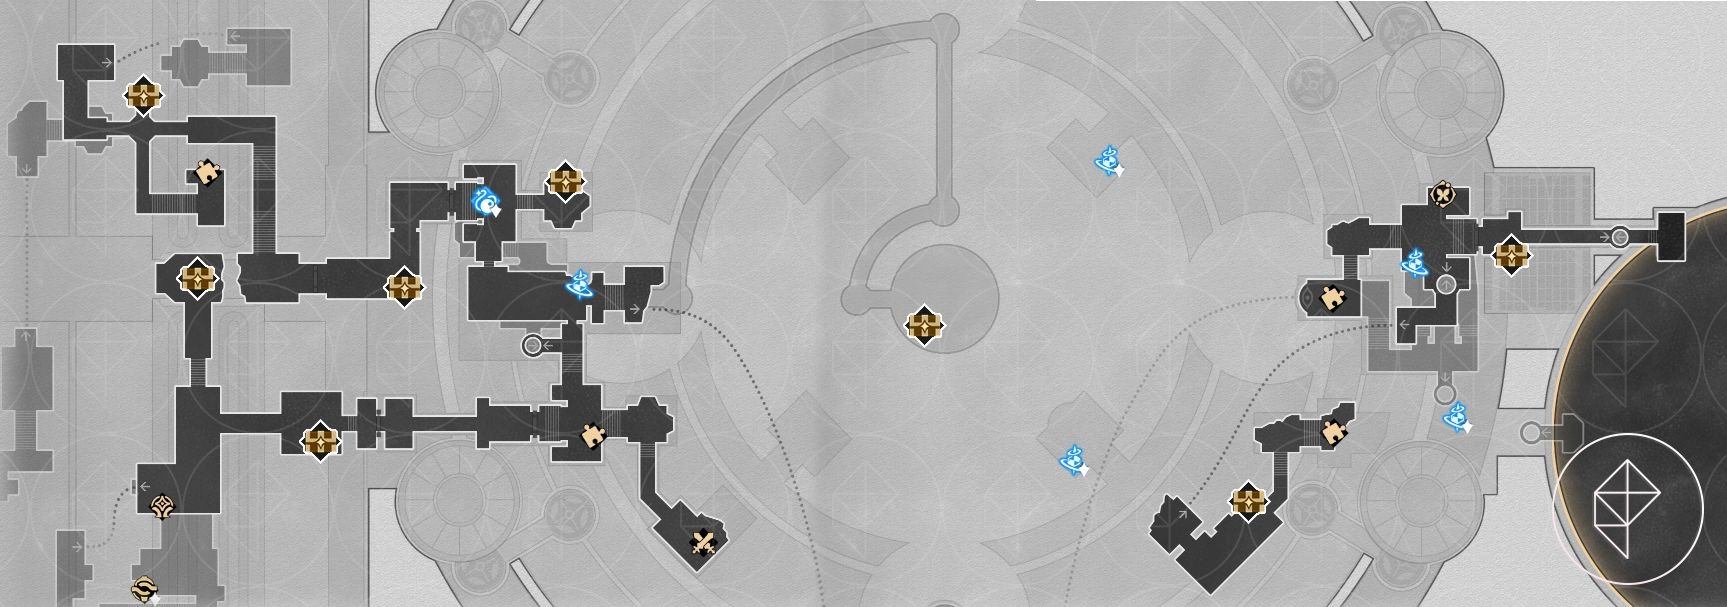
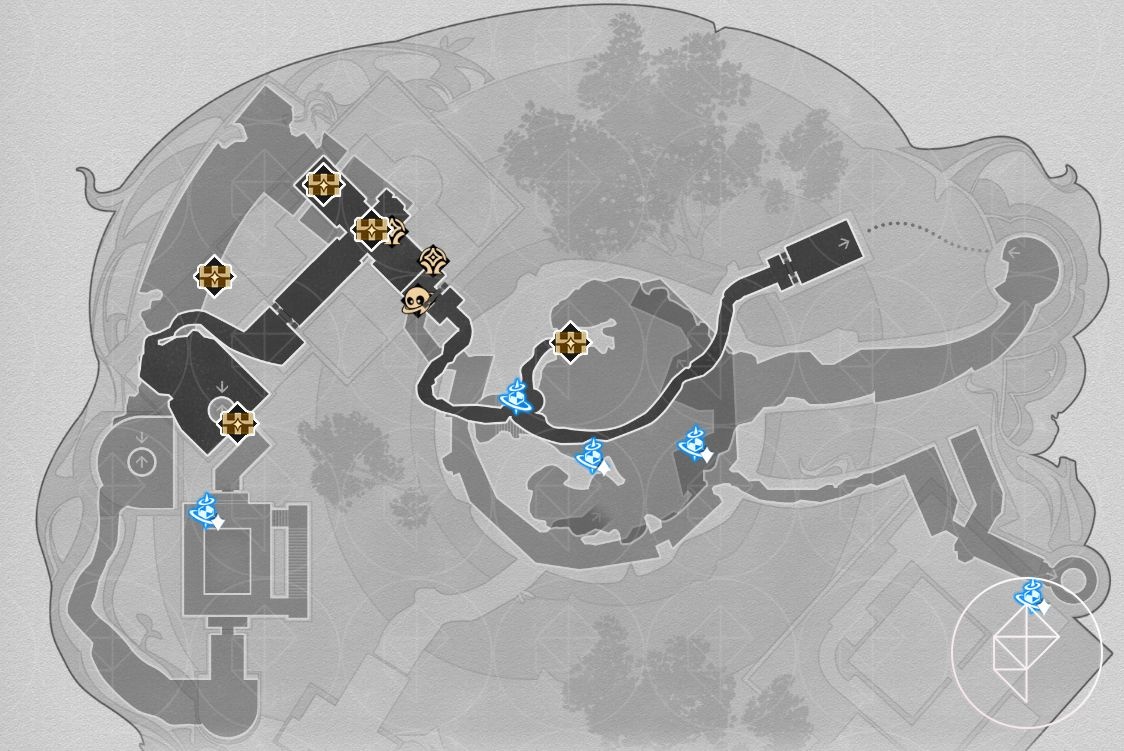
‘Strife Ruins’ Castrum Kremnos chest locations
The Strife Ruins also span multiple floors with several 3D rooms. Sweep each 3D space in both time states to ensure you don’t miss upper-level chests.
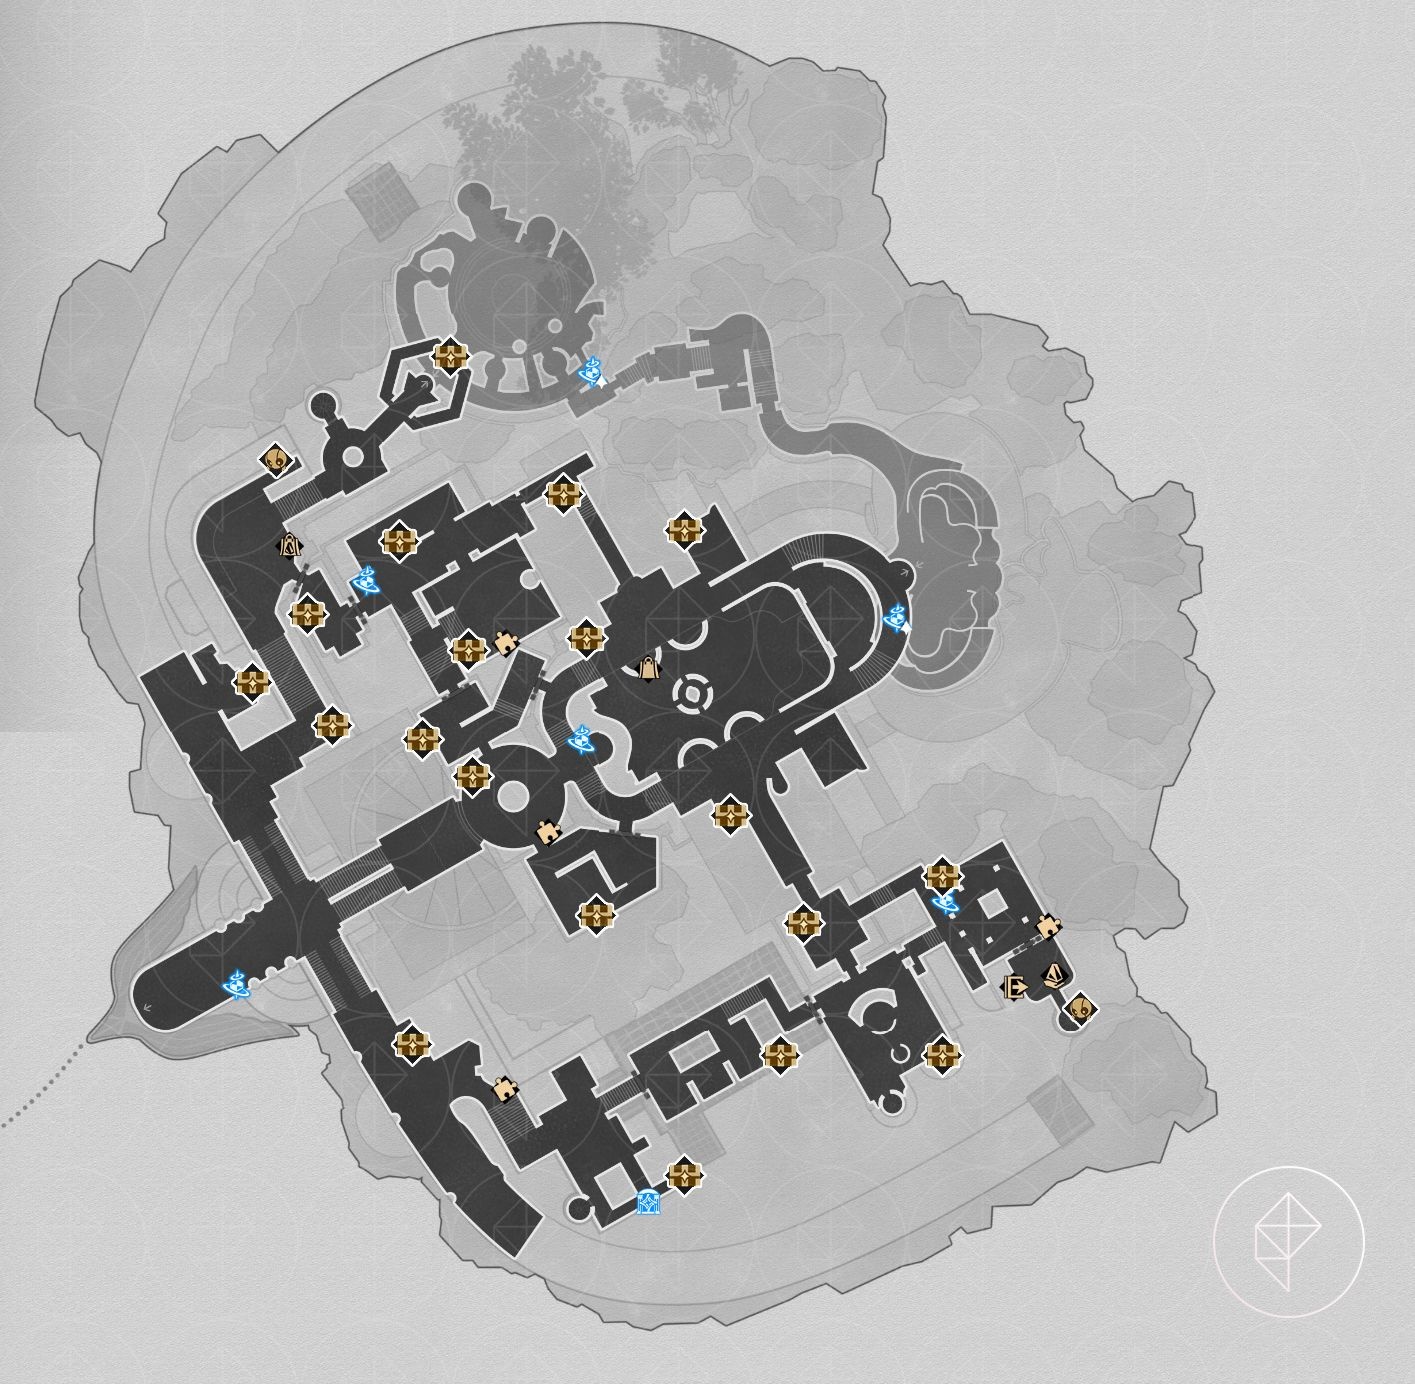
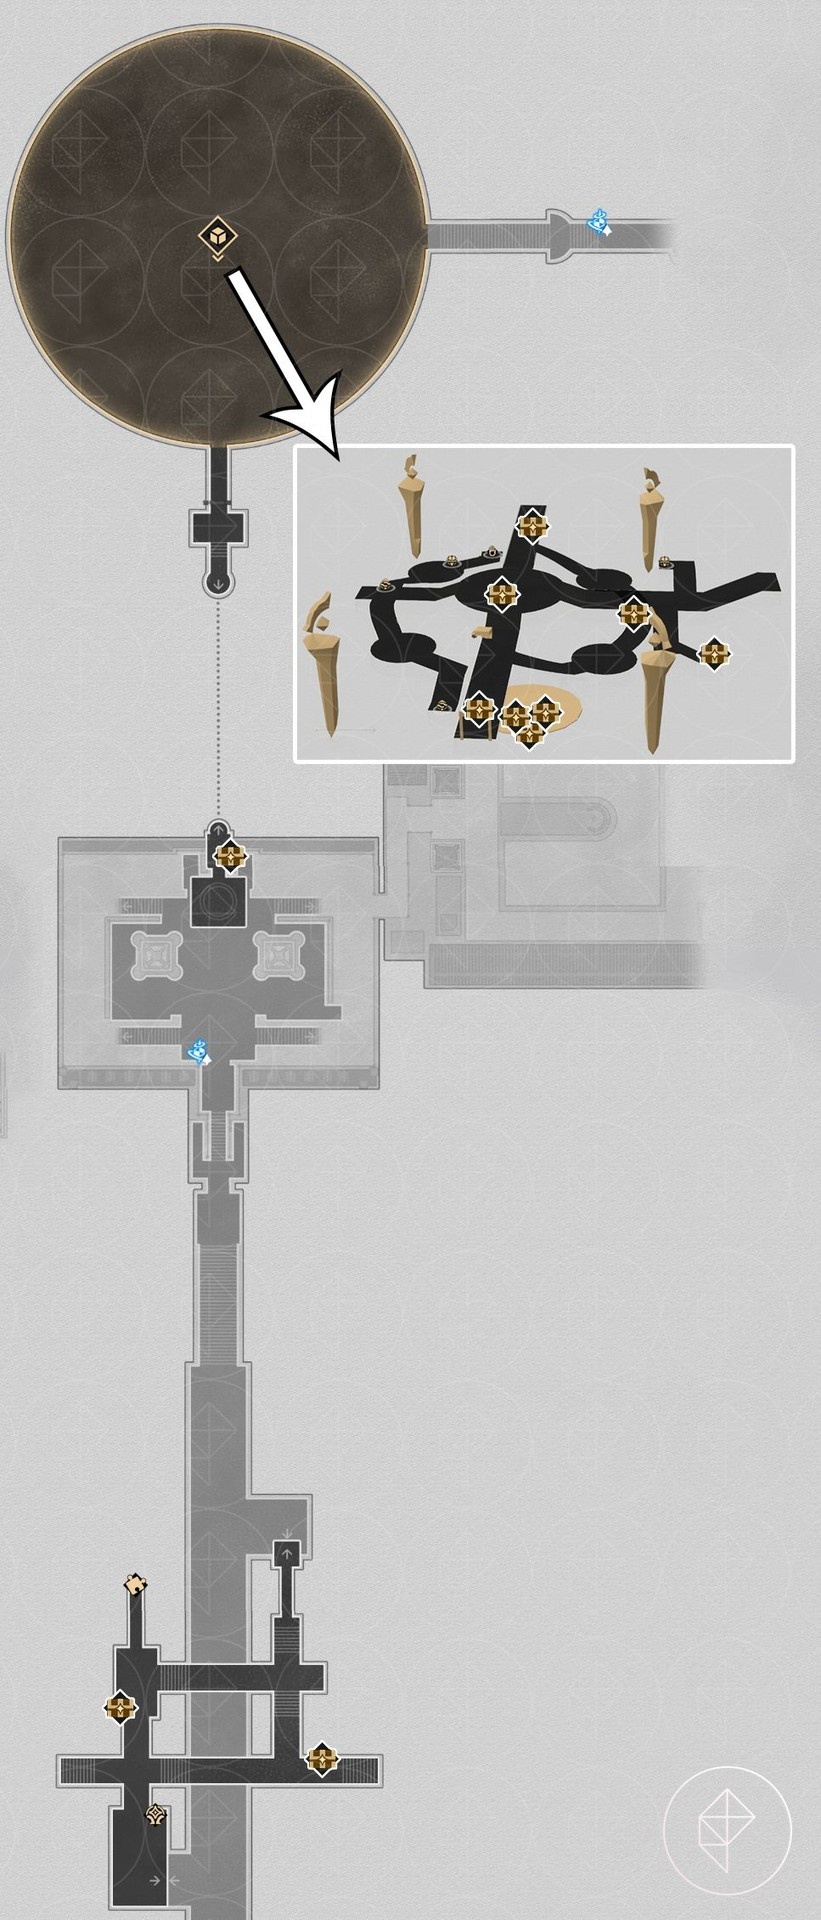
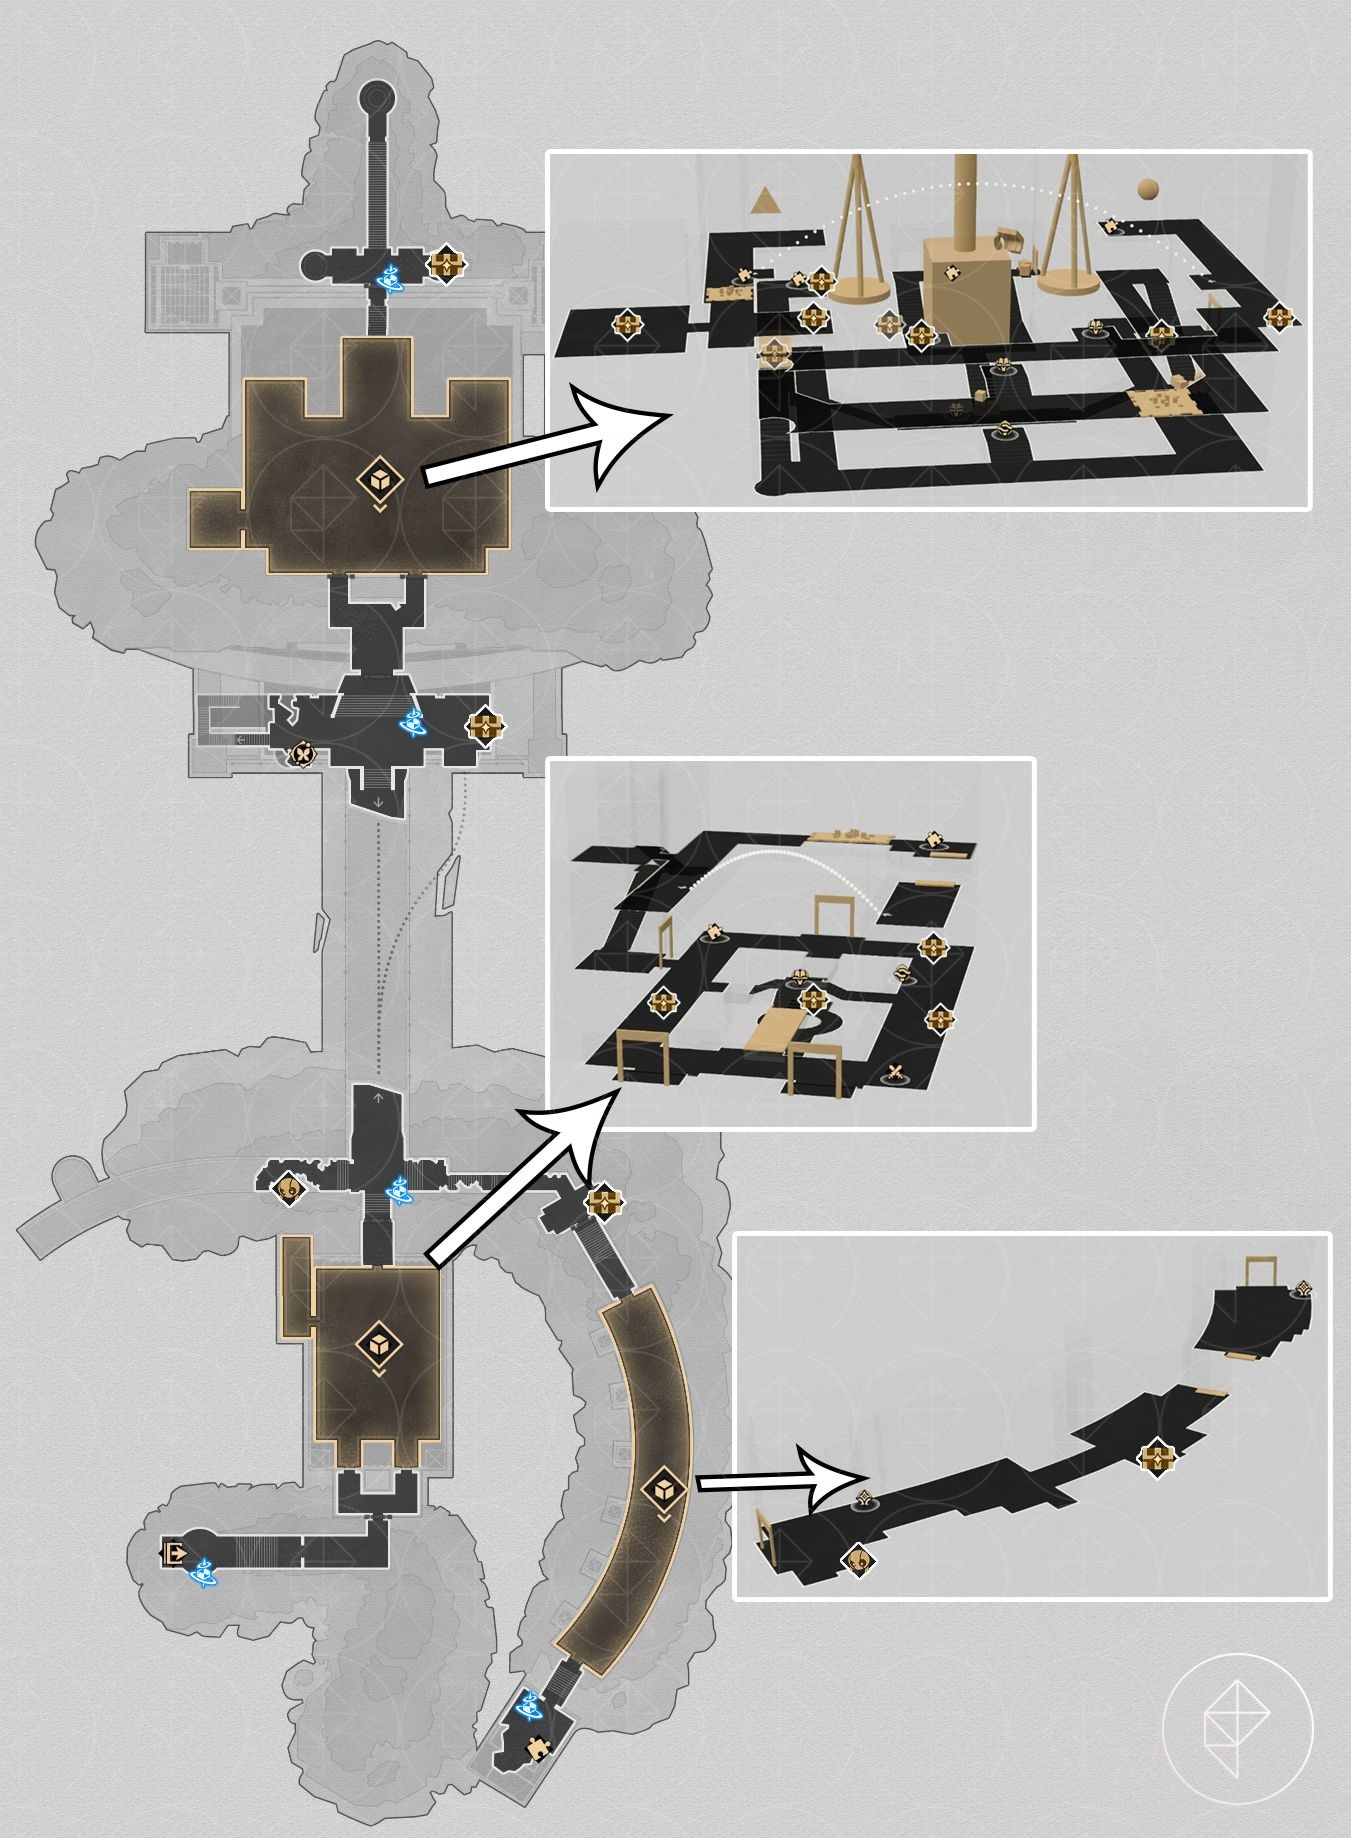
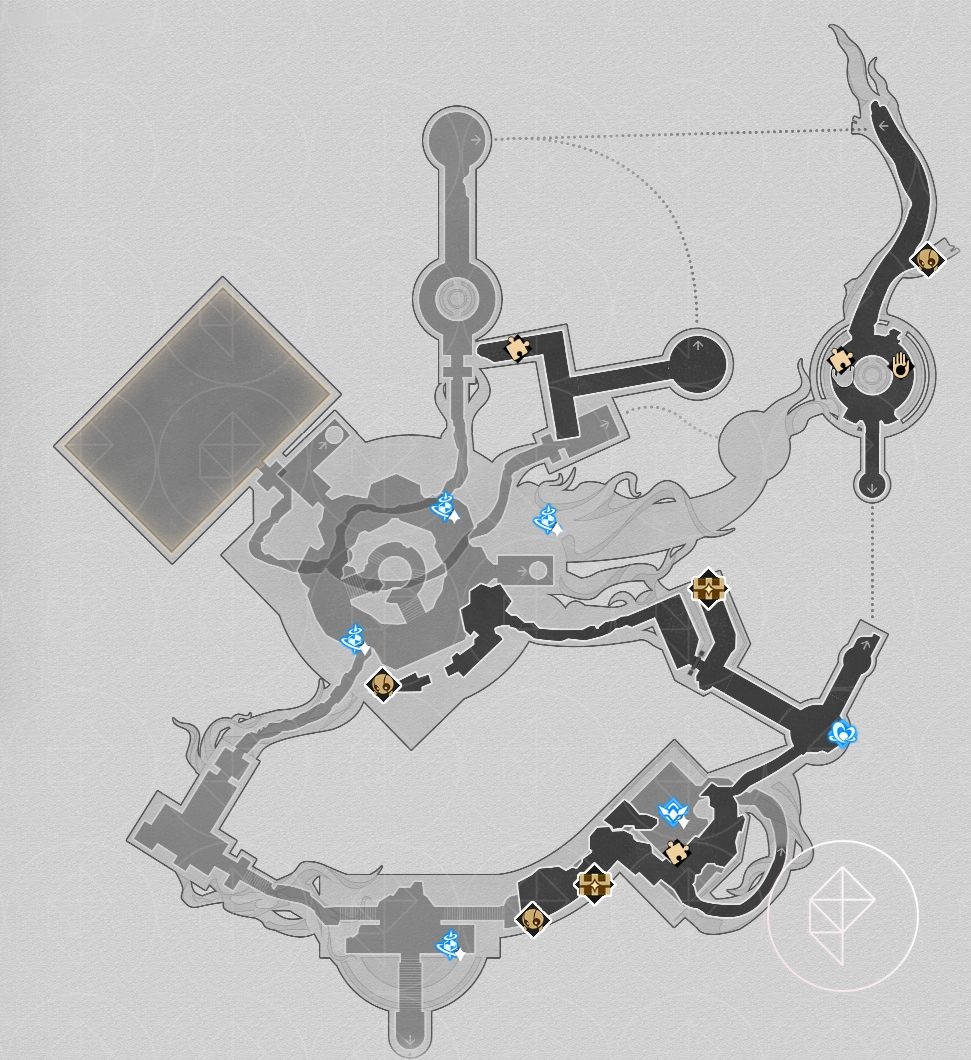
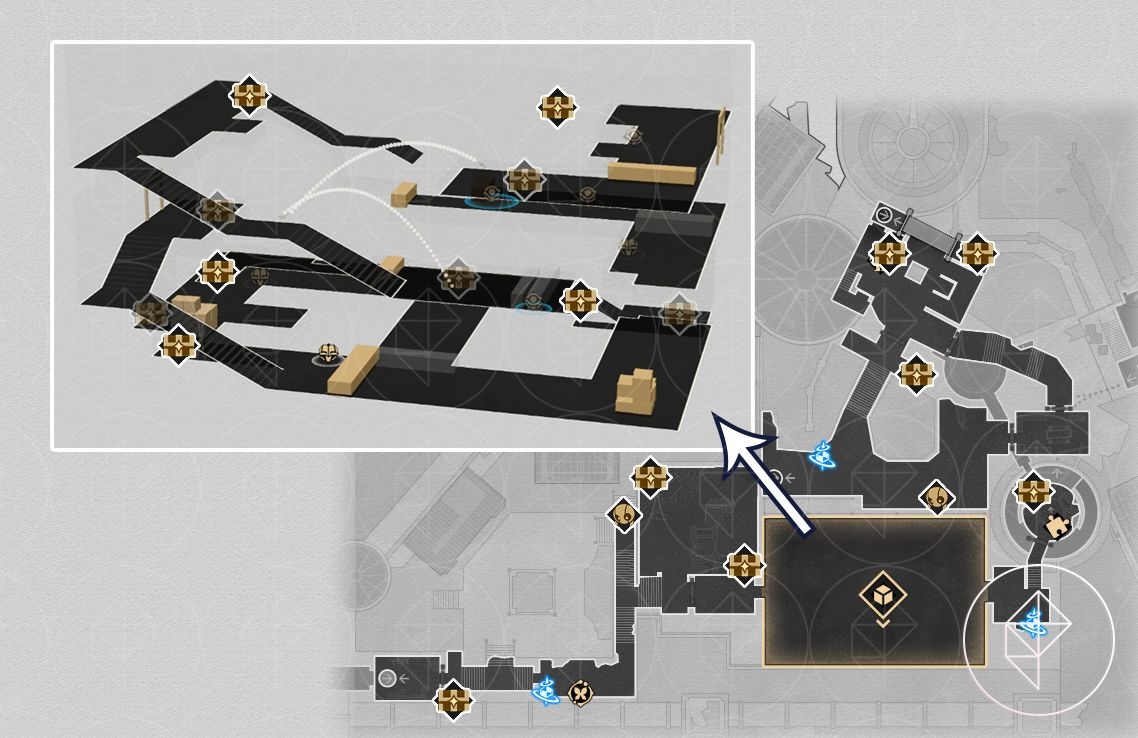
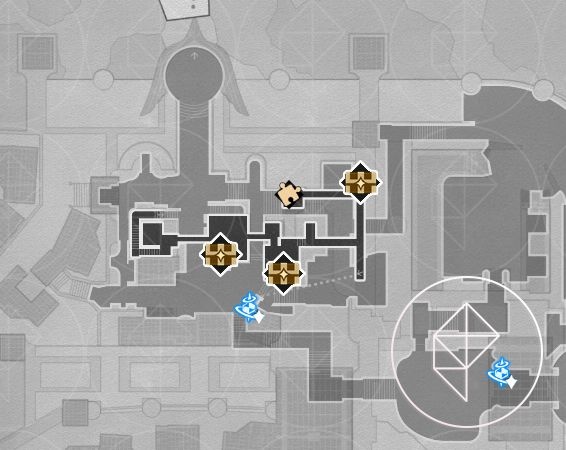
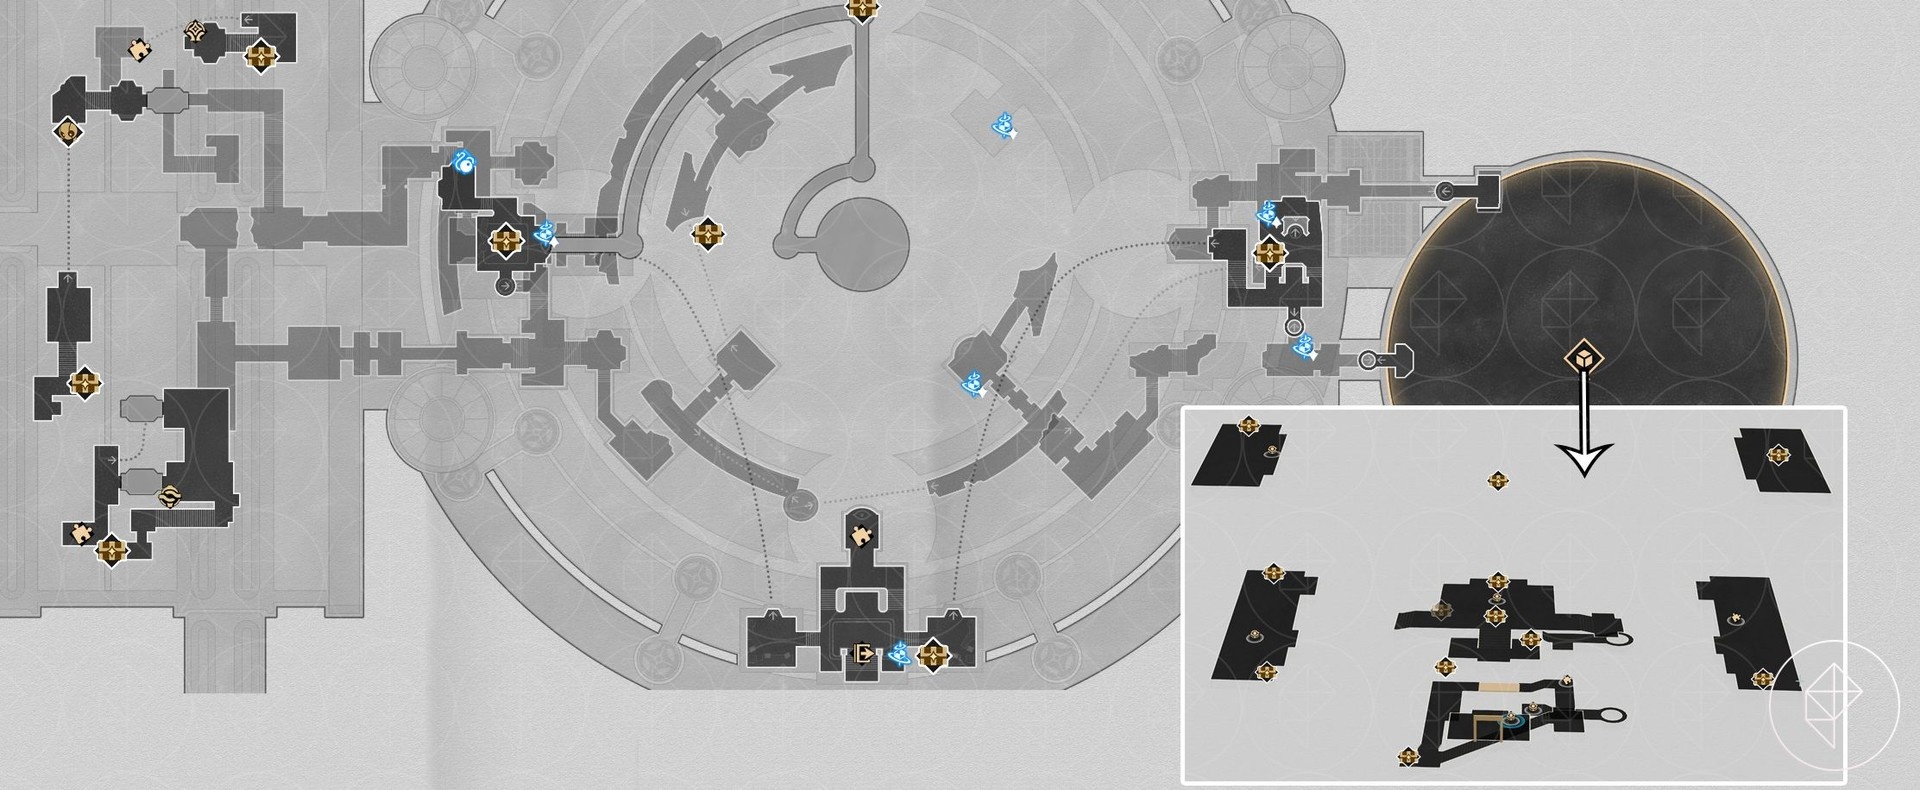
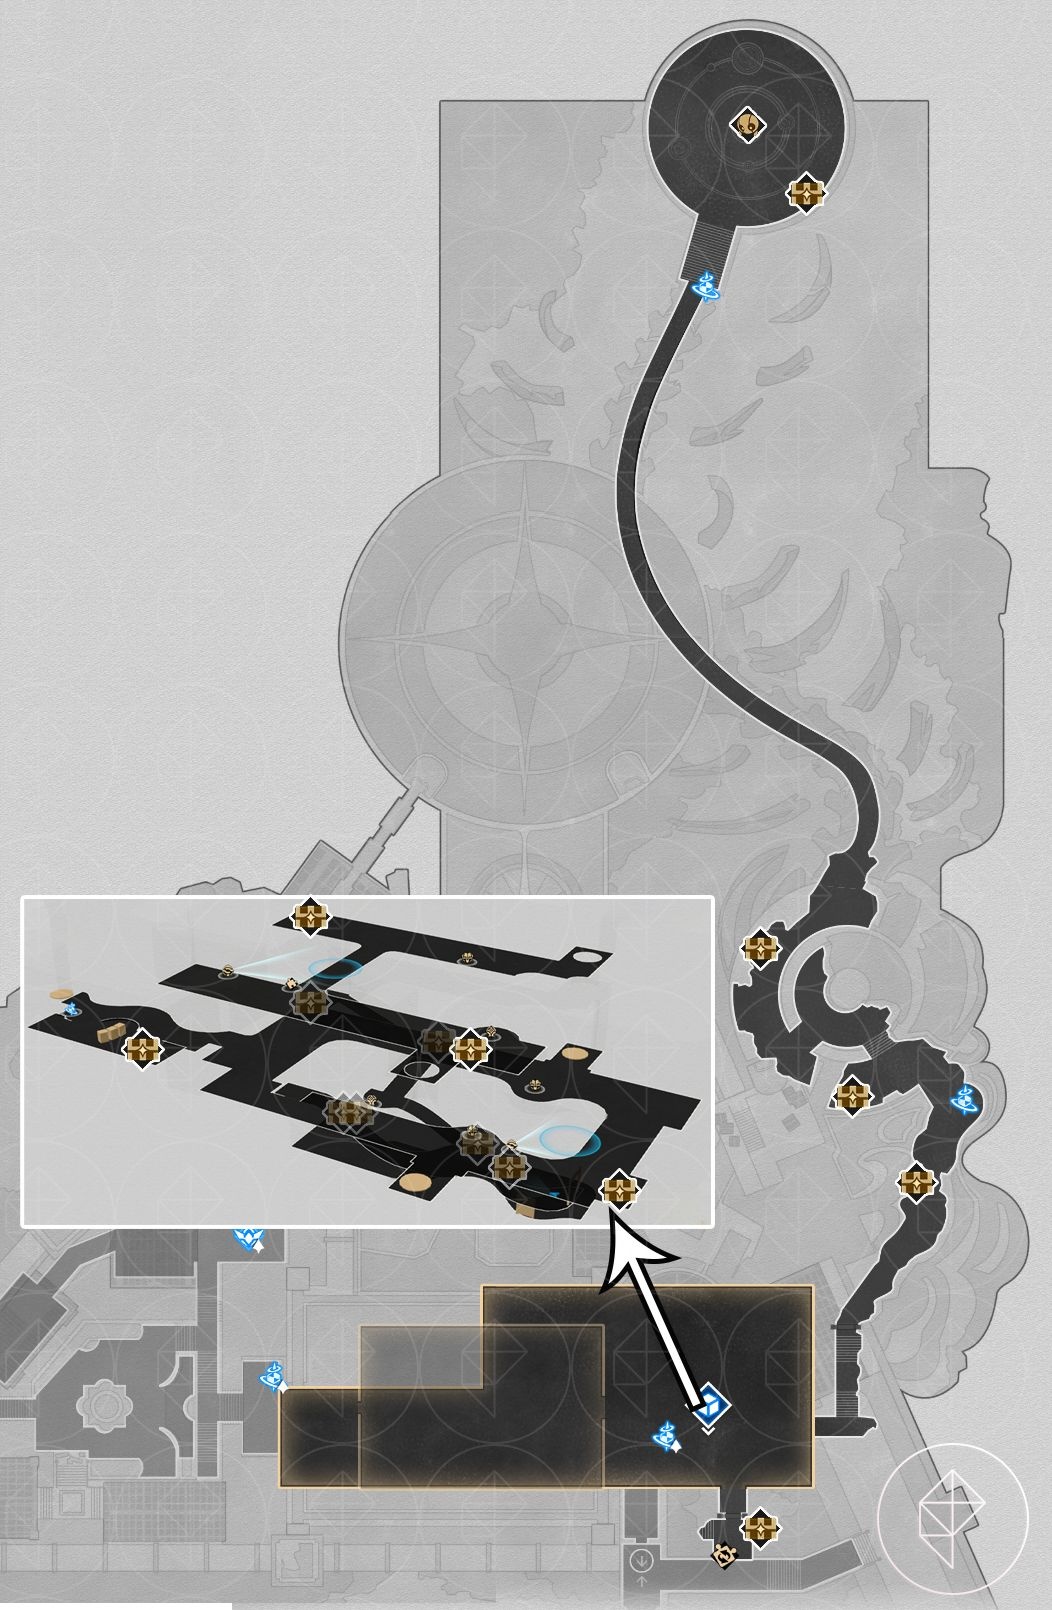
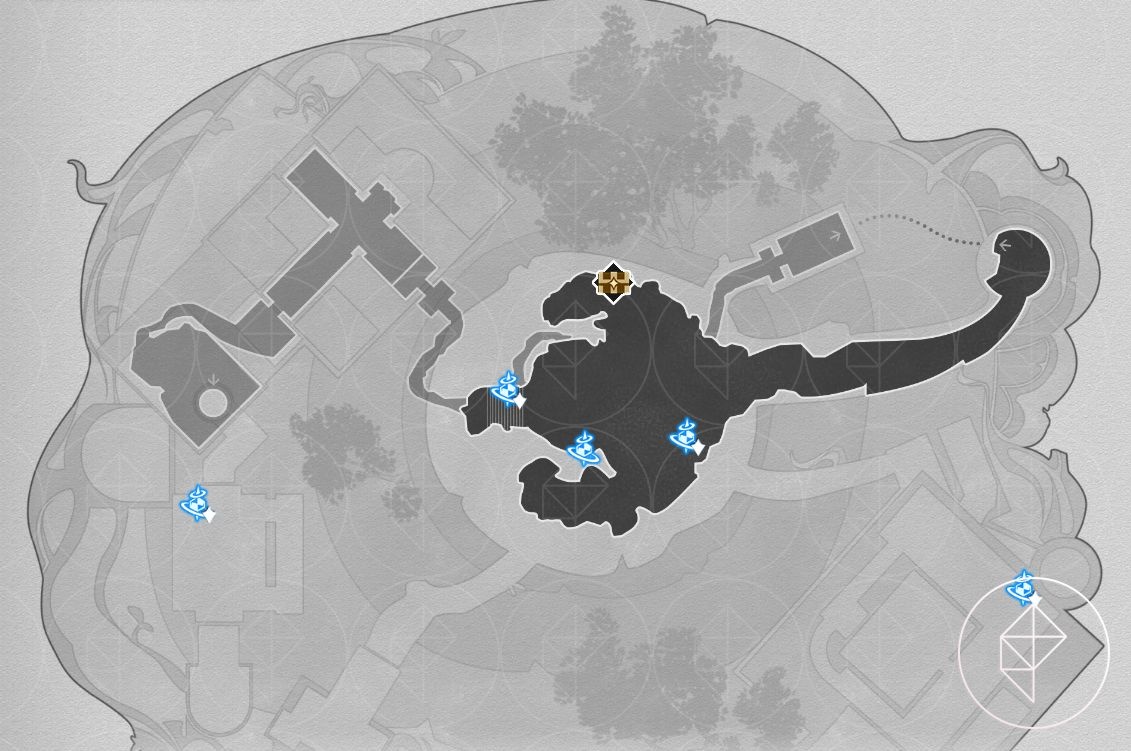
‘Abyss of Fate’ Janusopolis chest locations
Janusopolis features large 3D rooms and a scale-and-hand puzzle in the north. During dawn, use the giant hand to pick up the wall sphere and place it on the right side of the scale, then stand on the left scale to reach the third floor. After that, you can activate the lift to move freely between floors and gather all chests.
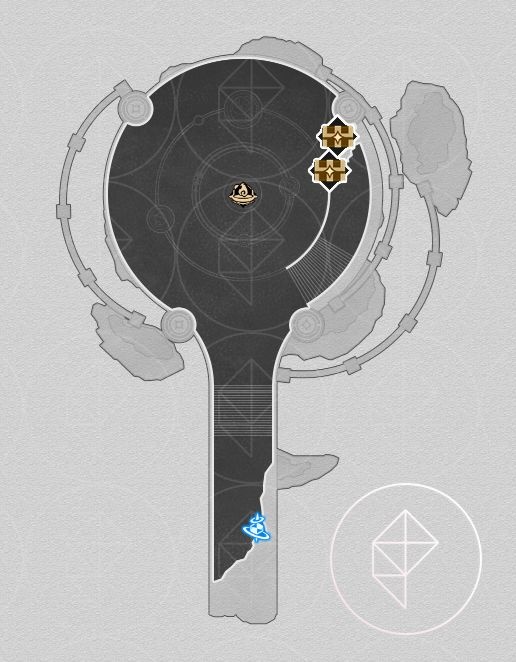
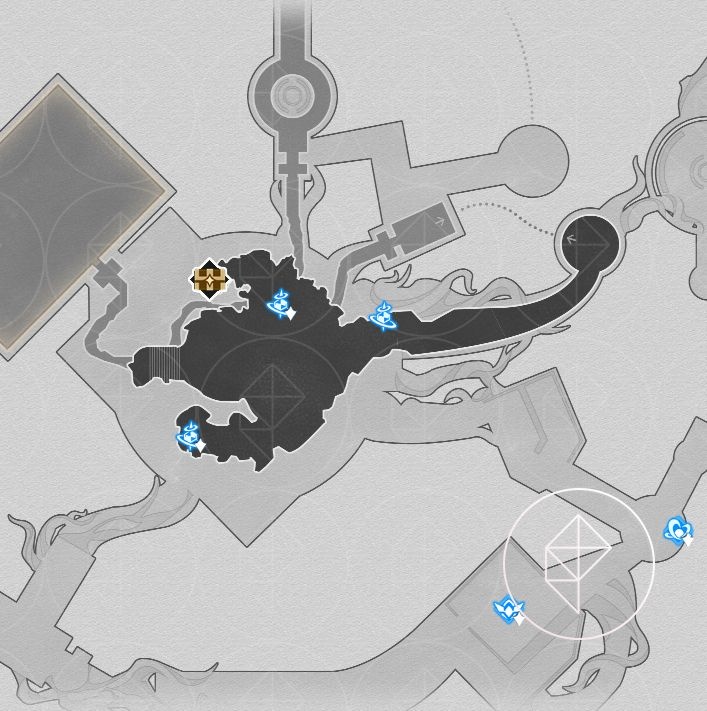
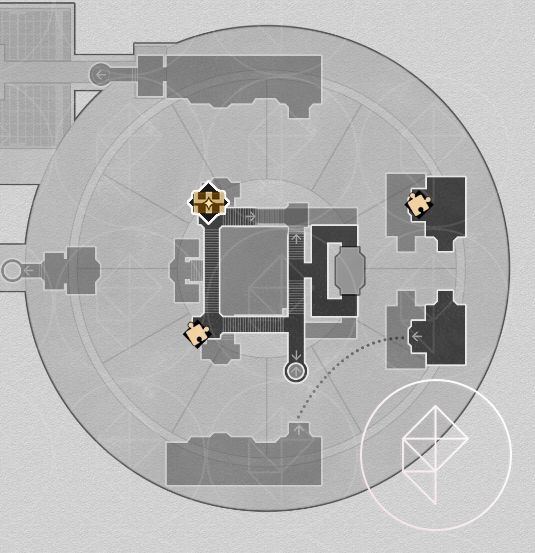
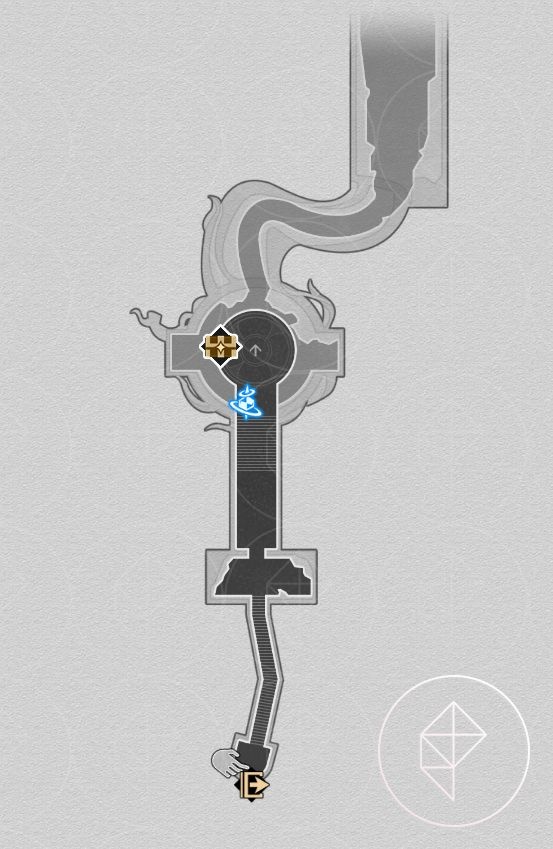
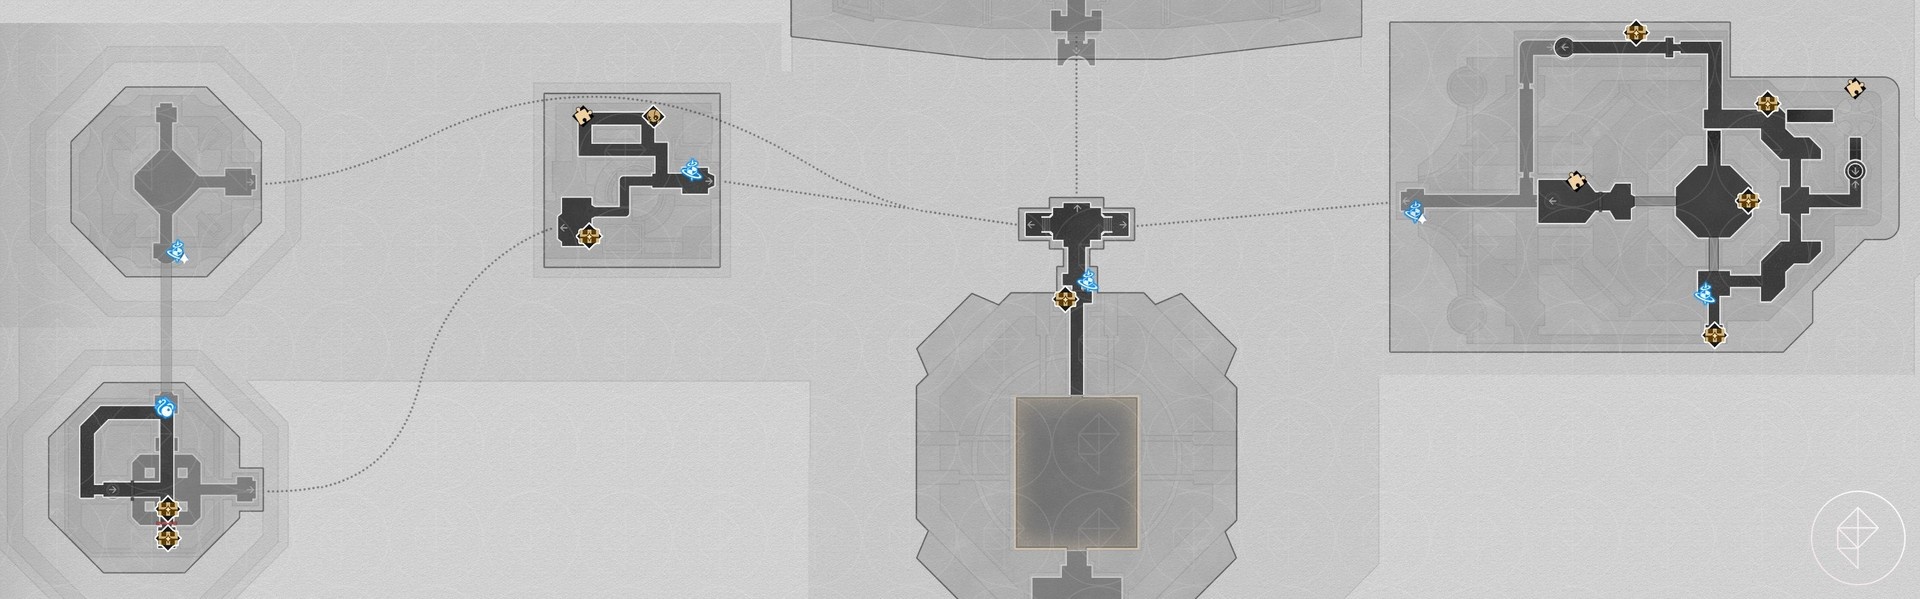
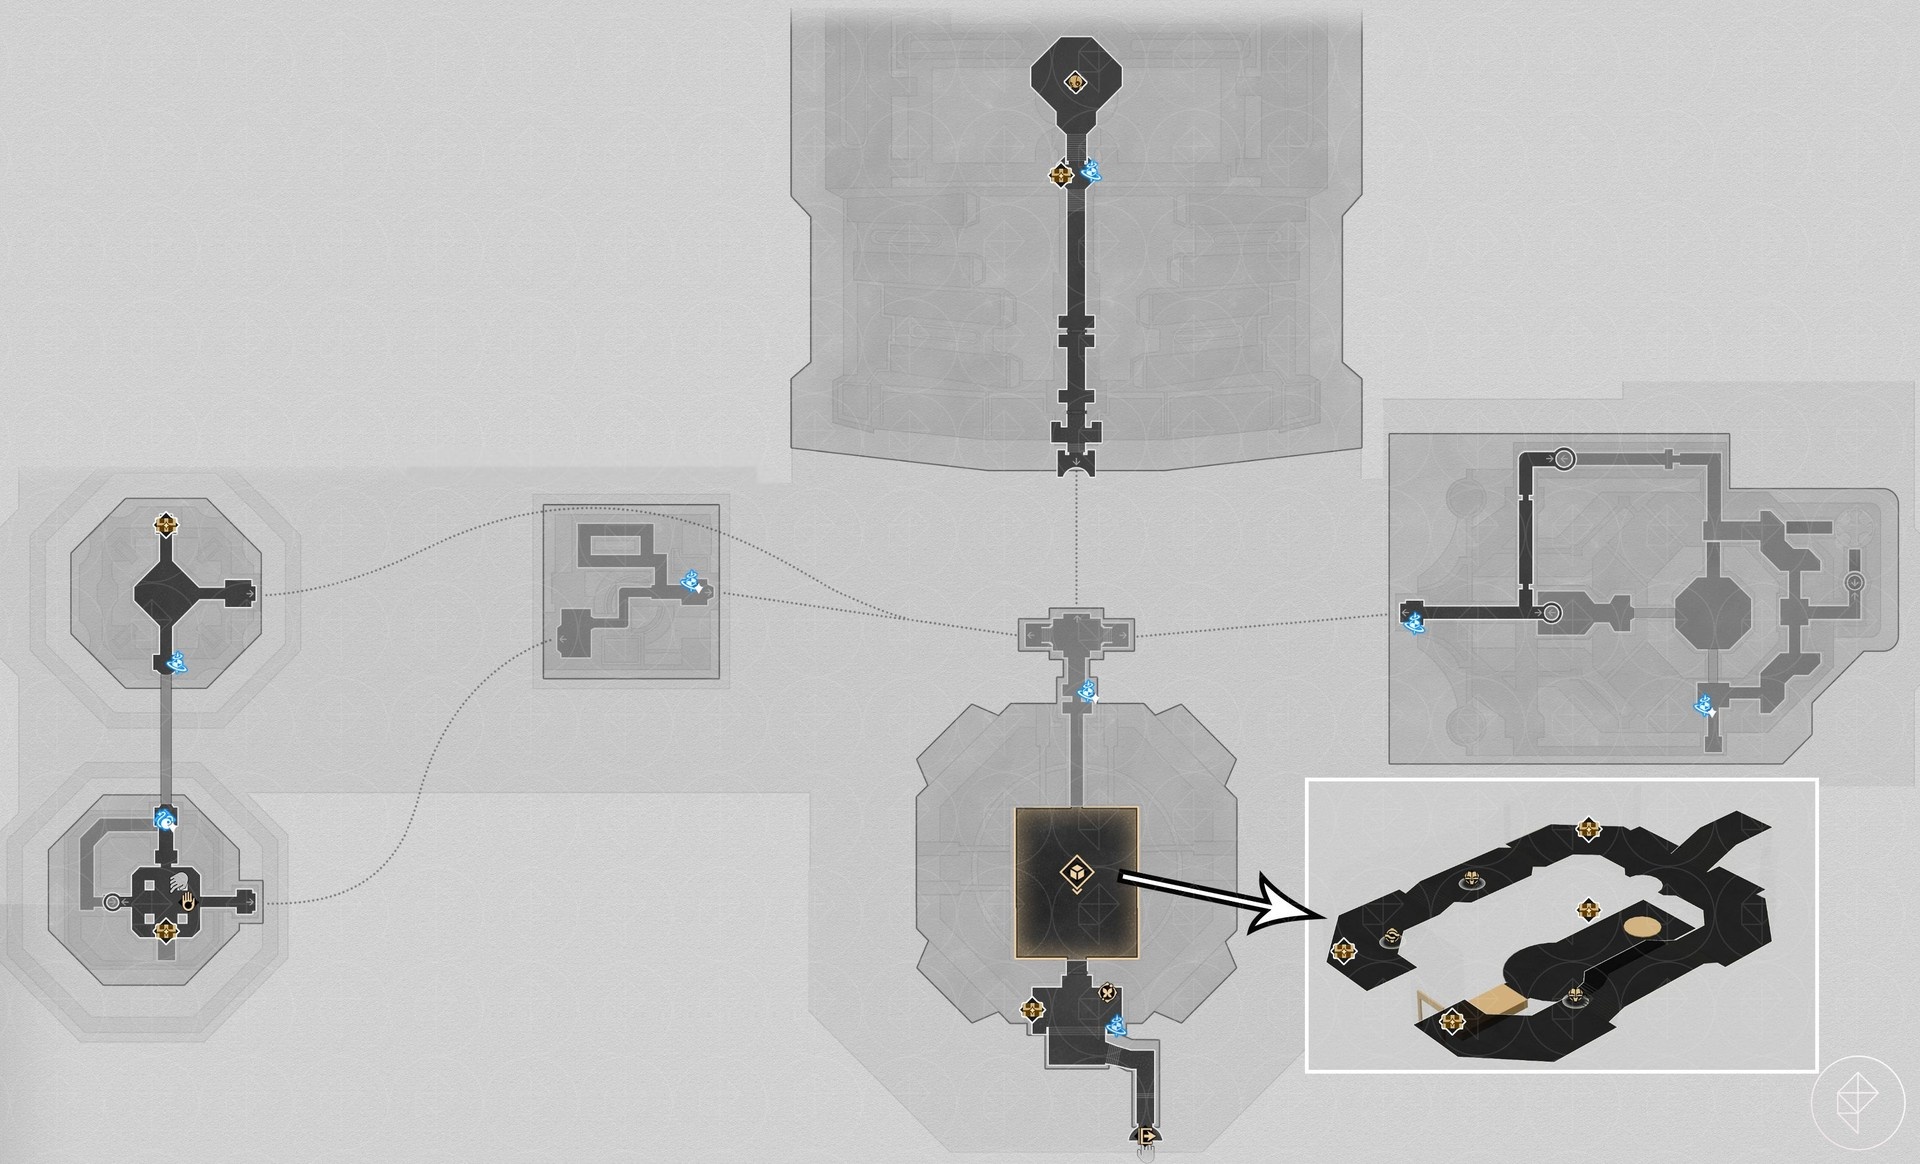
Vortex of Genesis chest locations
The Vortex of Genesis is where you turn in Celestial Ambrosia to the Tides of the Basin. Collecting and handing in ambrosia is how you obtain basin rewards and progress toward the Trailblazer Remembrance upgrade.
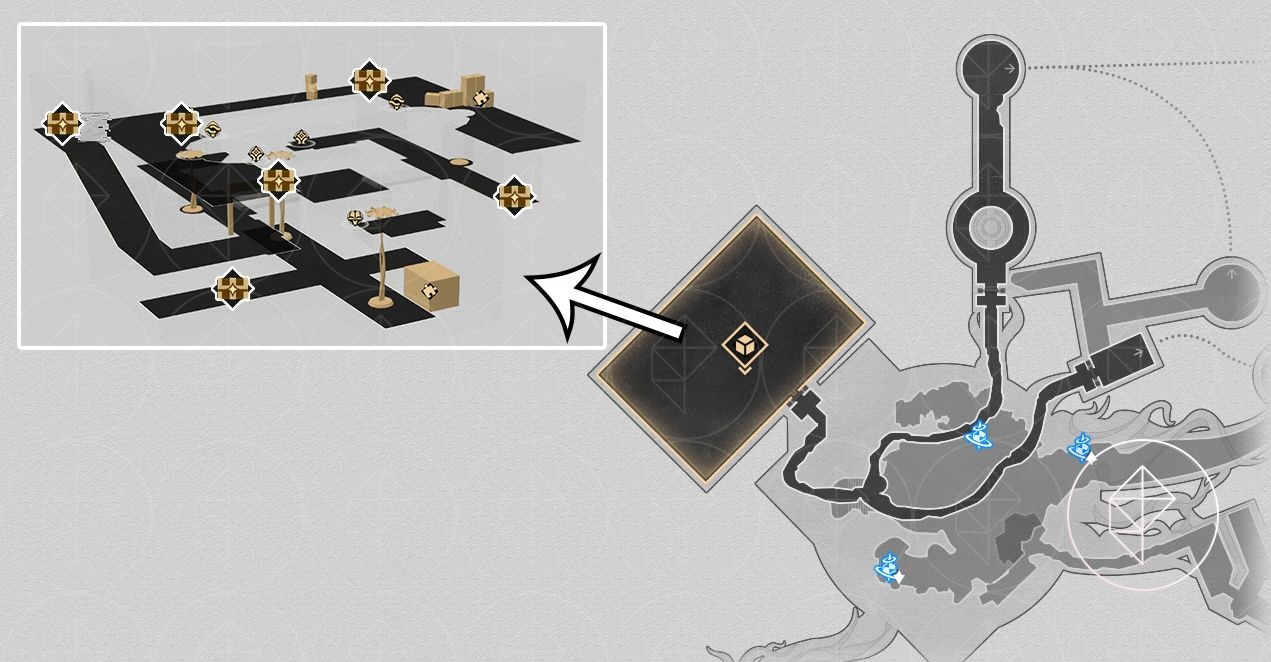
‘Sanctum of Prophecy’ Janusopolis chest locations
Added in version 3.1, this area contains many chests that do not get counted by the on-map chest counter because they are tied to the “Janus’ Maze” quest. The quest unlocks in the northeast library area of F1 and is marked on the map with a blue symbol.

‘Murmuring Woods’ Grove of Epiphany treasure chests
Also added in 3.1, this zone has multiple floors with puzzles and Spirithiefs. One Spirithief in the southern area steals a large, rewindable block rather than a chest. After defeating that Spirithief, use the block to clear a path and unlock a door on F1 to reach the nearby chest.
‘Demigod Council’ Dawncloud treasure chests
Added in version 3.2, this long area includes several Spirithiefs. The northern Spirithief on this map steals a floating scroll rather than a chest, so keep an eye out for that object when following markers.

‘Dragonbone City’ Styxia treasure chests
Introduced in 3.2, Dragonbone City uses controllable mechanisms in its 3D rooms. On F1, use the giant hand to break boxes and reveal hidden areas, then use the spotlight mechanism to collect chests across day and night. F2 requires finding and using hidden passage mechanisms to reach all chests.
‘Fortress of Dome’ Eye of Twilight treasure chests
Added in 3.3, the Fortress of Dome spans multiple floors and contains Spirithiefs that sometimes take hidden passages instead of chests. Plan to explore each floor thoroughly and switch time states to reveal all items.

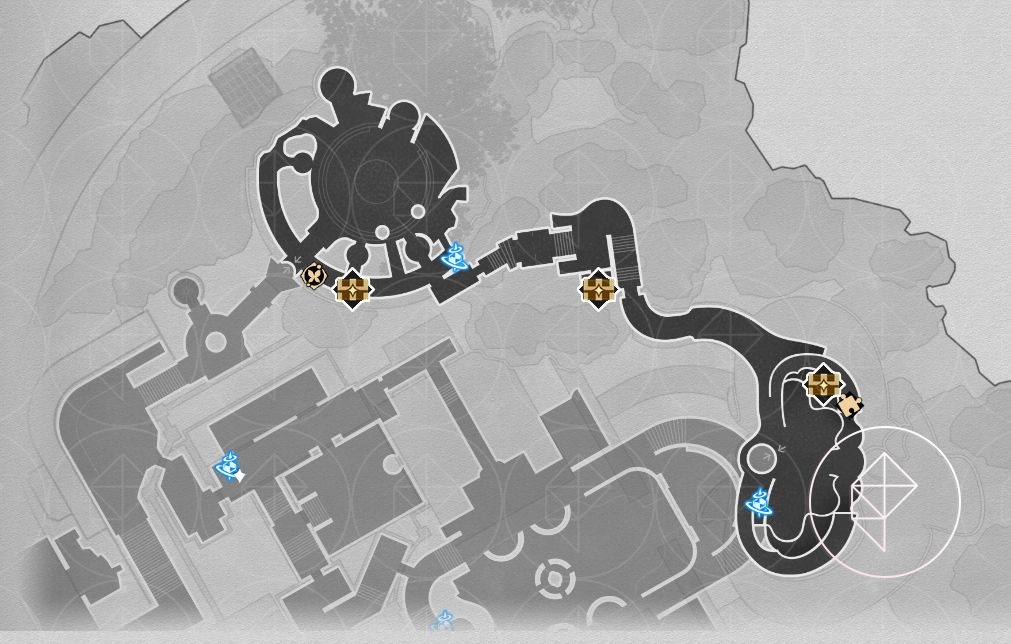
‘Fallen Twilight City’ Okhema treasure chest locations
Also from version 3.3, Fallen Twilight City reuses Okhema layouts with new placements. The Spirithief near the teleporter here is triggered by interacting with a small chimera, not by a chest interaction.

‘Lightless Chapel’ Dawncloud treasure chest locations
Added in 3.3 and similar to earlier maps, the Lightless Chapel contains Spirithiefs that steal a mix of objects including a floating scroll, elite enemies, and even another Spirithief. Follow map markers and investigate apparent non-chest objects as well.

‘Cloudedge Bastion Ruins’ Eye of Twilight treasure chest locations
Also added in 3.3, Cloudedge Bastion requires using the compass to create paths; since compass paths change, floating-center chests are obtained via the compass. Several Spirithiefs here take nymphs or hidden passages rather than chests, so pay attention to non-chest markers.
‘Aedes Elysiae’ treasure chest locations
Added in version 3.4, Aedes Elysiae’s chests are straightforward and don’t require complex 3D puzzles. Explore normally and you should find them without special tricks.
‘Warbling Shores’ Styxia treasure chest locations
Introduced in 3.5, Warbling Shores contains visible Spirithiefs that are not hidden behind chests; some are plainly in view while others show their coin even when tucked away. The repeating southern puzzle can give many chests, but those repeats may not count toward the on-map chest counter.
‘Radiant Scarwood’ Grove of Epiphany treasure chest locations
Added in 3.6, Radiant Scarwood uses portals that let you become Bartholos. To reach some northeastern chests you must transform into Bartholos and plug water spouts to drain areas. Furthermore, a few chests are only reachable by flying as Bartholos to otherwise inaccessible spots.

‘Universal Matrix’ Great Tomb of the Nameless Titan treasure chest locations
Also added in 3.6, this area compresses pathing into tighter rooms. In this zone, Spirithiefs often trigger a battle after you interact with marked objects rather than physically stealing a chest. As always, check both time states and clear 3D rooms thoroughly.
If you want to hunt every chest efficiently, switch between dawn and evernight, clear 3D rooms fully, and note which Spirithiefs take chests versus non-chest objects. In short: explore both states, do required side quests (for hidden elevator chests), and be ready to fight Spirithiefs when they show up. Happy looting!


