Get Full Health Fast: Every Mask Shard in Hollow Knight: Silksong (20 Locations & Requirements)
If you’re hunting every mask shard in Hollow Knight: Silksong, this guide lists the exact locations and requirements for all 20 shards so you can boost your health quickly and reliably. Below you’ll find which shard is where, what you need to reach it, and a short tip for each one.
- Mask shard #3 — Far Fields
- Mask shard #4 — Shellwood
- Mask shard #5 — Deep Docks
- Mask shard #6 — Weavenest Alta
- Mask shard #7 — Cogwork Core
- Mask shard #8 — First Shrine in Songclave
- Mask shard #9 — Savage Beastfly Grand Hunt
- Mask shard #10 — Whispering Vaults
- Mask shard #11 — Far Fields (jumping gauntlet)
- Mask shard #12 — Mount Fay
- Mask shard #13 — Blasted Steps
- Mask shard #14 — Wisp Thicket
- Mask shard #15 — Bilewater
- Mask shard #16 — The Slab
- Mask shard #17 — “Fastest in Pharloom” wish (Act 3)
- Mask shard #18 — “Dark Hearts” wish (Act 3)
- Mask shard #19 — Mount Fay (Act 3)
- Mask shard #20 — “The Hidden Hunter” wish (Act 3)
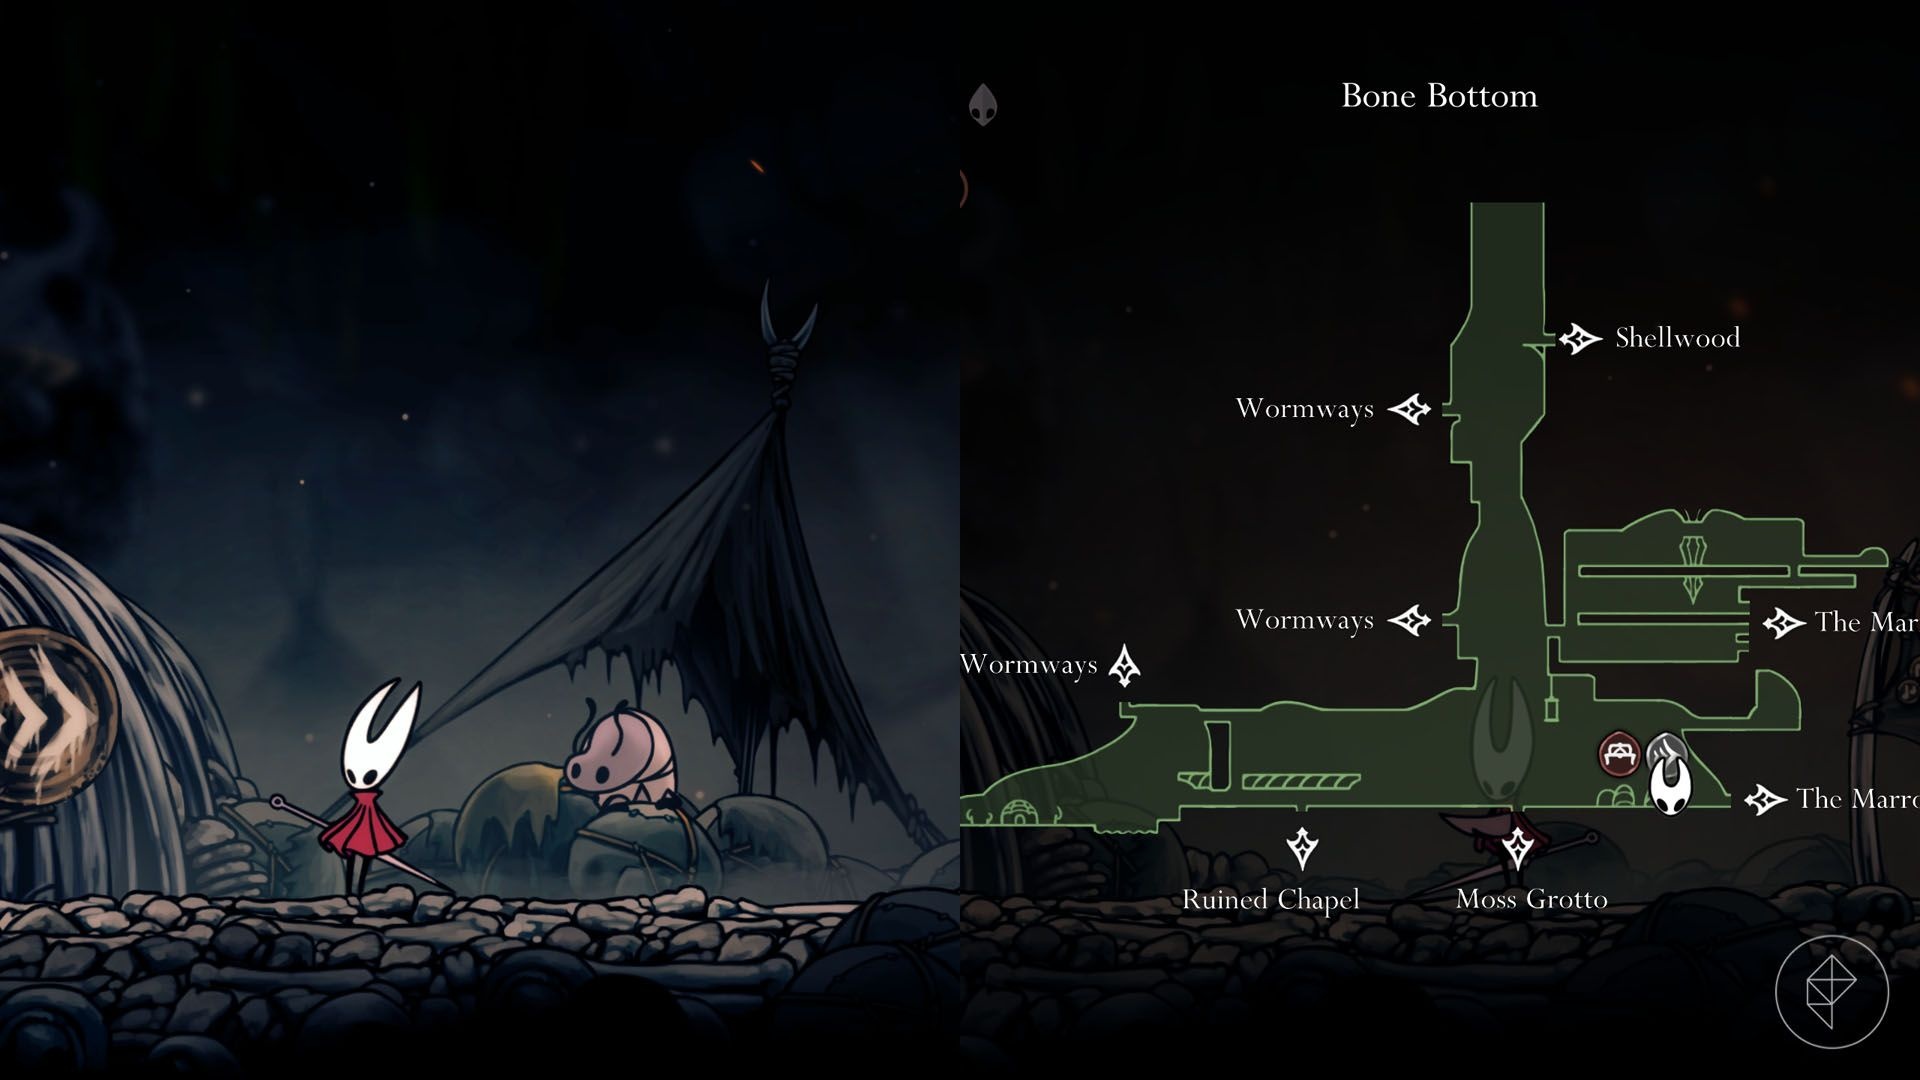
Mask shard #1 — Bone Bottom
You can buy the first mask shard from Pebb in Bone Bottom for 300 rosaries. So, if you want an early health boost, prioritize rosary farming or visit Pebb as soon as you reach Bone Bottom.
Mask shard #2 — Wormways
This shard requires the Swift Step ability (unlocked in the Deep Docks). Head to the left end of Mosshome, dash across to the hanging cages, sprint past the acid-spitter, enter the locked-door area, drop through the hole and break the destructible wall on the right to find the shard.

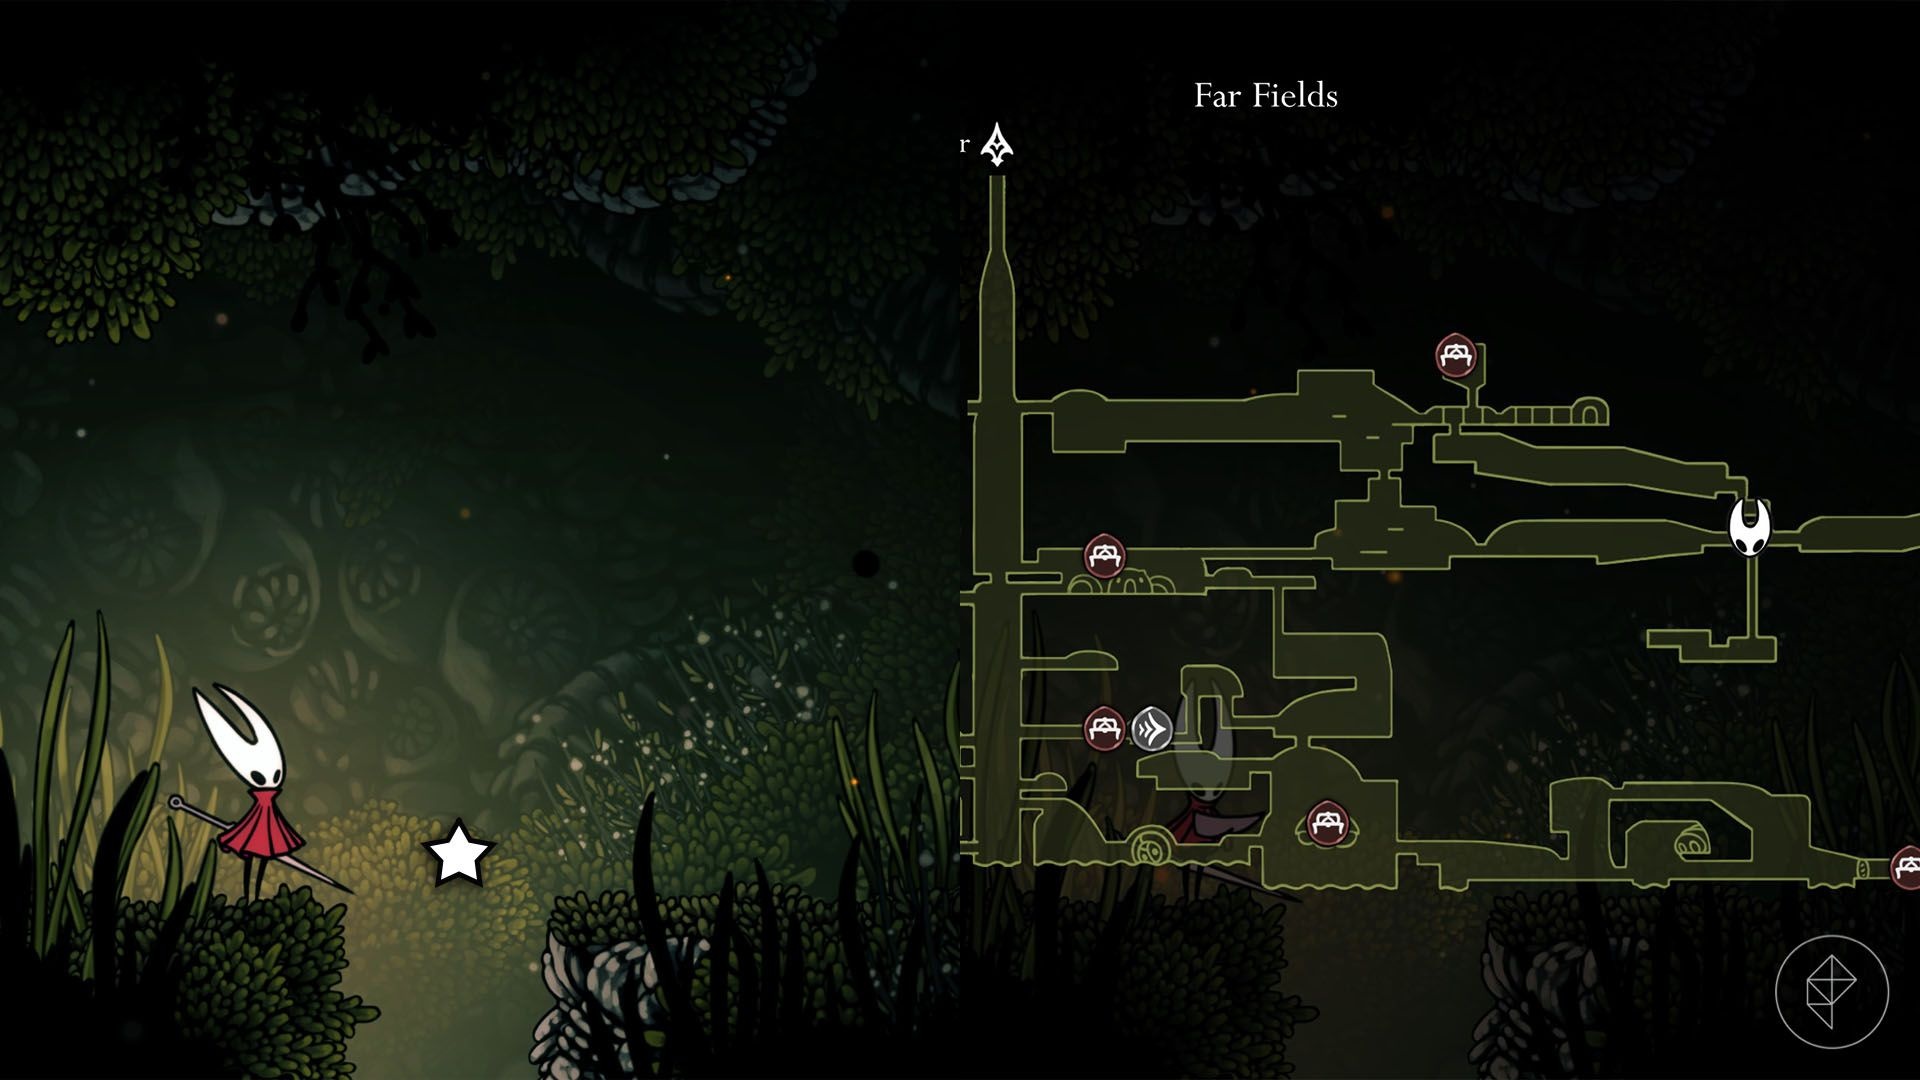
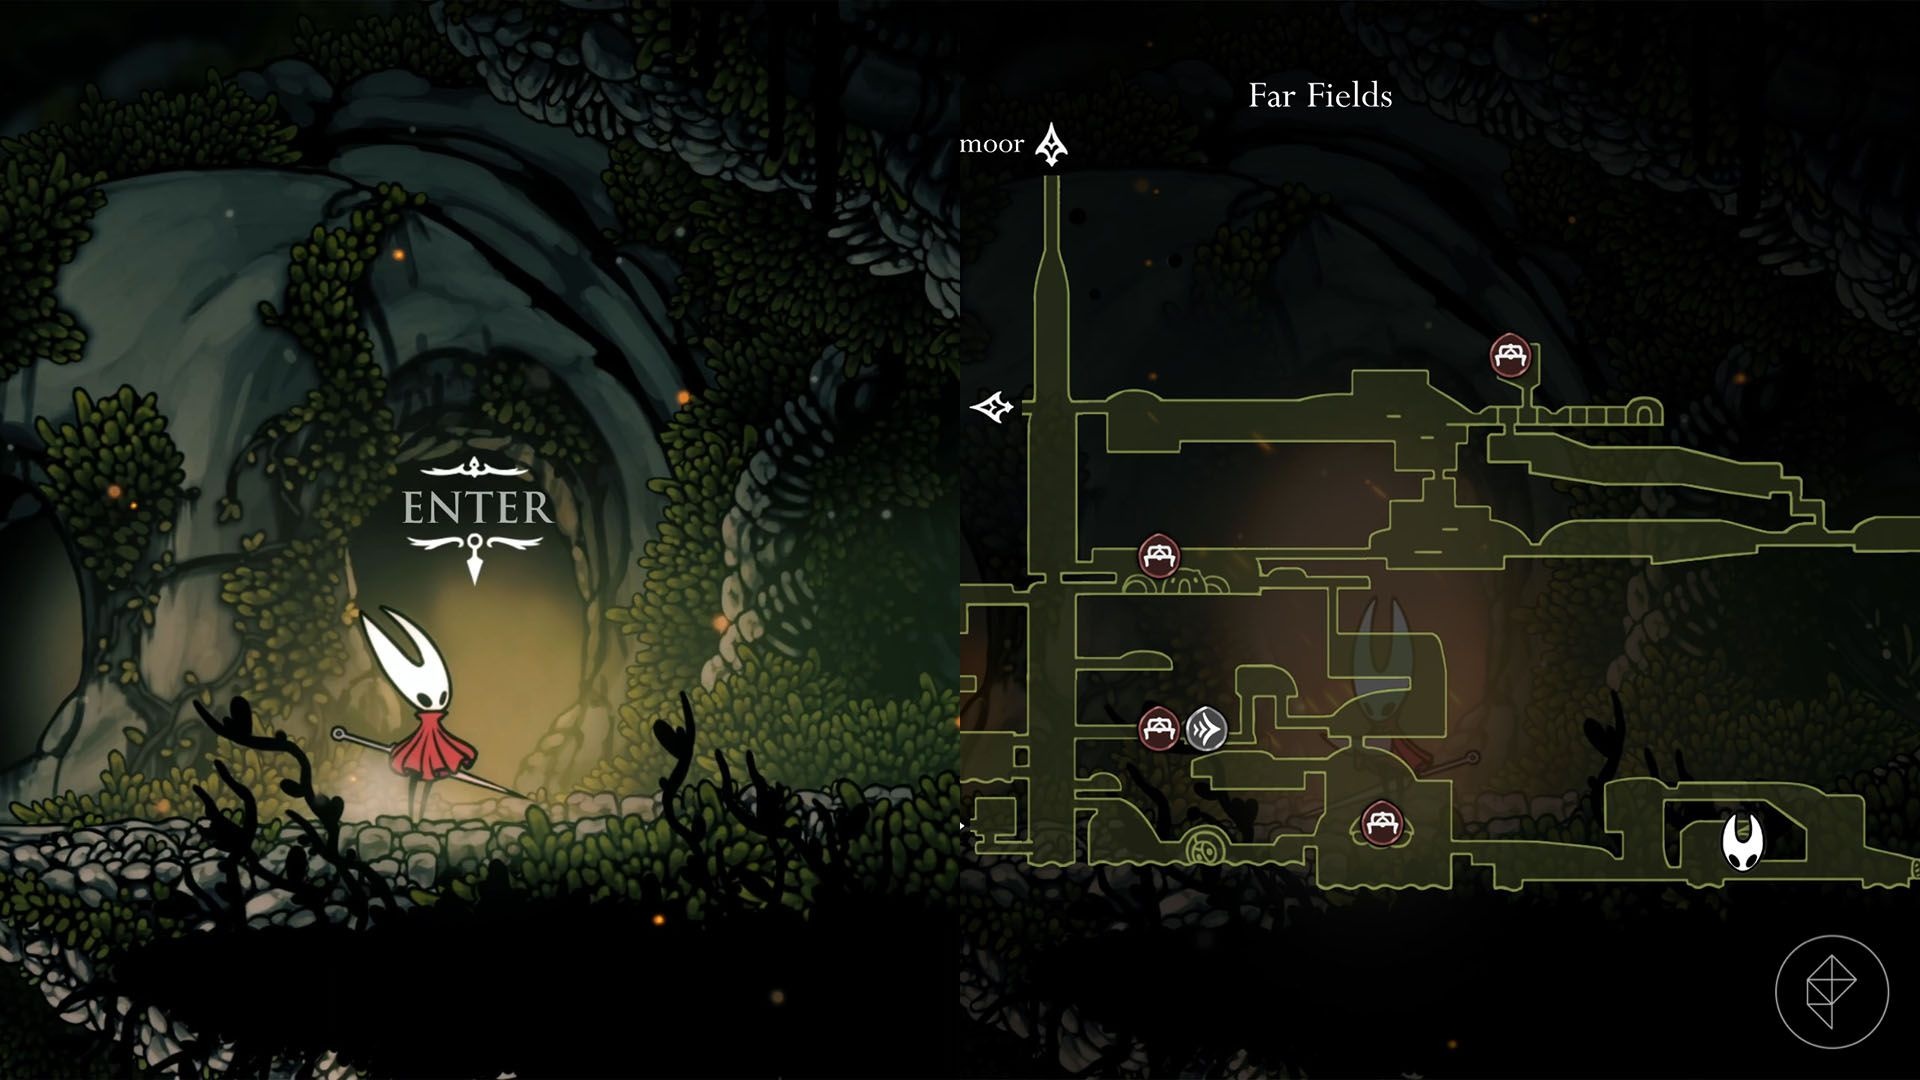
Mask shard #3 — Far Fields
After completing the “Flexile Spines” quest to get the Drifter’s Cloak, go to the right of the Seamstress’ house in Far Fields. Use air currents and hit explosive rocks to open paths, then glide across to a room where hitting all explosive rocks reveals the shard hidden in the ground.
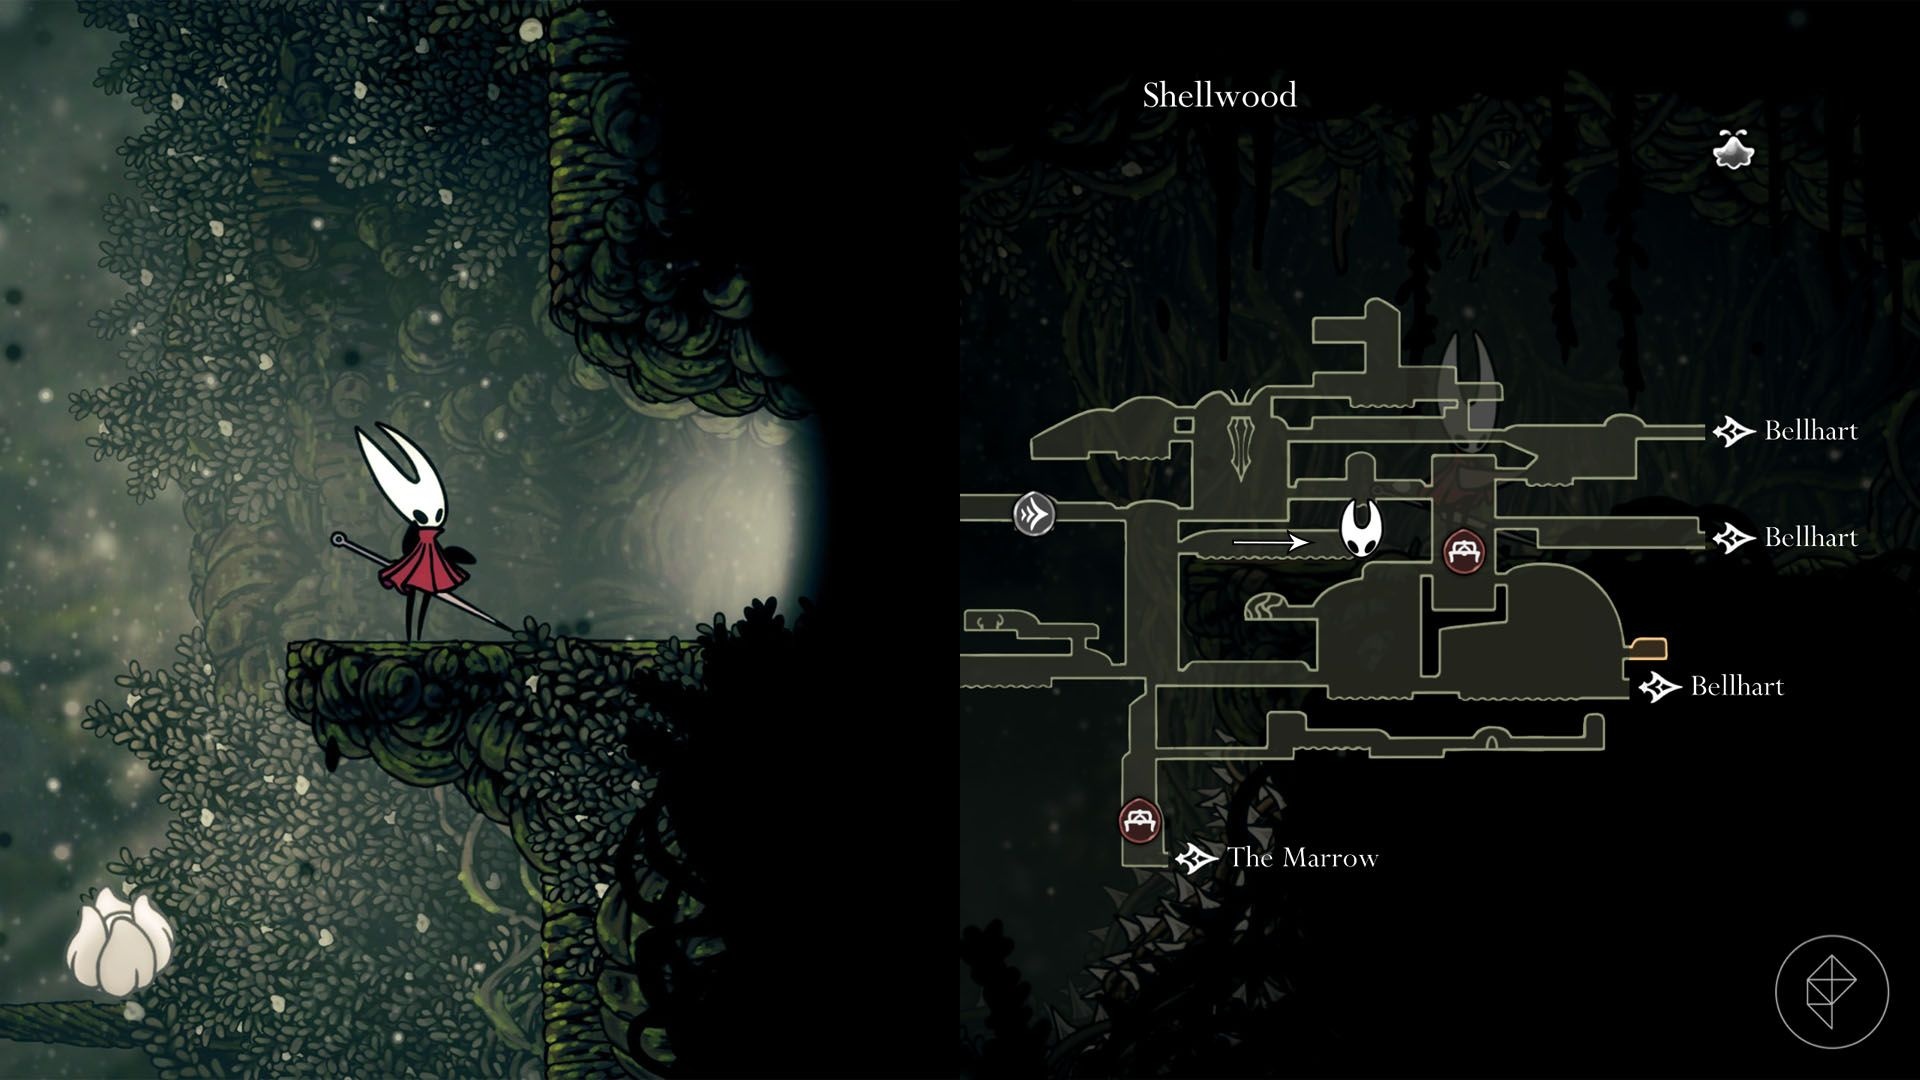
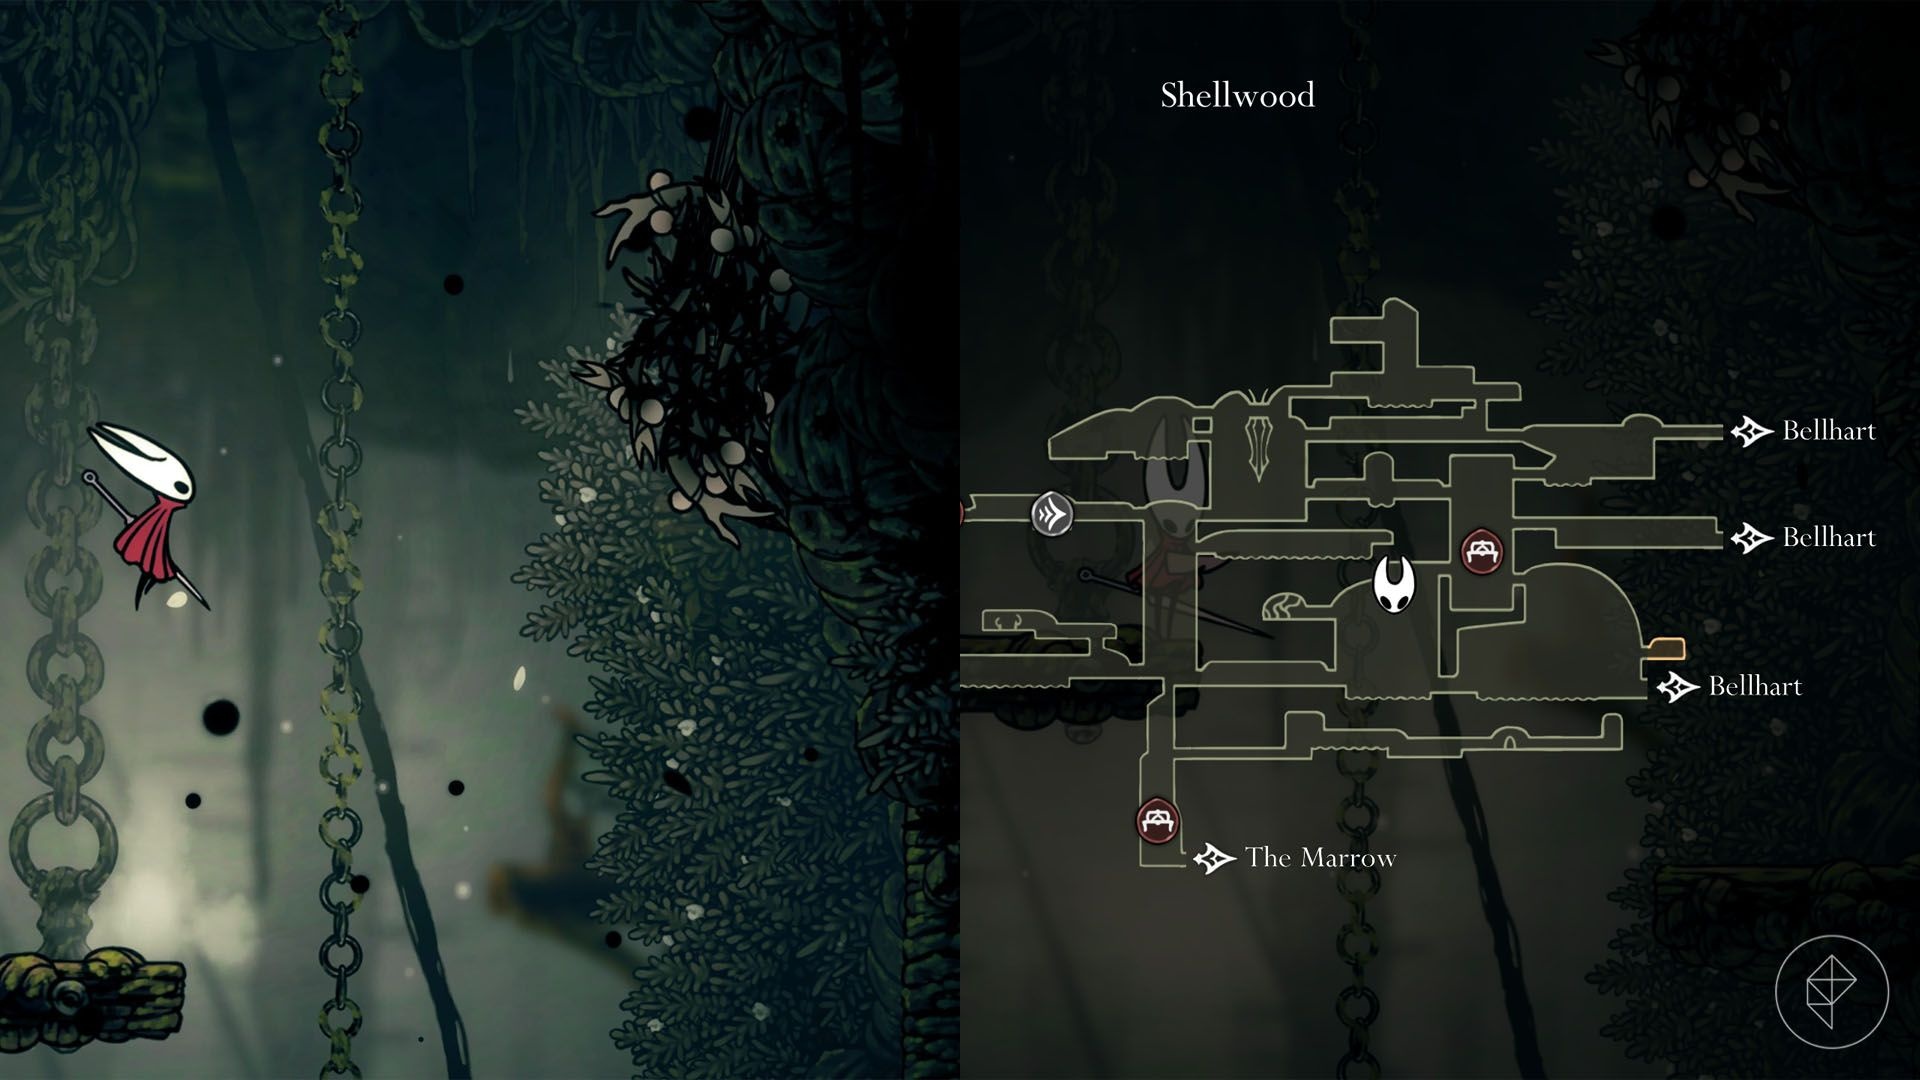
Mask shard #4 — Shellwood
From the Shellwood Bellway station, go right into the next room. Glide to the right path, take the exit at the top, then pogo over enemies and plants to reach a shard at the end of the path.
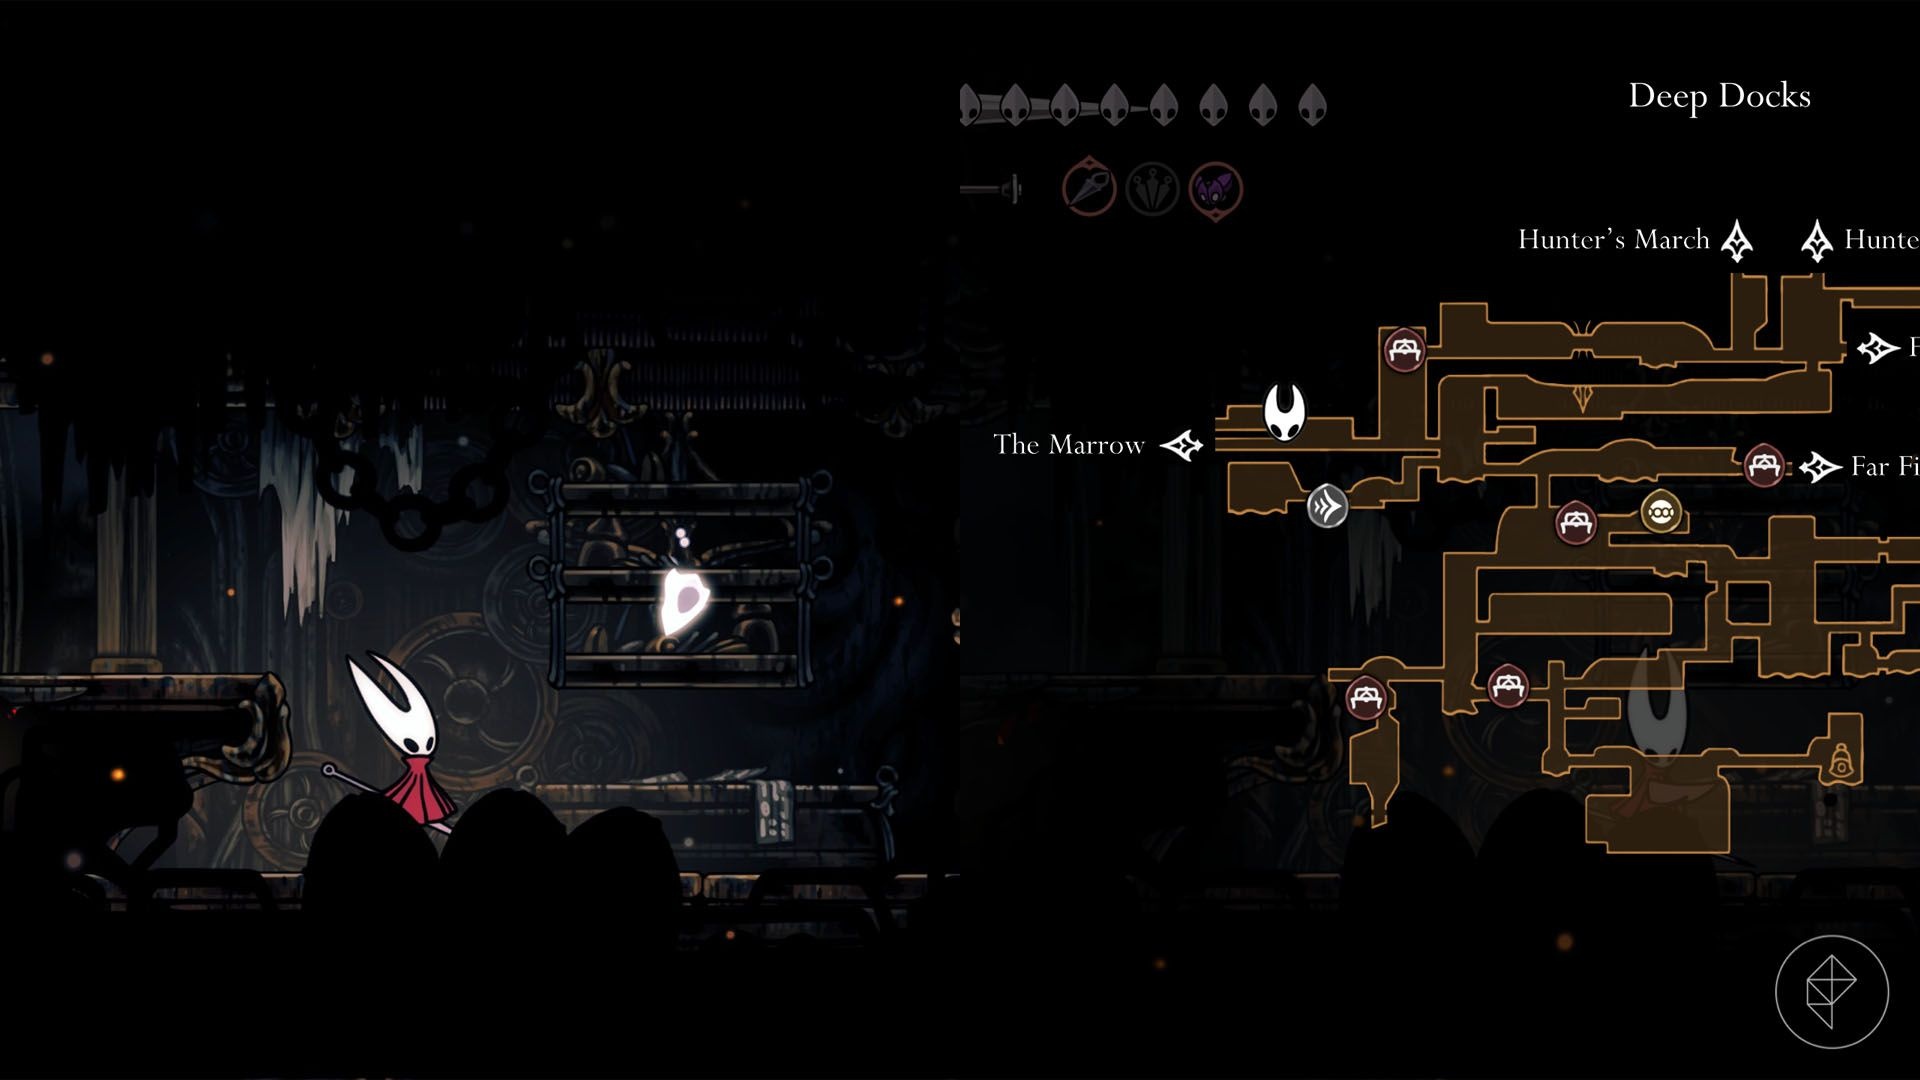
Mask shard #5 — Deep Docks
This shard is visible when you first ride the elevator toward the Deep Docks bench, but you need Cling Grip to reach it. Start in The Marrow, take the upper path on the left side of the bottom-right room, climb a vertical wall, enter the Deep Docks, clear the enemy gauntlet to the right, and collect the shard.
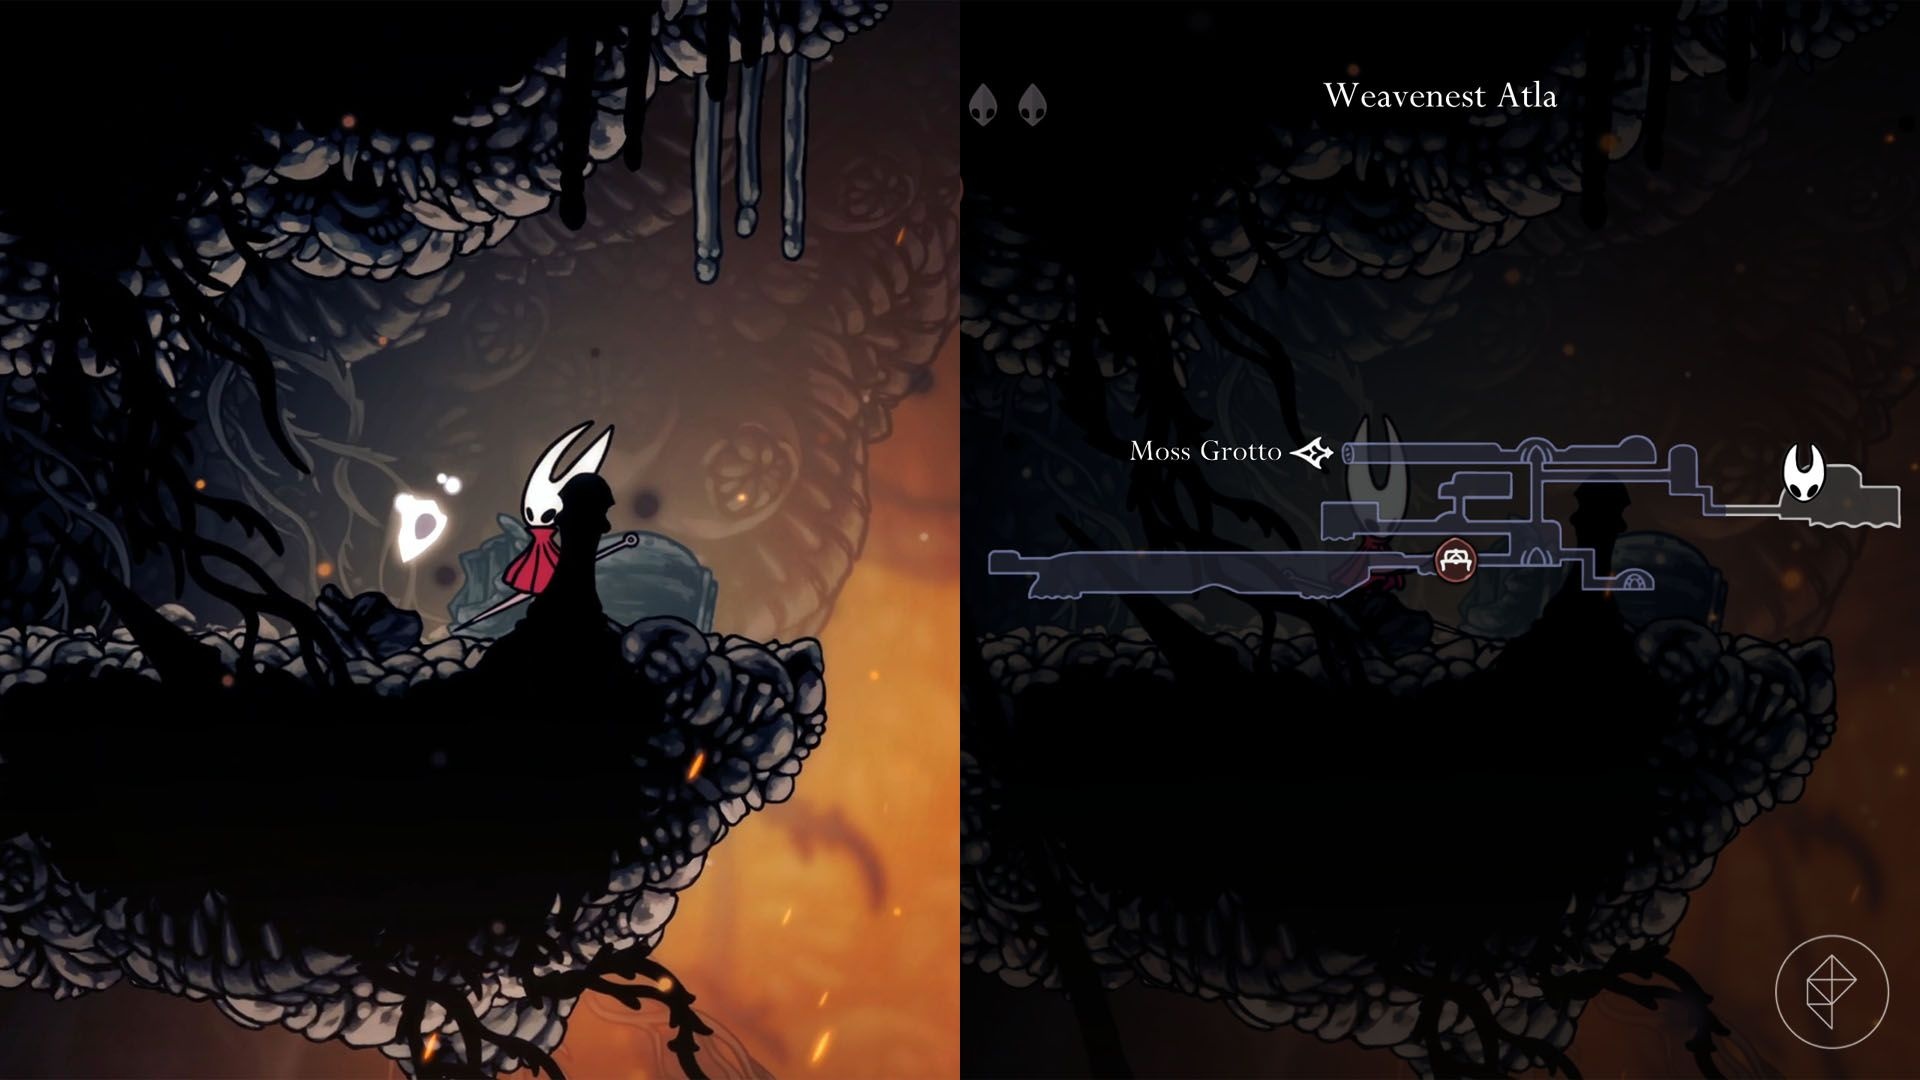
Mask shard #6 — Weavenest Alta
After unlocking the Needolin, return to the bottom-right of Moss Grotto, play the Needolin to open a weaver door, then power up Weavenest Alta by hitting two silk spools. Use Cling Grip and climb the shaft to enter a secret area; complete a lava-and-pogo challenge to reach the shard in the top-left corner.
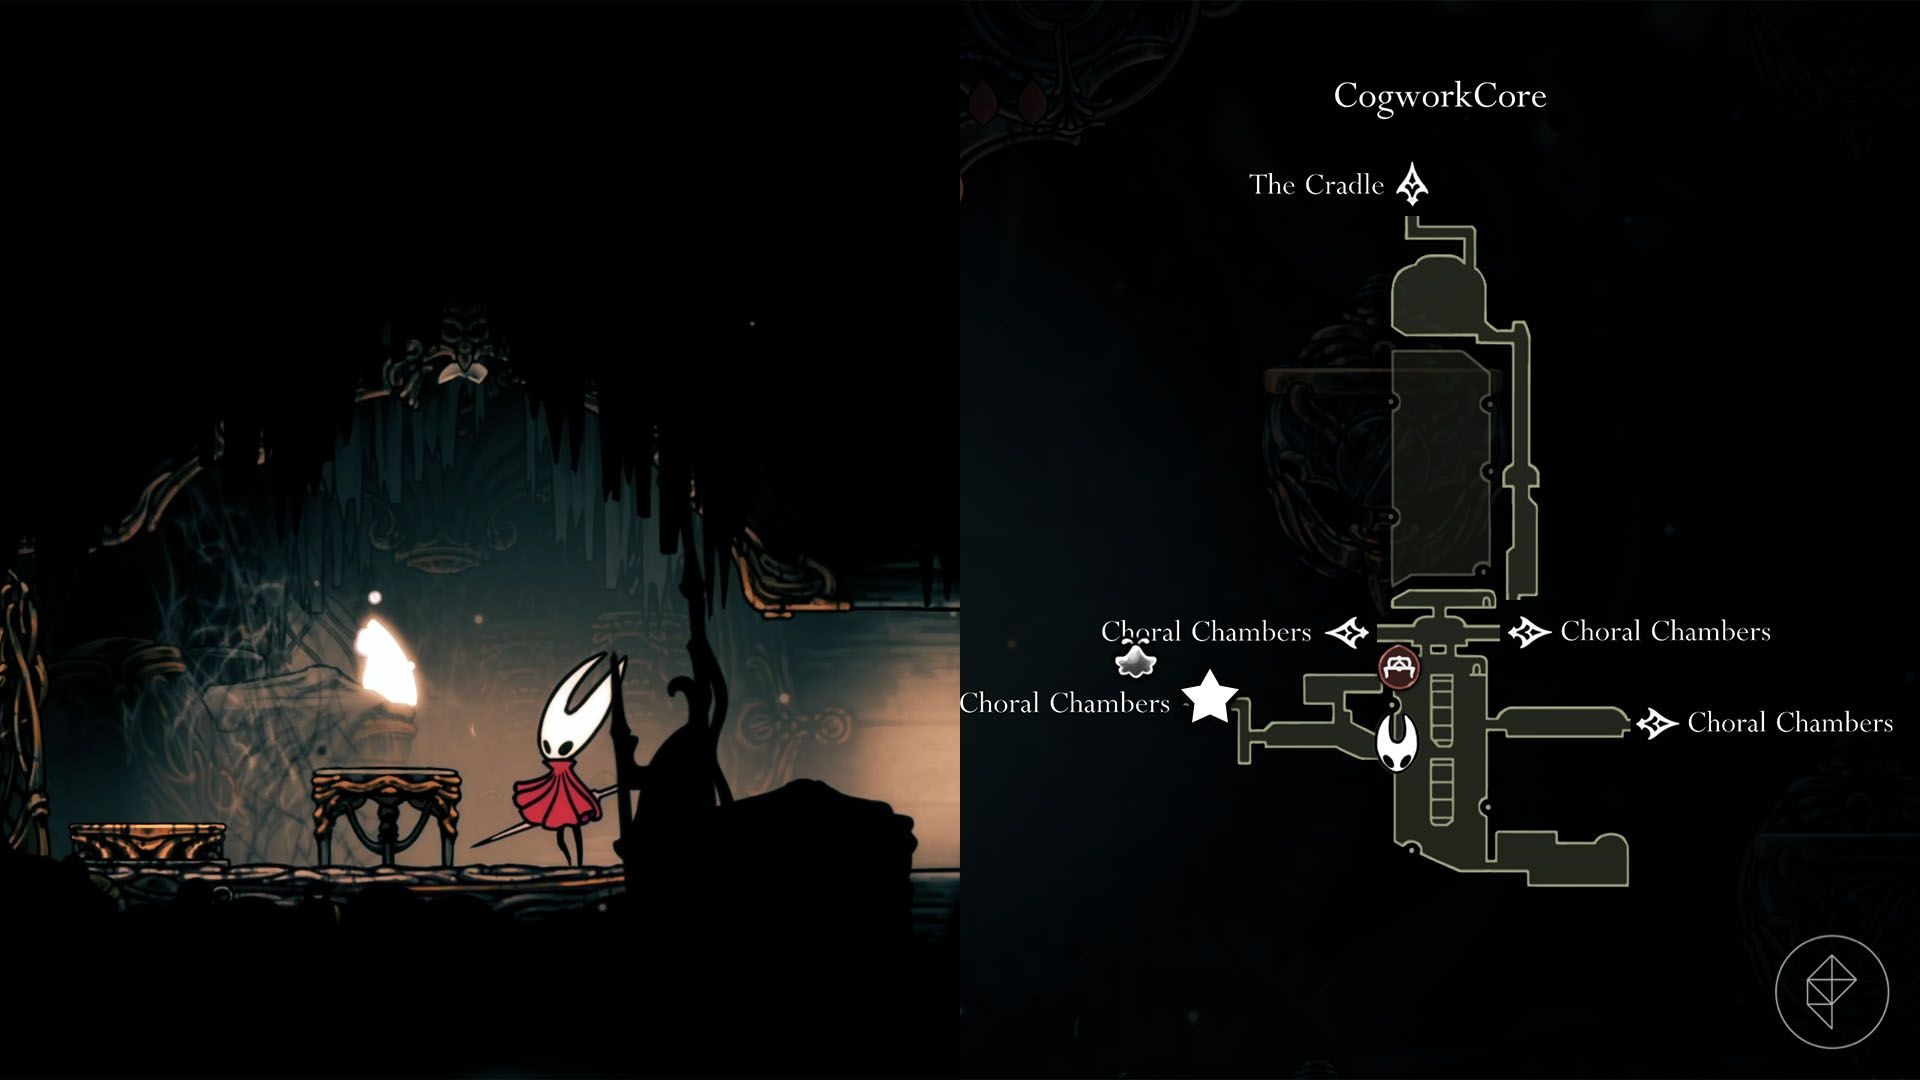
Mask shard #7 — Cogwork Core
Defeat the Cogwork Dancers in Act 2, drop into the holes below, descend through spinning cogs and gears, look for a left exit, clear the robot gauntlet, hit the left switch and follow the path up to a shard.
Mask shard #8 — First Shrine in Songclave
You can buy this shard from Jubliana at the First Shrine in Songclave for 750 rosaries. However, Jubliana only appears there after you complete the “The Wandering Merchant” wish on the nearby wishboard.
Mask shard #9 — Savage Beastfly Grand Hunt
To earn this shard you must:
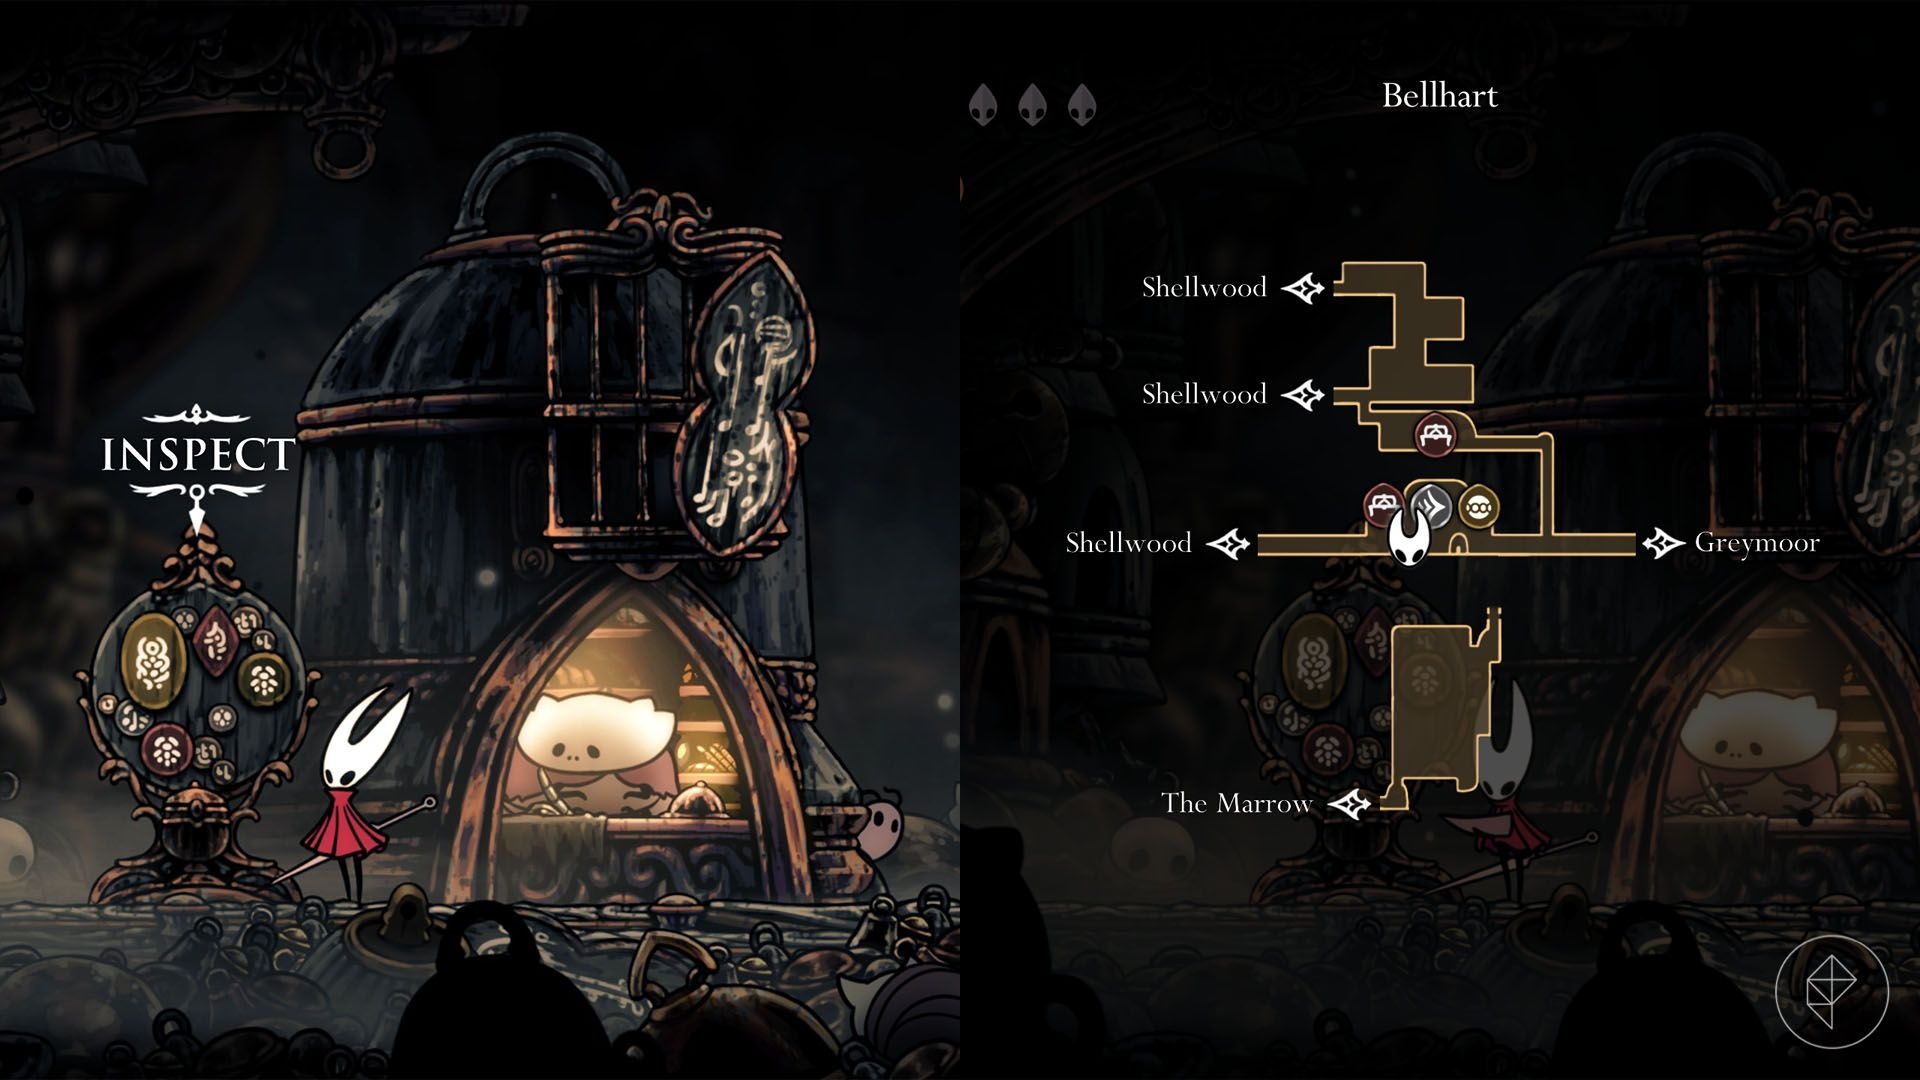
- Complete “The Threadspun Town” quest in Bellhart
- Defeat the Savage Beastfly in the Chapel of the Beast (Hunter’s March)
- Defeat the Cogwork Dancers in Cogwork Core
Then the Savage Beastfly Grand Hunt appears on the Bellhart wishboard; win that hunt to receive the shard. The Savage Beastfly fight takes place in the same area where you face Fourth Chorus in Far Fields.
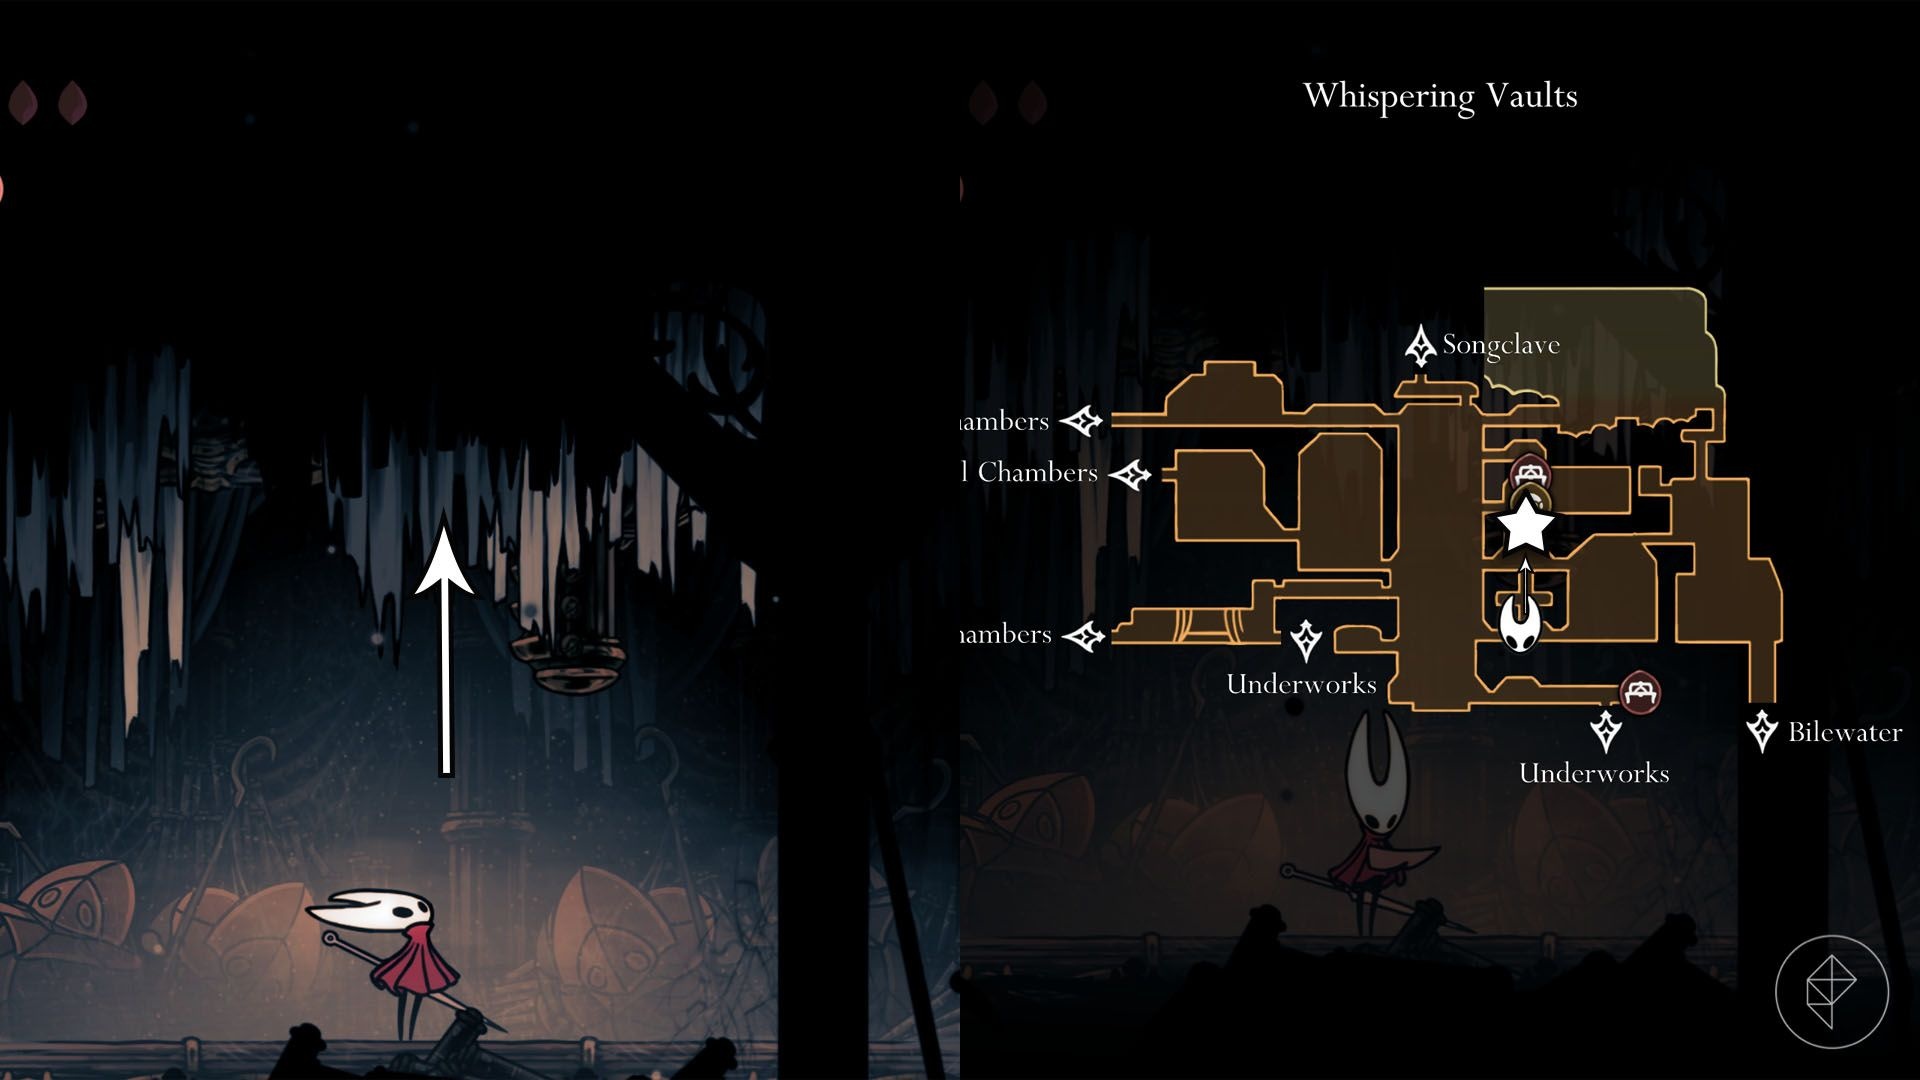
Mask shard #10 — Whispering Vaults
Go to the hallway one layer above the very bottom (after passing through the Underworks). Hit the suspicious object hanging from the ceiling to drop and reveal a climbable hole. Climb up, push the wooden block by hitting the ceiling, and reach the very top to collect the shard.
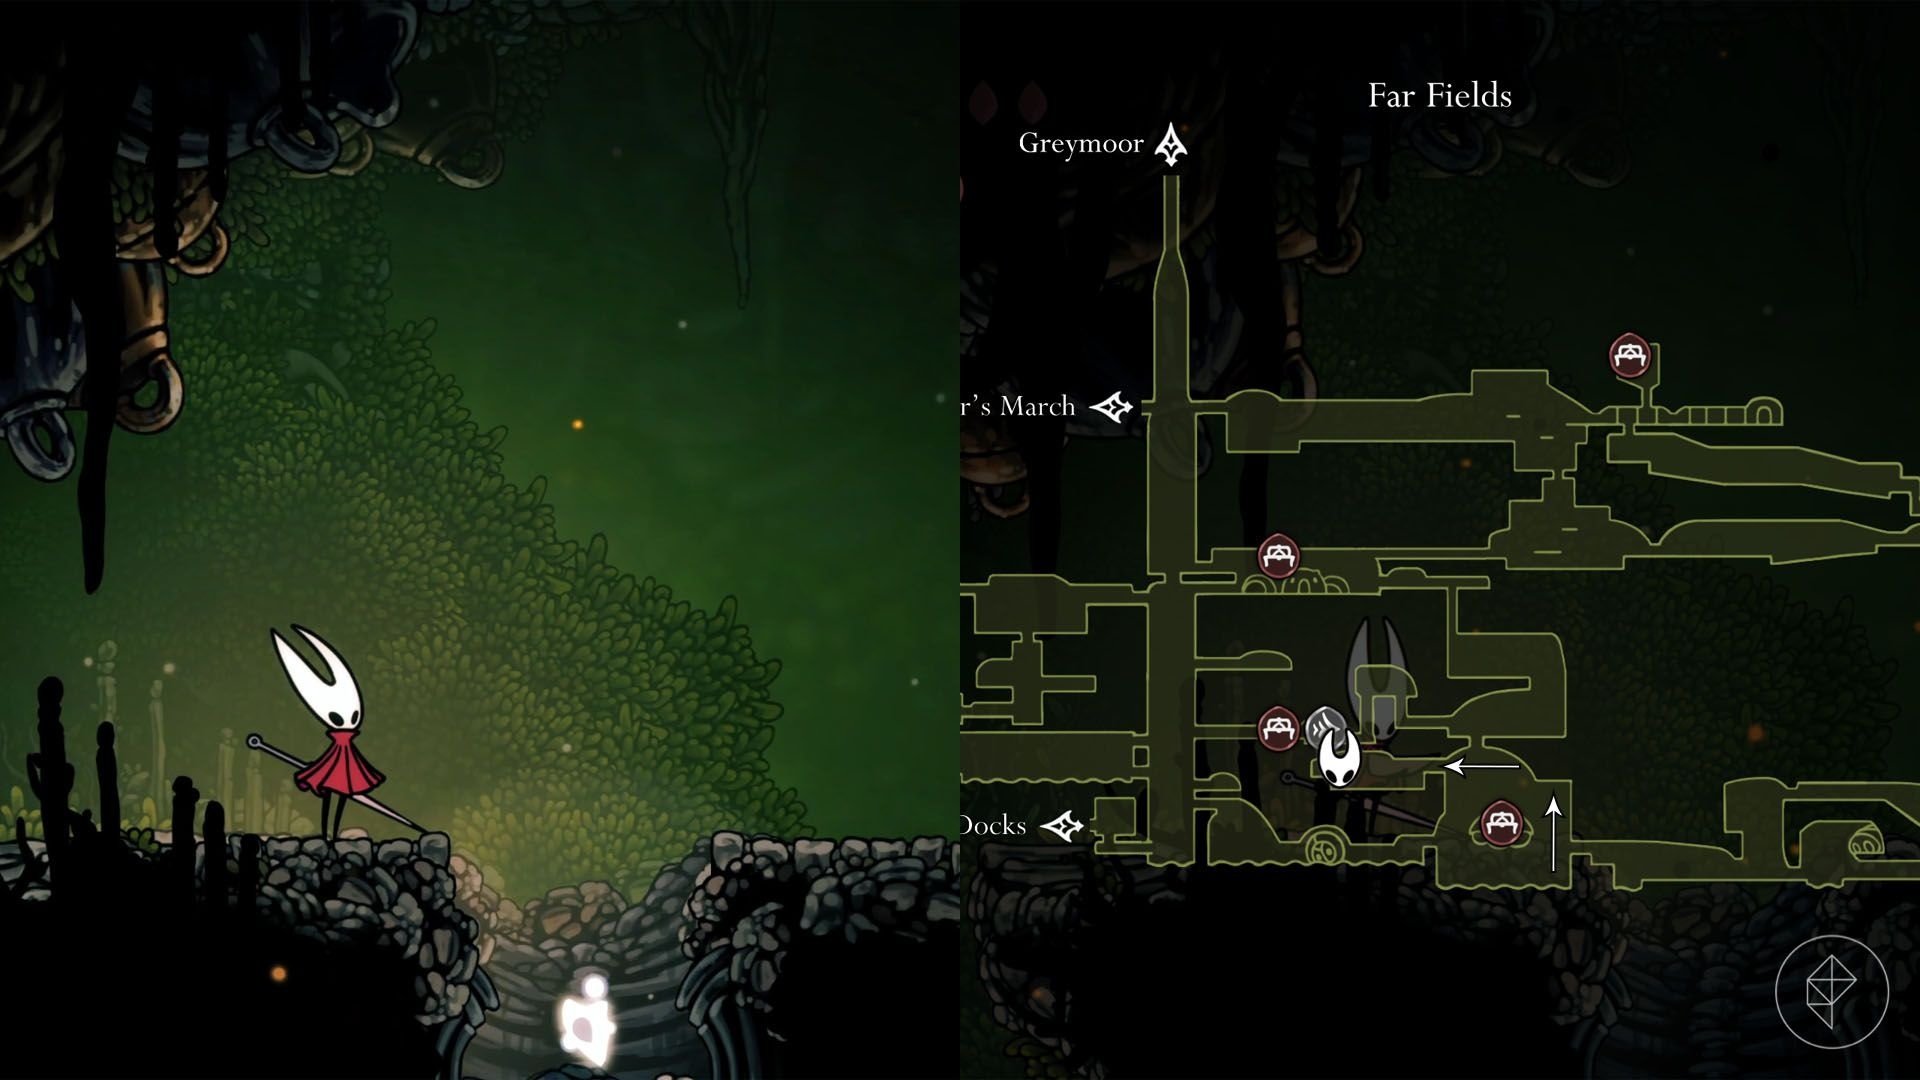
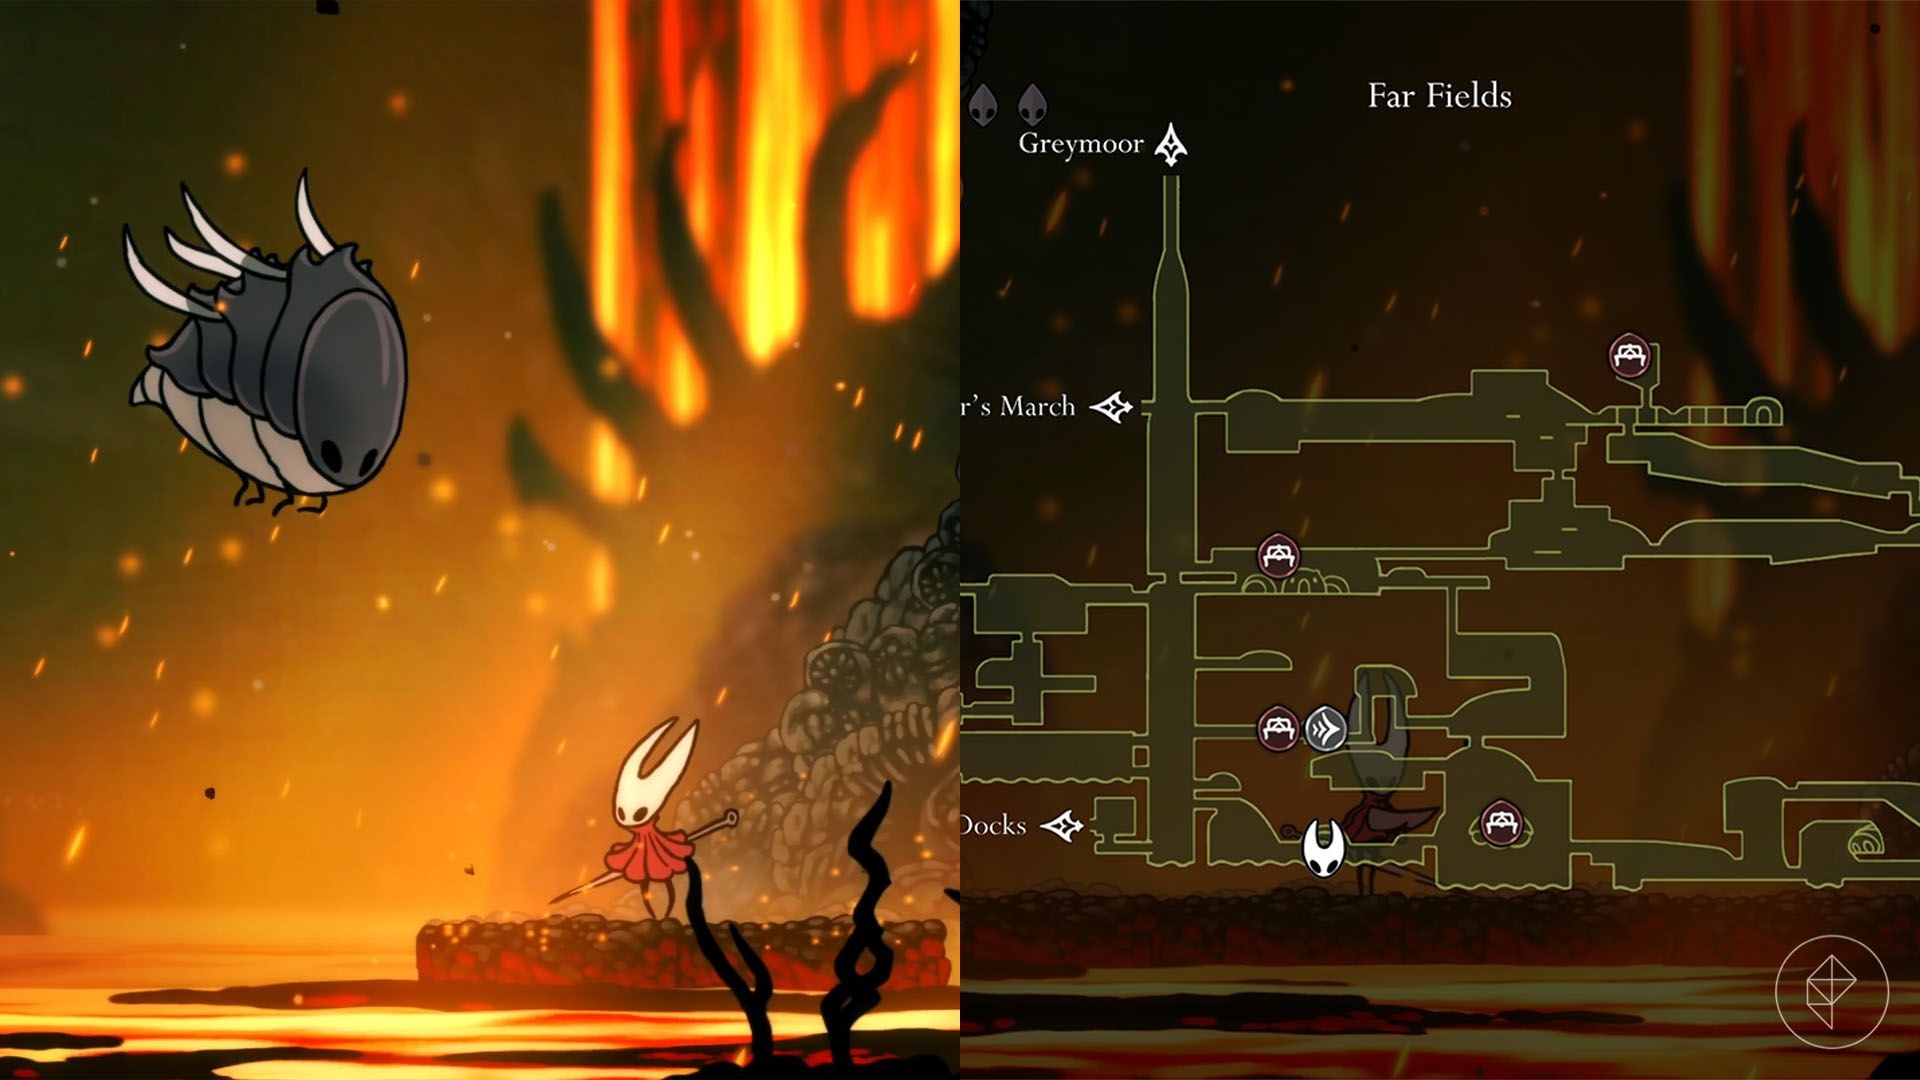
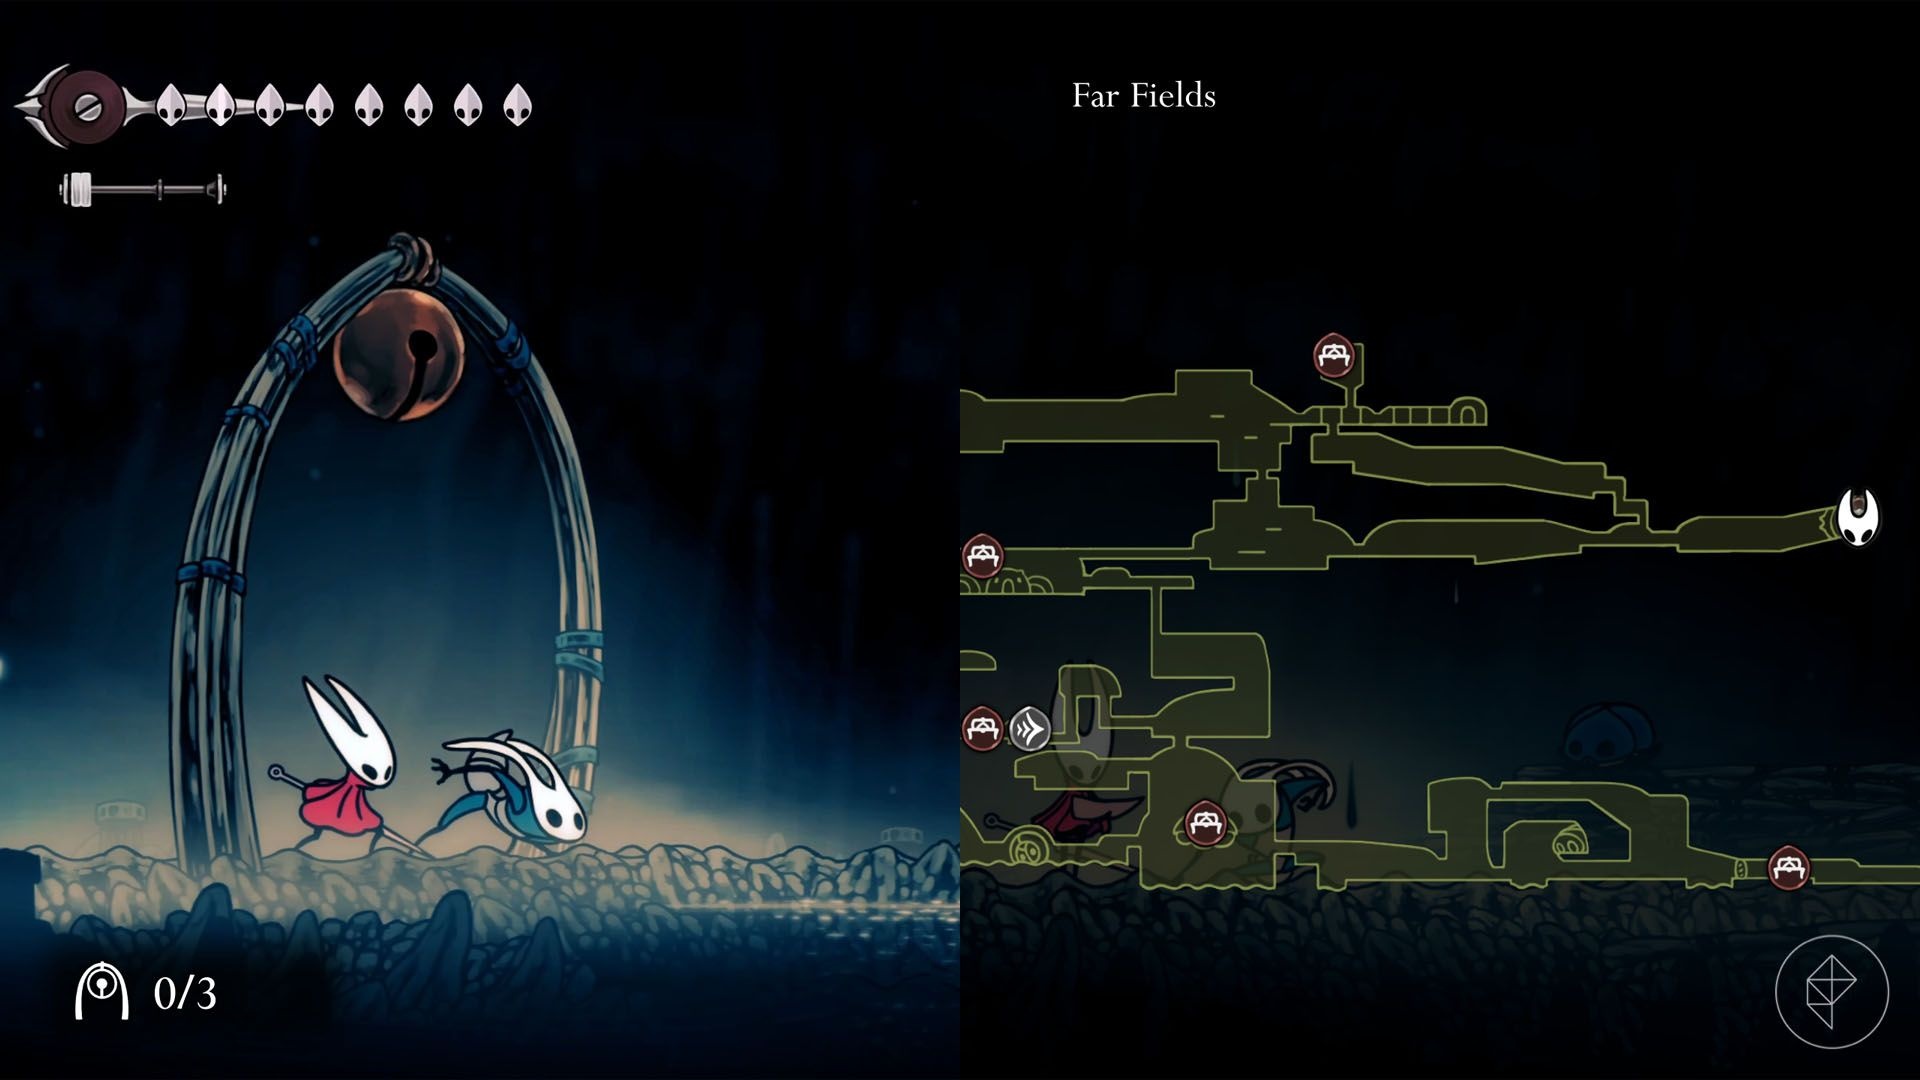
Mask shard #11 — Far Fields (jumping gauntlet)
In bottom-right Far Fields there’s an apparently unreachable house with hanging rings. Use Clawline to grapple the rings into the house. The doorway closes behind you; glide down and avoid spikes until you reach an explosive rock that removes the floor, revealing lava and two destructible platforms. Clear a difficult enemy gauntlet using the two platforms and walls, then outrun rising lava to reach the top and collect the shard. Expect repeated attempts — failure sends you back to the start of the sequence.
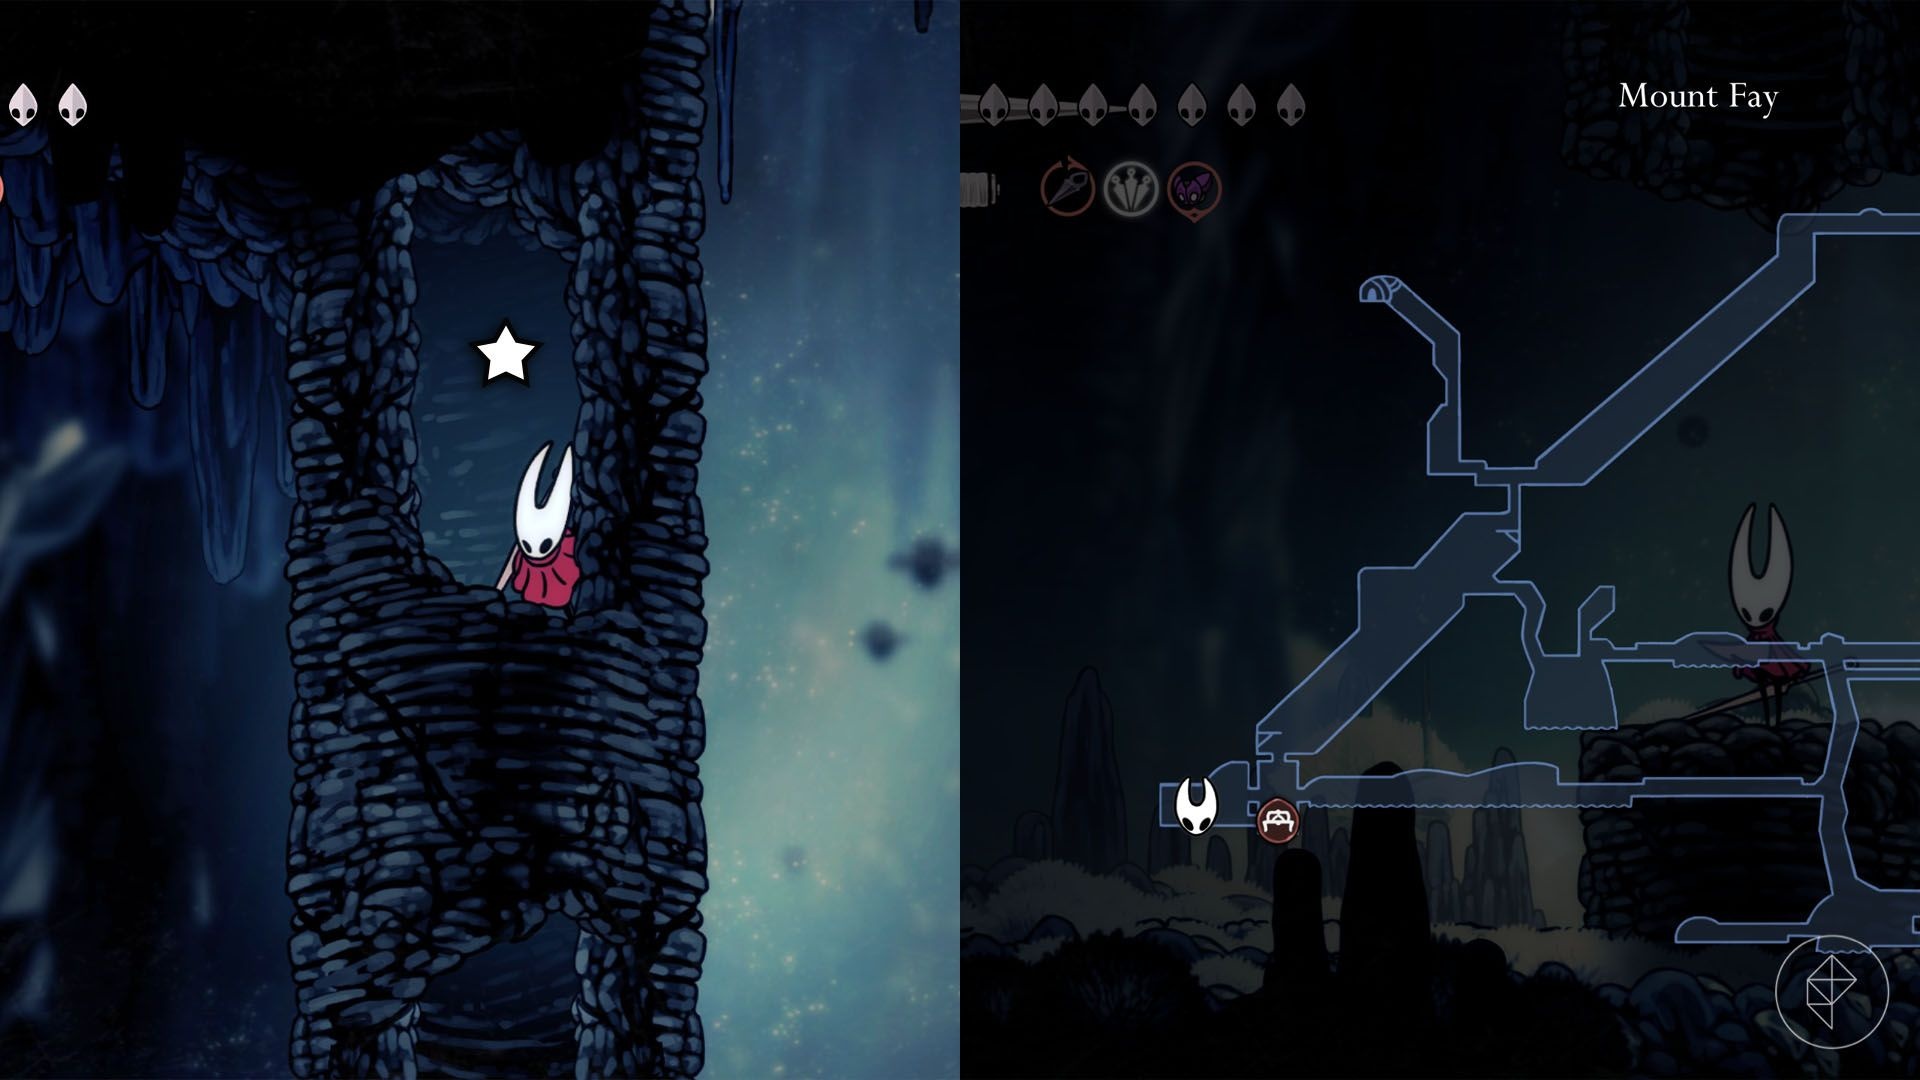
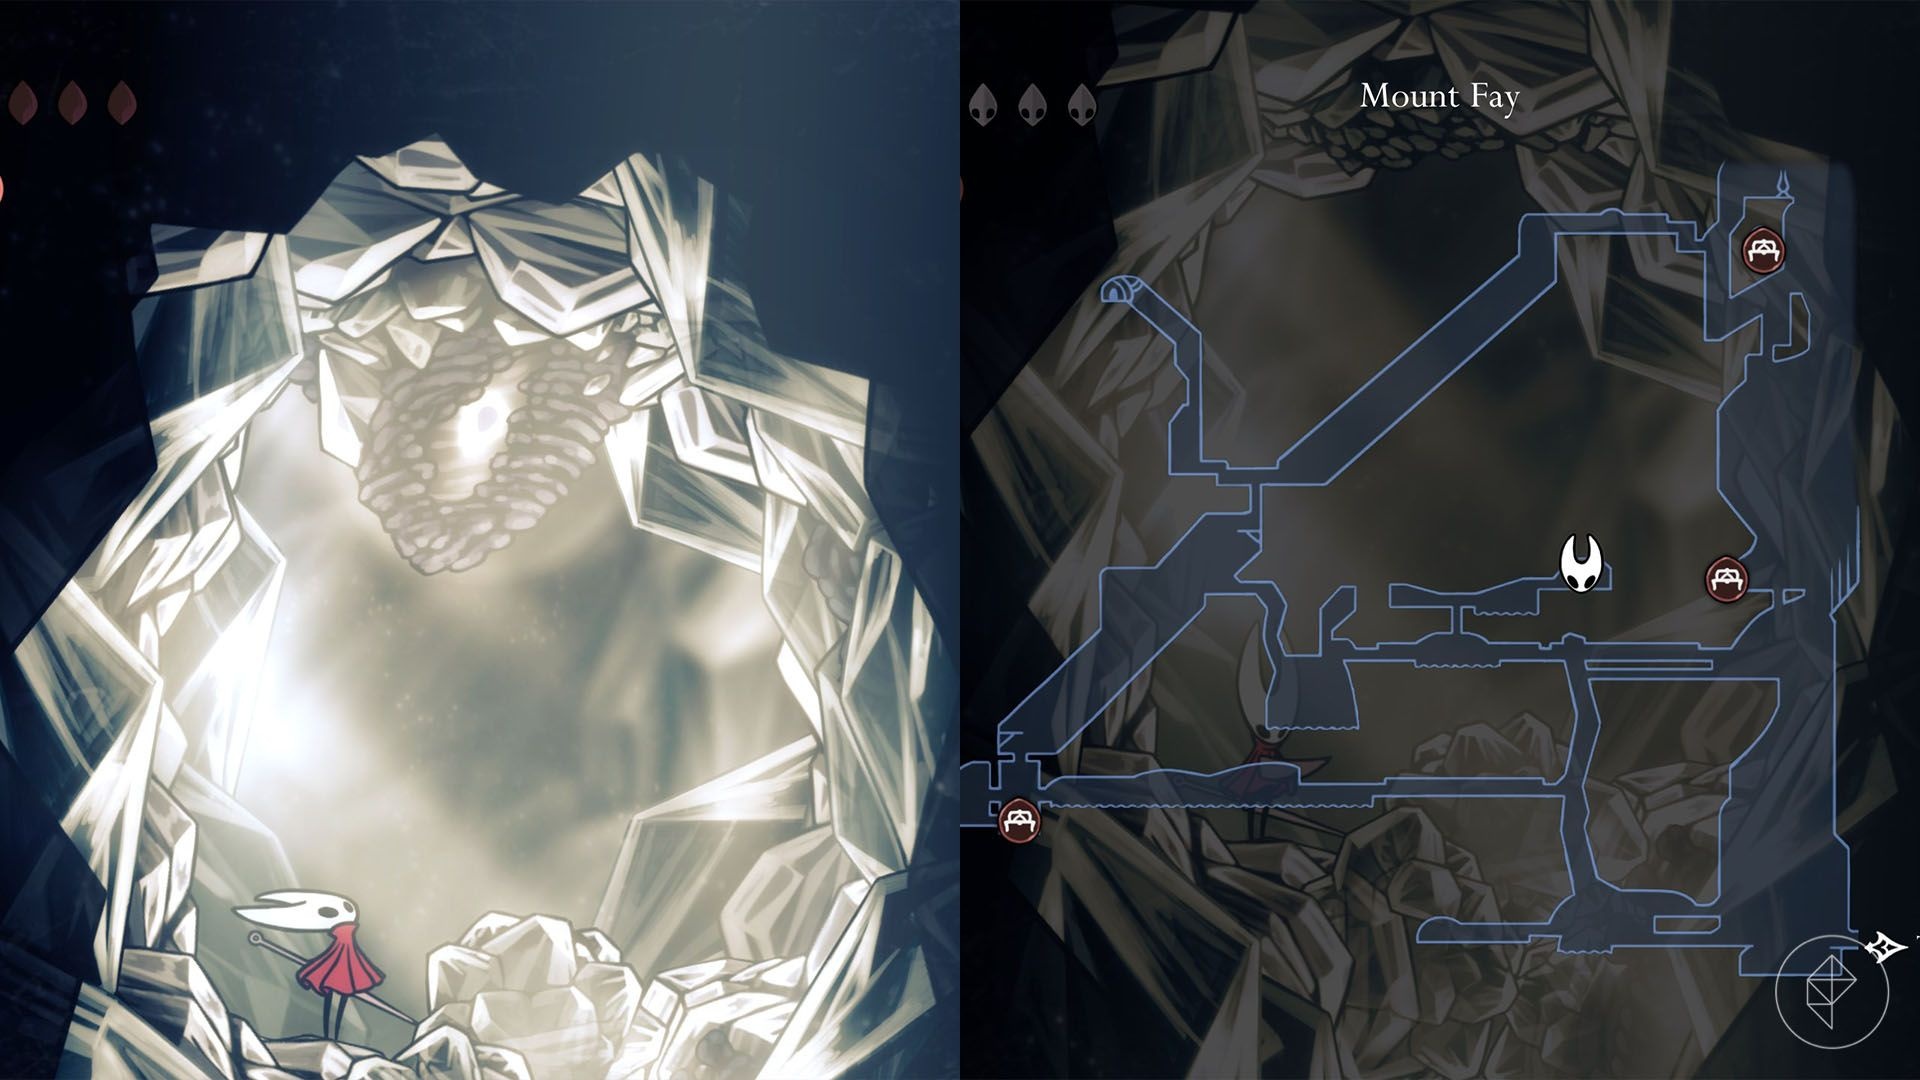
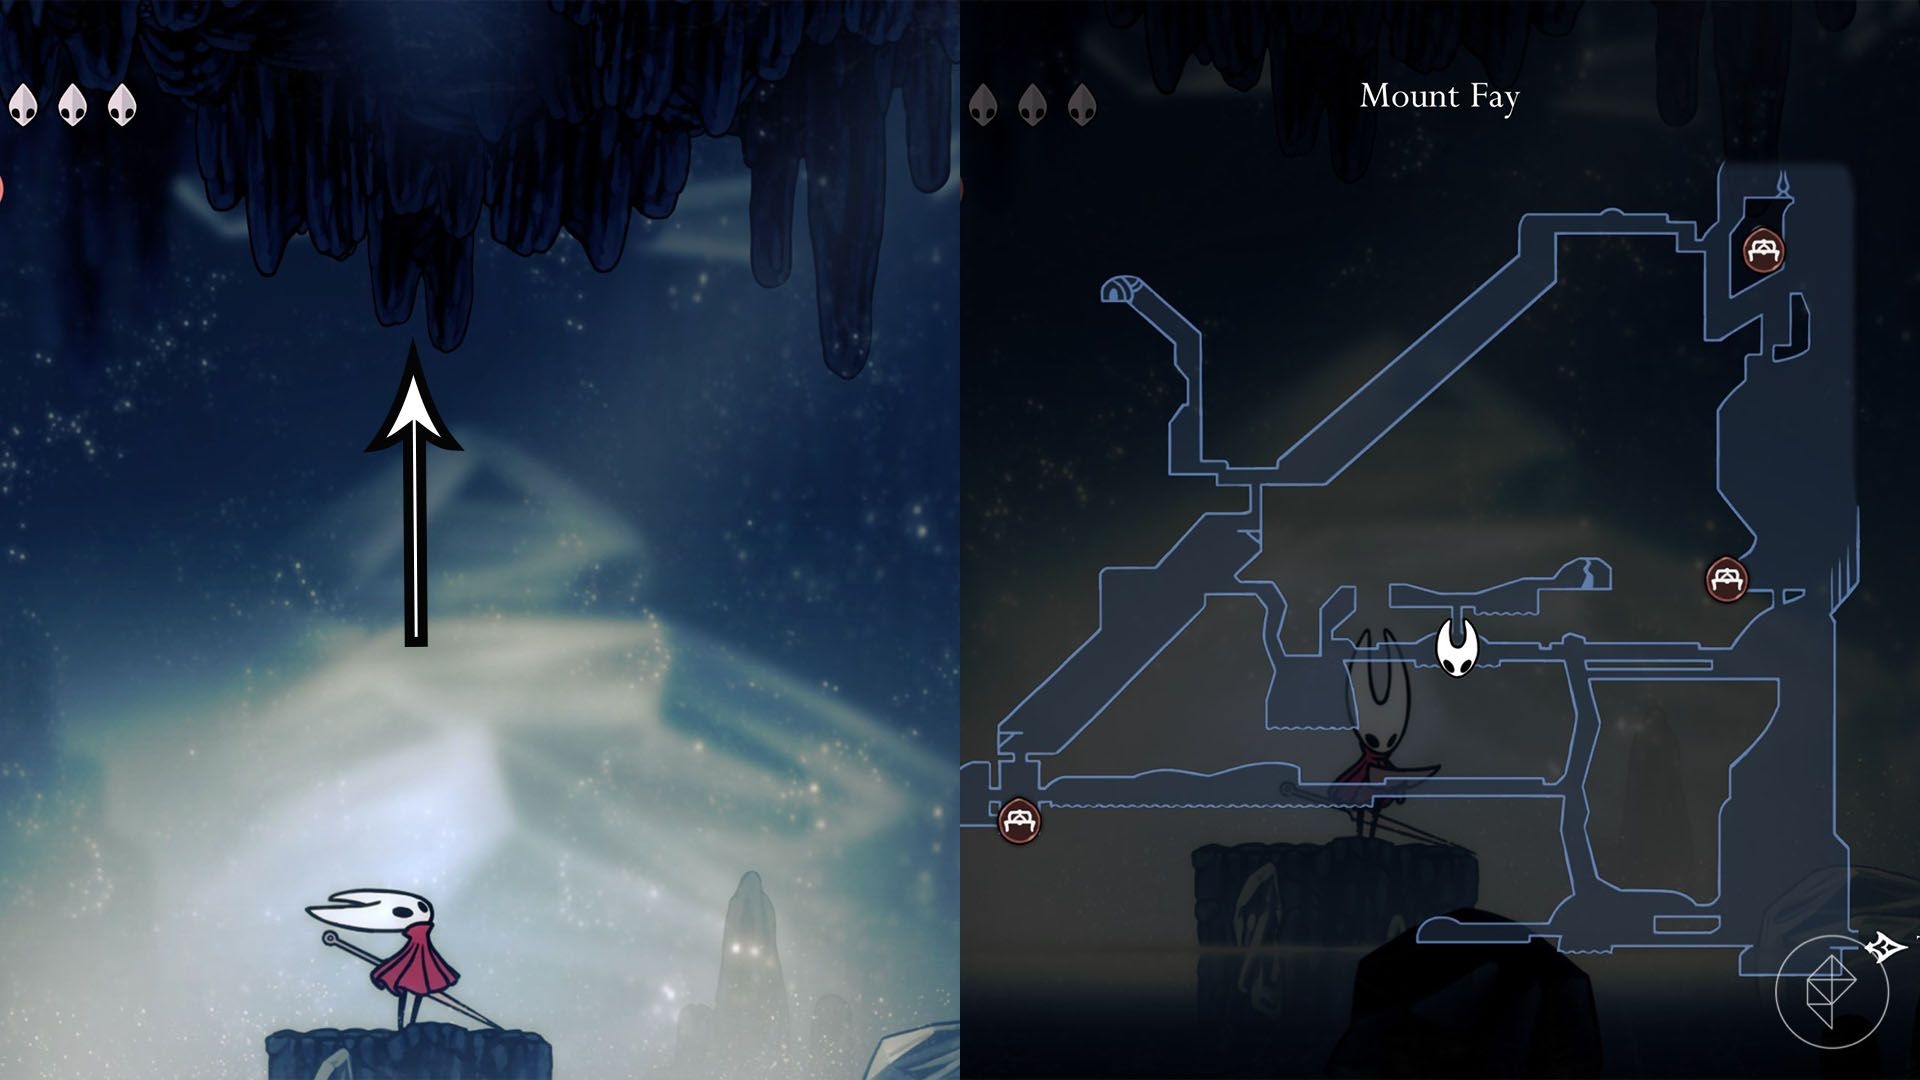
Mask shard #12 — Mount Fay
After you unlock the Faydown Cloak at Mount Fay’s summit, slide down the snowy slope, hop over spikes, and enter a hollow pillar in the bottom-left corner; double-jump into the pillar to find the shard inside.
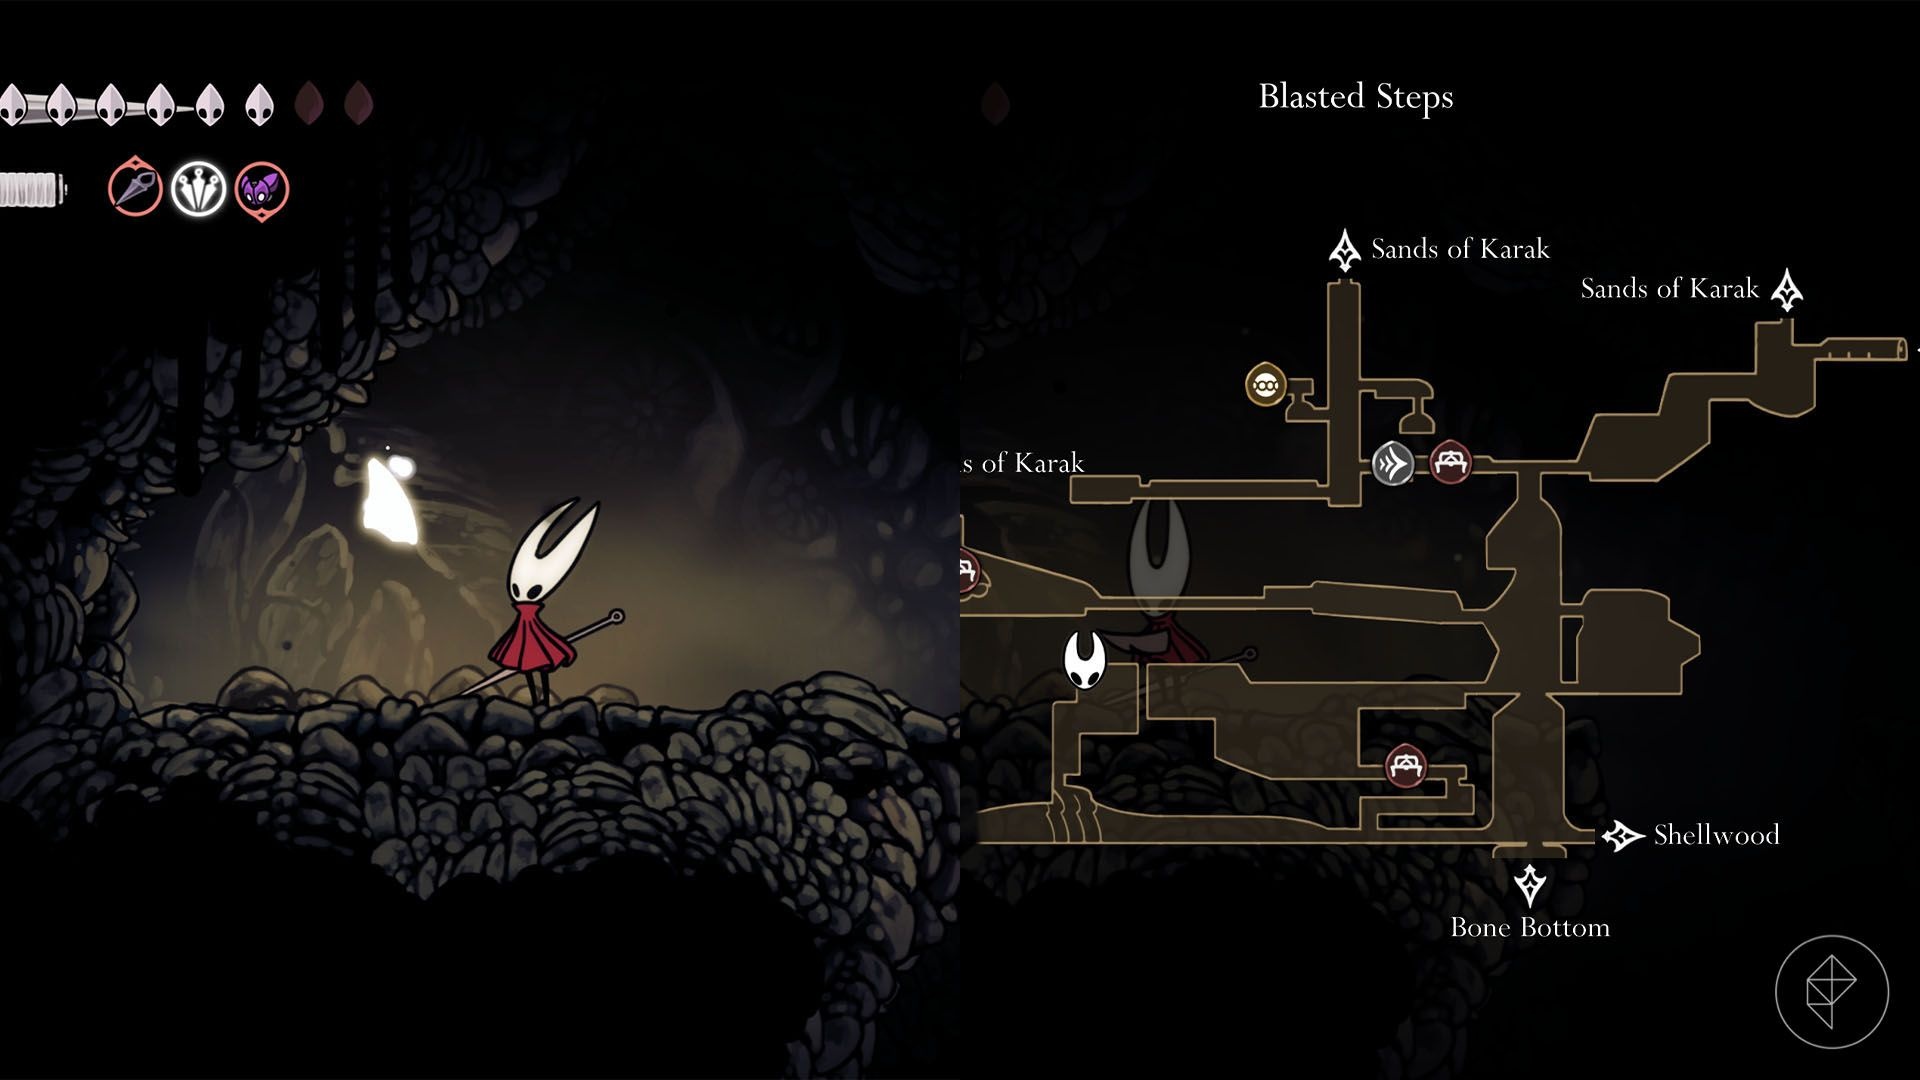
Mask shard #13 — Blasted Steps
This one needs Clawline and Faydown Cloak. From the bottom-left of Blasted Steps, stand on the final ground stone platform, then sprint-jump left, use Clawline midair and double-jump with Faydown Cloak to reach higher platforms. Repeat similar moves upward, traverse a room with wall-climbing bugs, falling rocks and spikes, and collect the shard in the top-left corner.
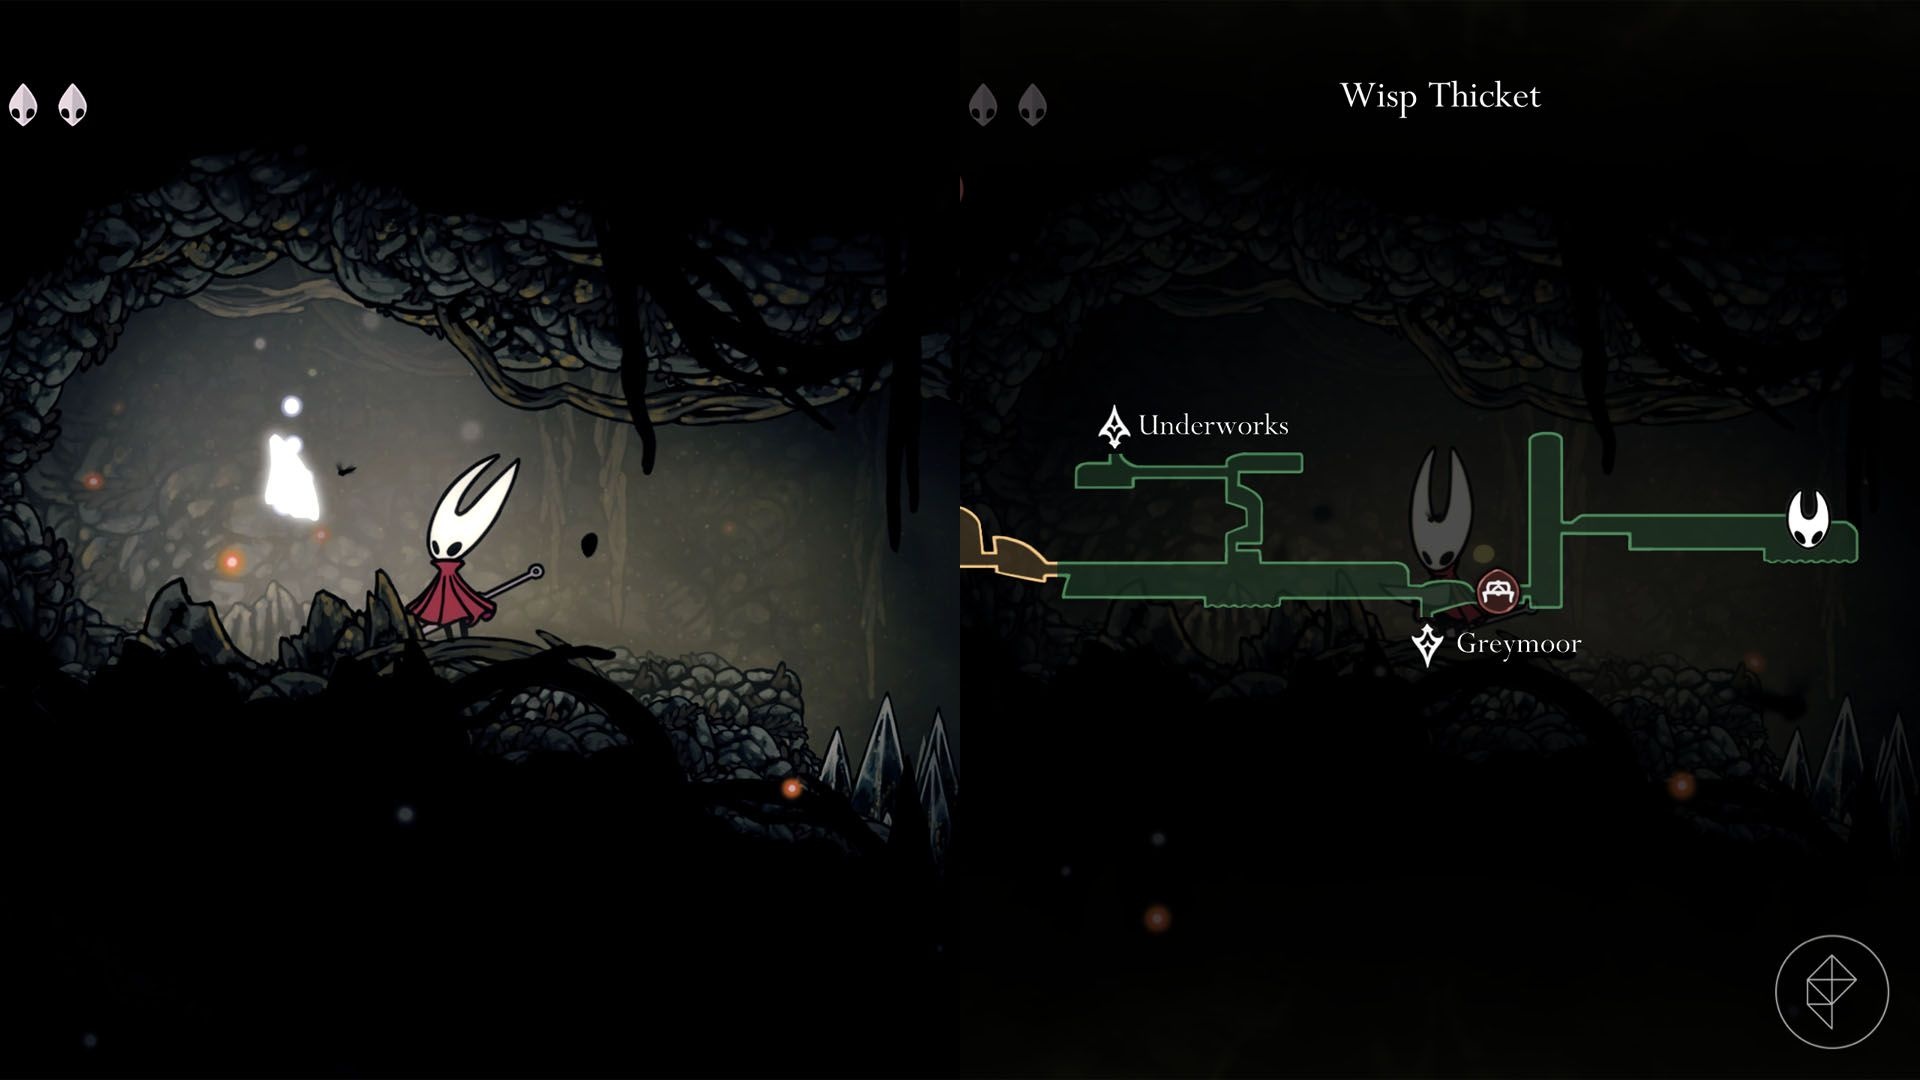
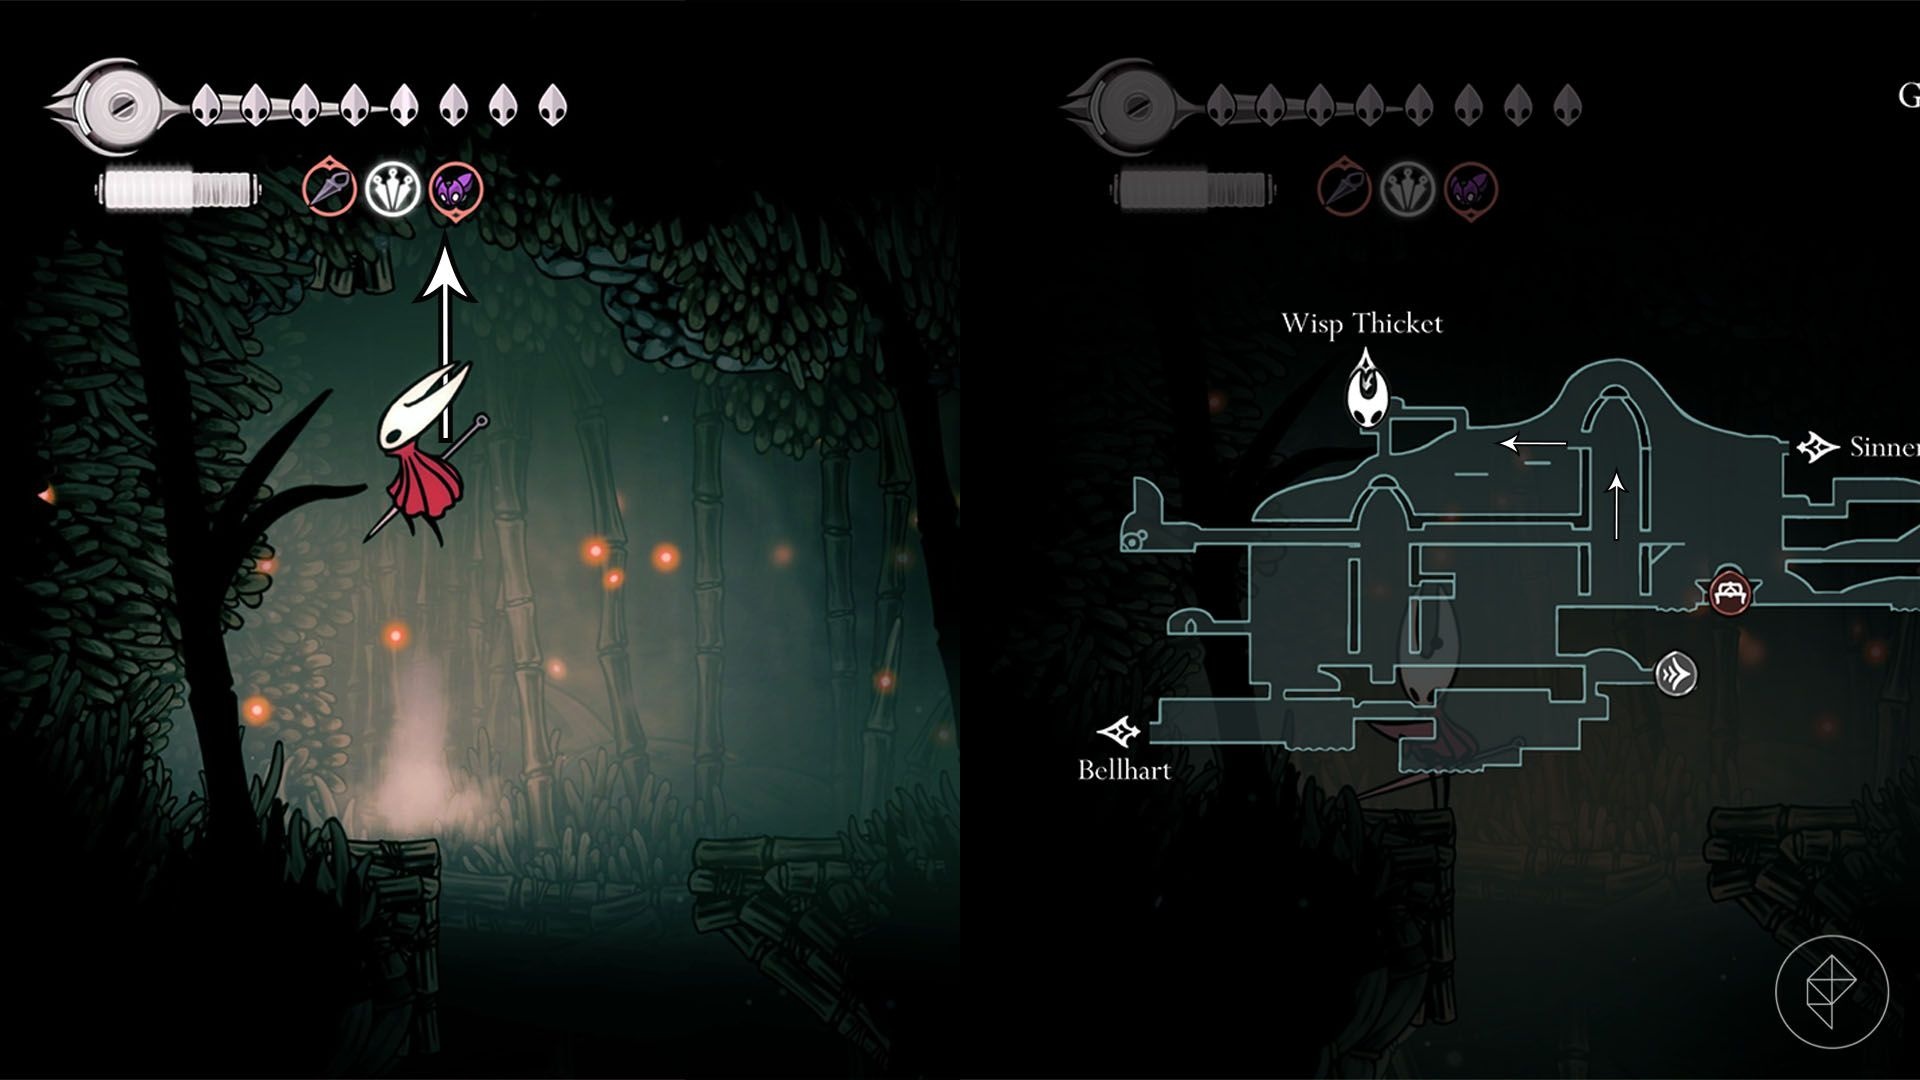
Mask shard #14 — Wisp Thicket
Unlock Faydown Cloak first, then enter Wisp Thicket (entrance in top-left Greymoor). After entering, head right, break a hanging sac to drop a bench and rest, then use pogo on hanging red balloons and Clawline to climb. Take the first right exit while climbing, ignore or run past fire-spewing enemies, and clear a final Clawline-and-pogo section to reach the shard.
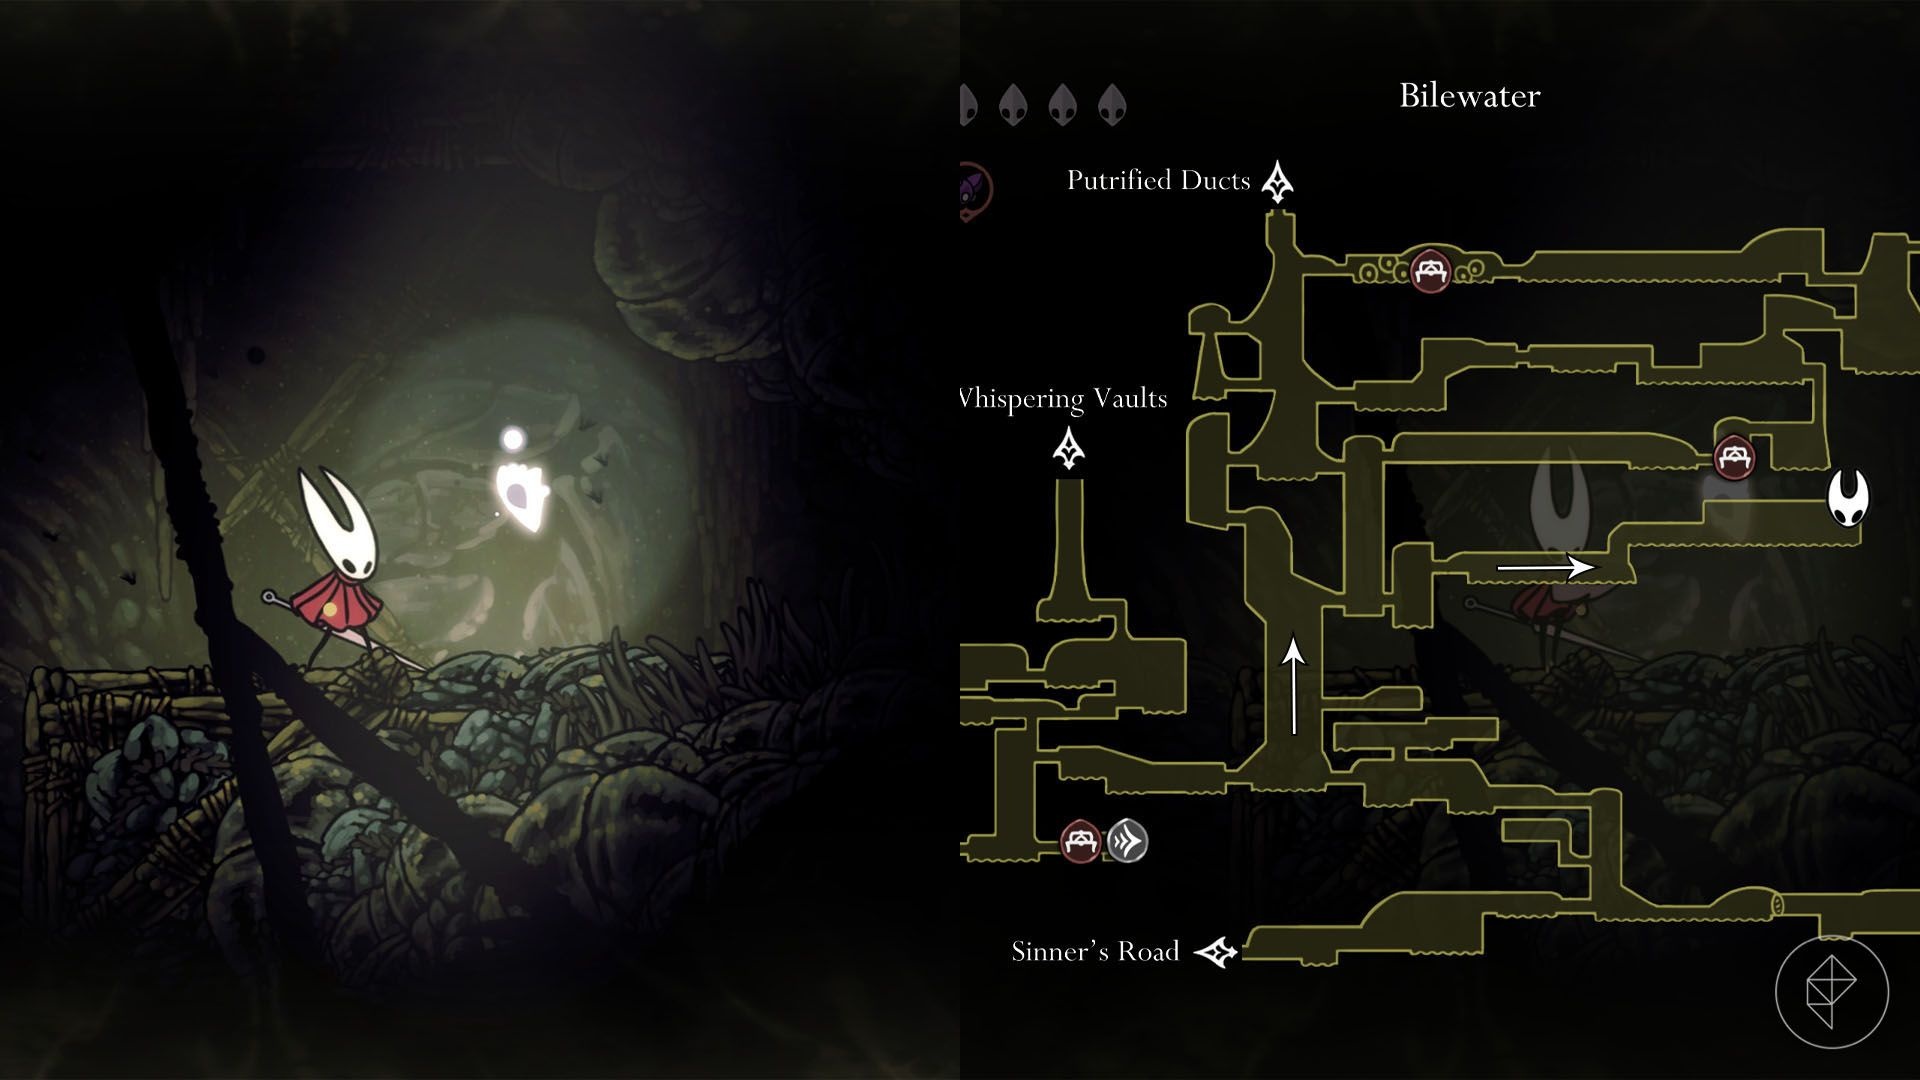
Mask shard #15 — Bilewater
This shard is deep in Bilewater and requires Clawline and Faydown Cloak. From the Bilewater Bellway, take the upper-right exit and enter a tall chamber. Double-jump and zigzag up using Clawline and Faydown; watch for bloatroaches that spit bile and slubberlugs that can drag you into grub-infested water. Continue right through the route until you reach the shard.
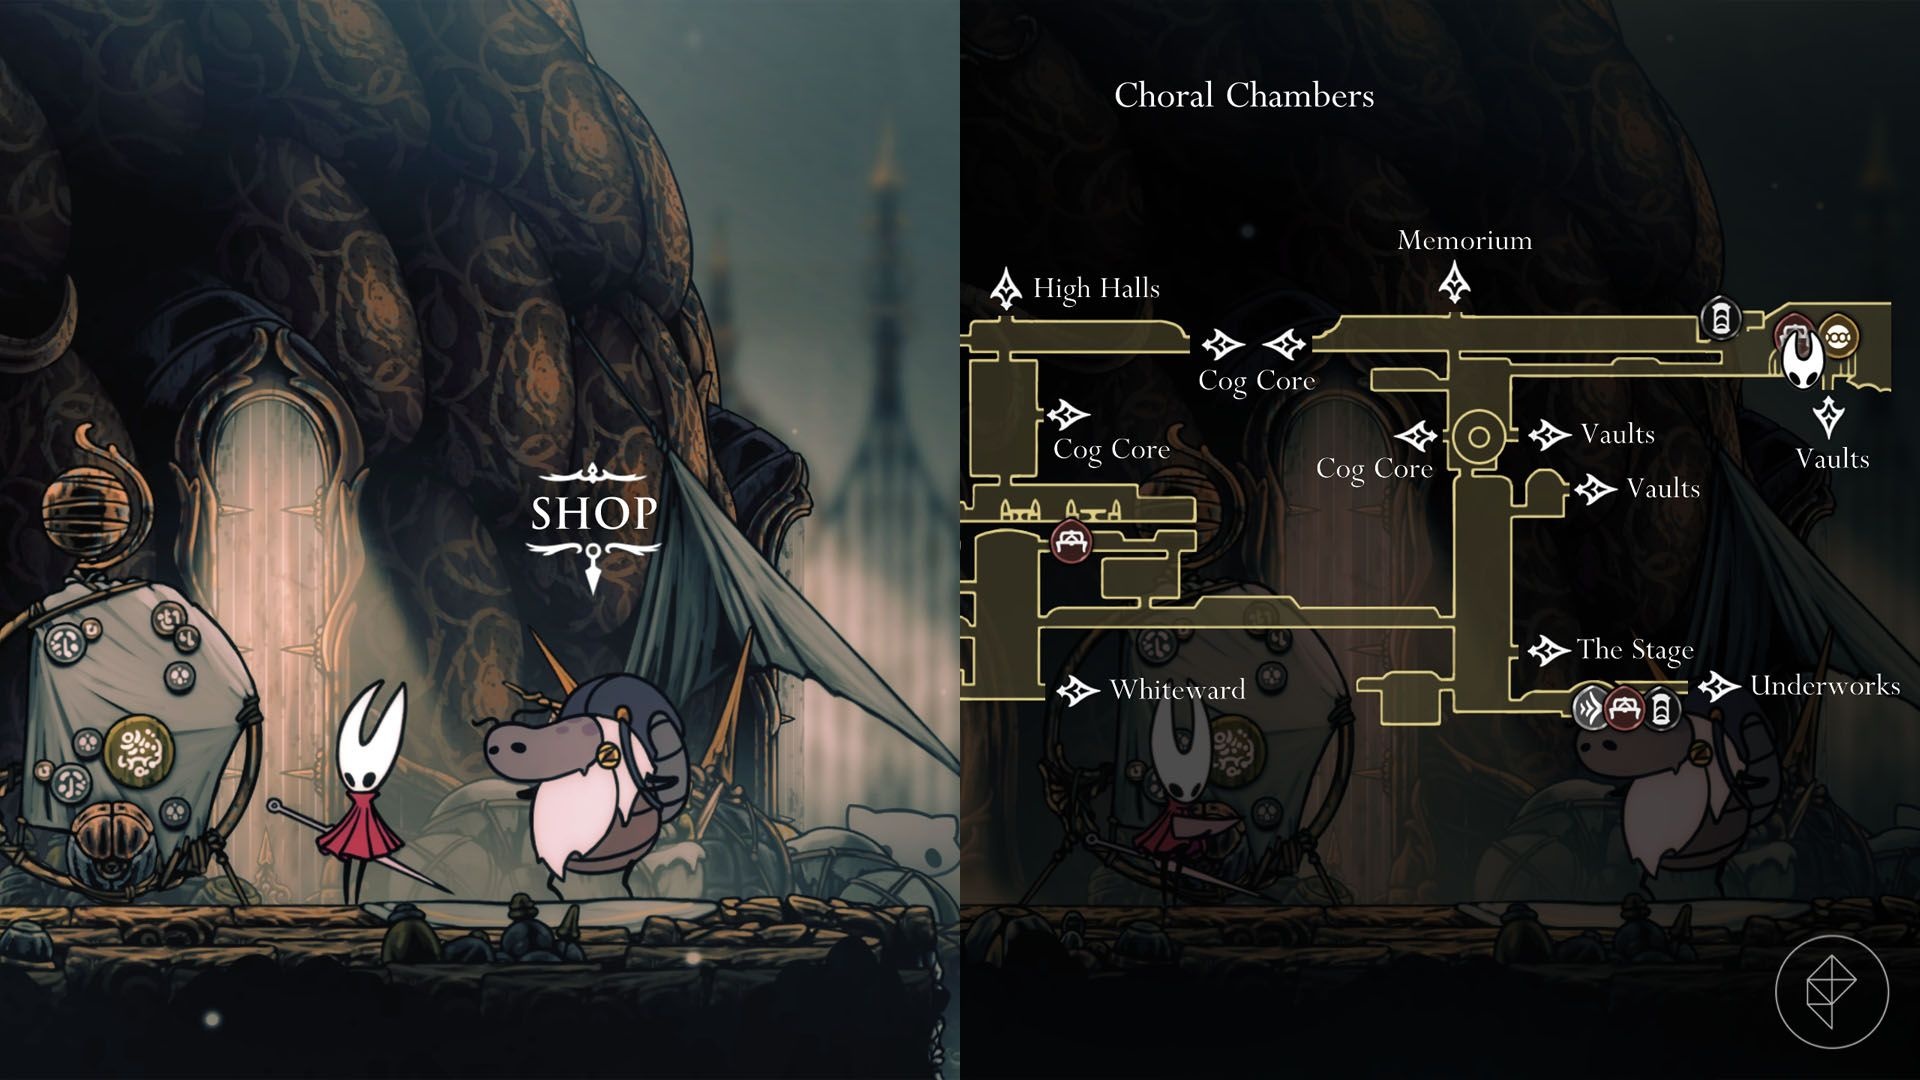
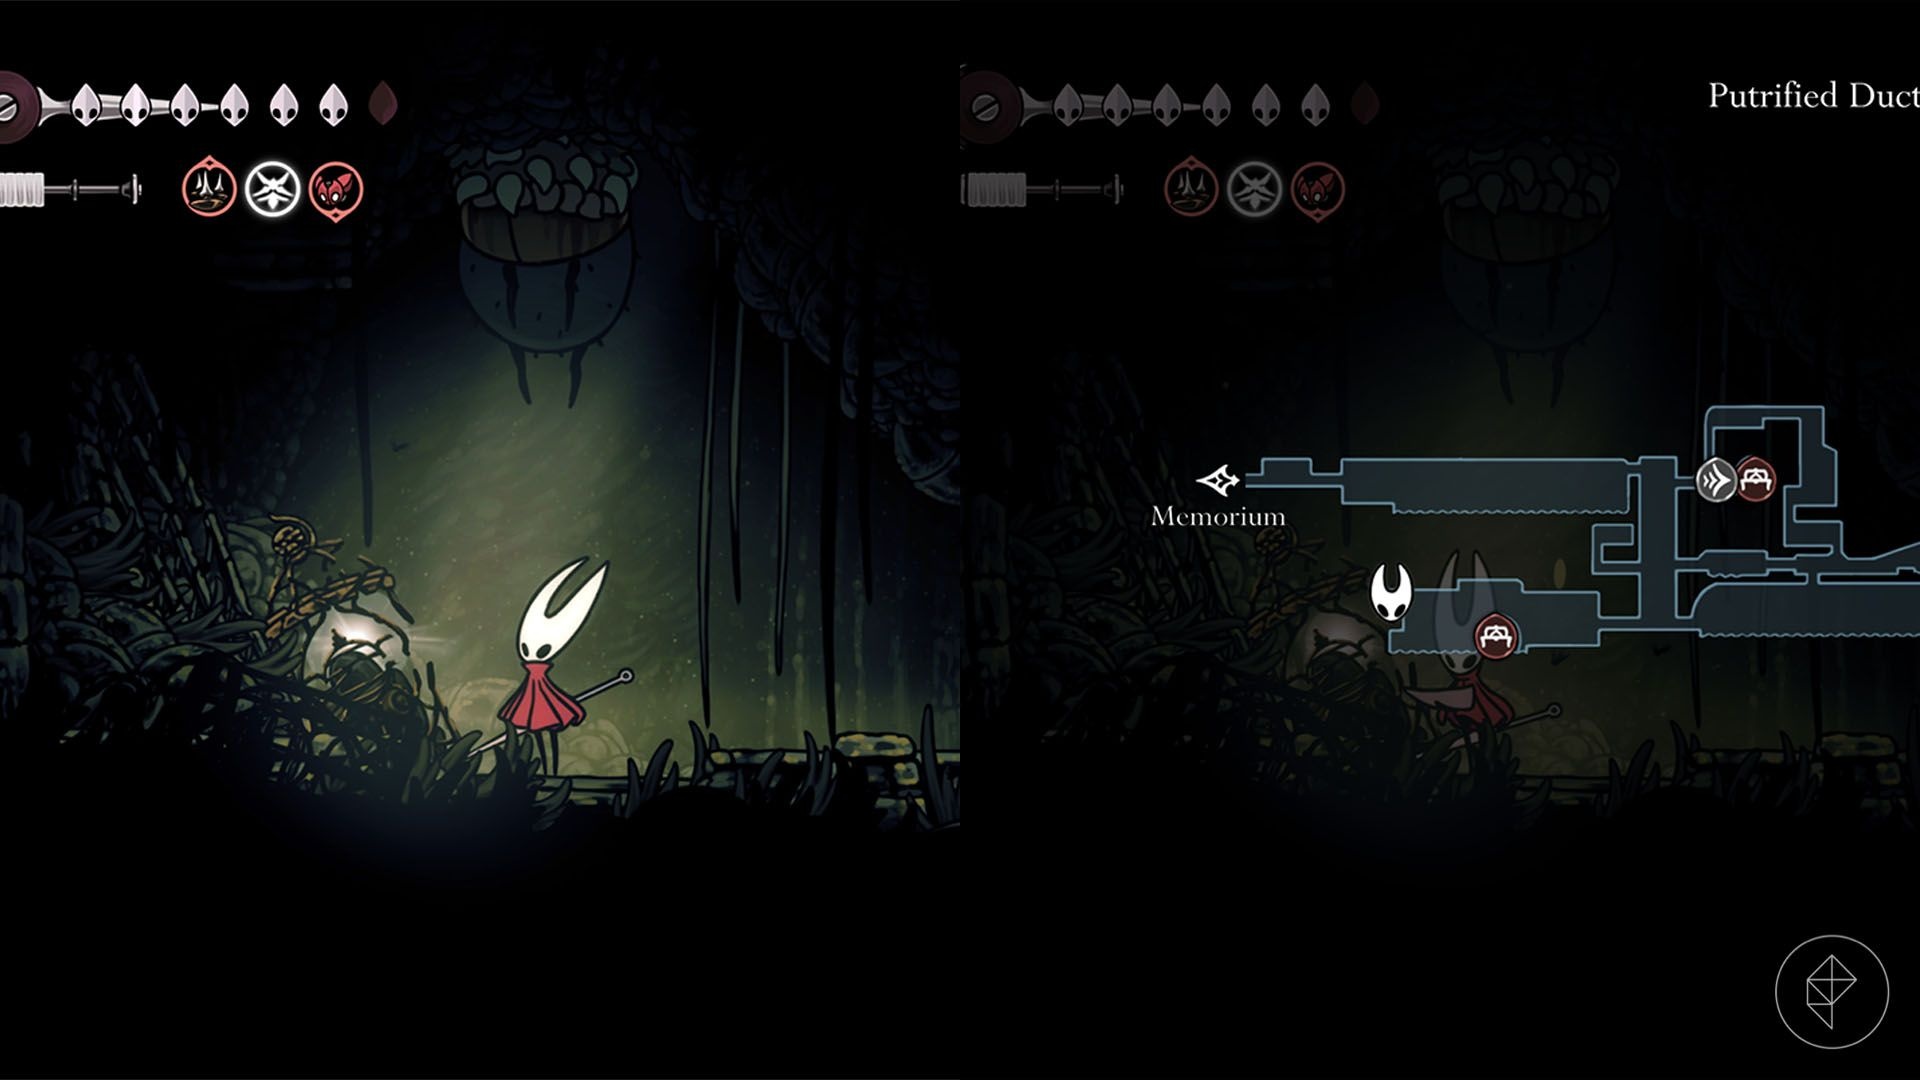
Mask shard #16 — The Slab
First, grab the Key of Apostate from the Putrified Ducts (bottom-left). Then enter The Slab via Choral Chambers, progress to collect the Key of Indolent and the Key of Heretic if needed, and unlock the door with the Key of Apostate at the top of the central chamber. Inside, pogo off a moving gear and follow it to the top; the shard sits in the top-left corner. If the gear moves out of range you must restart that sequence.
Mask shard #17 — “Fastest in Pharloom” wish (Act 3)
Start Act 3, then reach the top-right of Far Fields through the Hunter’s March Silk Soar secret route to find Sprintmaster Swift. Win three races of increasing difficulty to earn the shard. Use speed boosts like Silkspeed Anklets and Flea Brew to help win.
Mask shard #18 — “Dark Hearts” wish (Act 3)
In Act 3, accept the “Dark Hearts” wish at the Bellhart wishboard. Destroy 12 void masses across Pharloom to complete the wish and claim the shard. Void masses appear as clumps of enemies tied together by void strings; you can find more than 12 of them while exploring Act 3.
Mask shard #19 — Mount Fay (Act 3)
In Act 3, use Silk Soar from Hunter’s March to access a secret area at Mount Fay. Climb to the center hallway, use Clawline on flying crystal bugs to land on a small platform in water, Silk Soar up a ceiling hole, break ice to reach a bottom-right area, then Silk Soar again to a hidden cave. There, use Clawline on large mnemonords and stand on ice crystals for boosts to reach the top and collect the shard.
Mask shard #20 — “The Hidden Hunter” wish (Act 3)
Accept “The Hidden Hunter” wish at the Bellhart wishboard (Act 3). Track and defeat Gurr the Outcast. Note: you can trigger the Gurr arena by interacting with Gurr’s last tracks in the far-right section of Far Fields (just before the Sprintmaster Swift area). Defeat Gurr, then collect the Grass Doll from the left room (top-left corner) and return it to the wishboard to get the shard. Watch for a swinging-axe trap on the platform above the doll.