Honkai: Star Rail — All Amphoreus Nymph Locations Revealed (Find Every Beetle, Butterfly & Secret Chest)
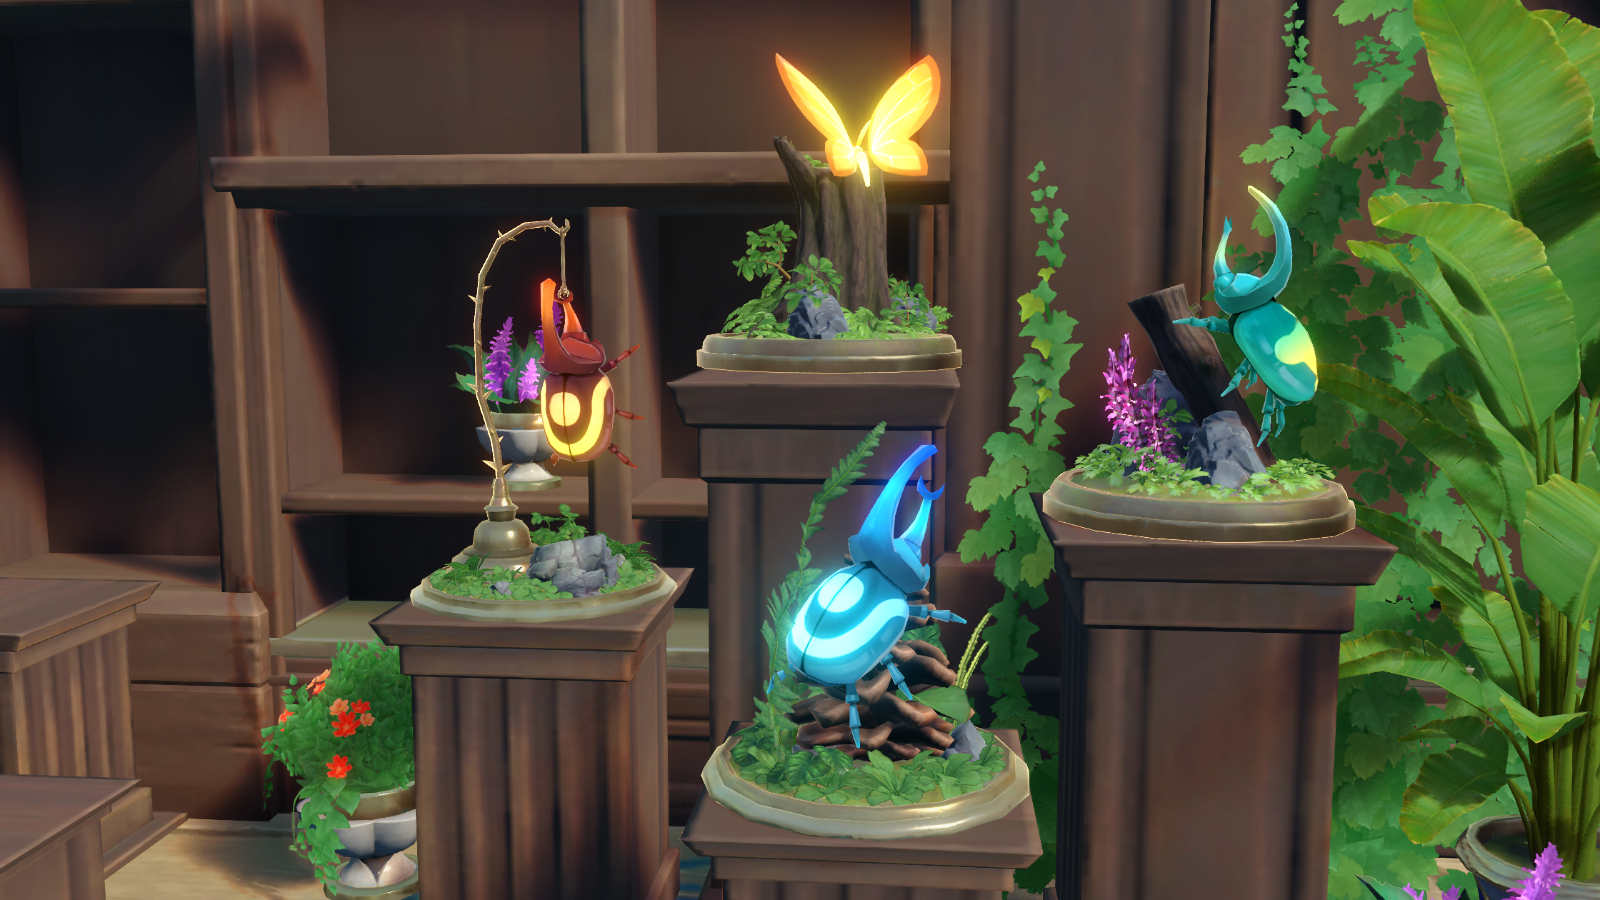
Honkai: Star Rail’s Amphoreus region added collectible nymphs (butterflies, beetles and similar critters) in the 3.0 update, and players can now hunt them across many instance maps for rewards like Stellar Jade and various forms of Celestial Ambrosia. Each area has a Garmentmaker NPC who tracks progress, and some full-collection rewards unlock small puzzles or special chests. Below I list each map’s nymphs, what they look like, how many to find, the rewards, and where to look on every floor.
- Overview of how nymphs work and rewards.
- Complete, floor-by-floor nymph locations for every Amphoreus map covered in the update.
- Links to puzzle solution videos (YouTube) and other helpful guides, placed where the source referenced them.
How nymphs work
First, the basics: nymphs are collectible critters added in Amphoreus with the 3.0 update (and the guide was updated for 3.5). They function similarly to Penacony origami birds, but instead of Light Cones you earn Celestial Ambrosia (or region-specific ambrosia types) plus Stellar Jade. Additionally, many areas give a key item (a “Portentous Goldwoven” for that map) once you fully collect the area’s nymphs, and that key item often unlocks a small puzzle that rewards a precious chest and an achievement.
Also, you can trade Memory Crystal Shards for hints about missing nymphs, but if you follow the locations below you shouldn’t need to. Meanwhile, the critters are often chatty: look for text bubbles to spot them. Finally, some variant maps let you auto-collect if you previously finished the matching base map.
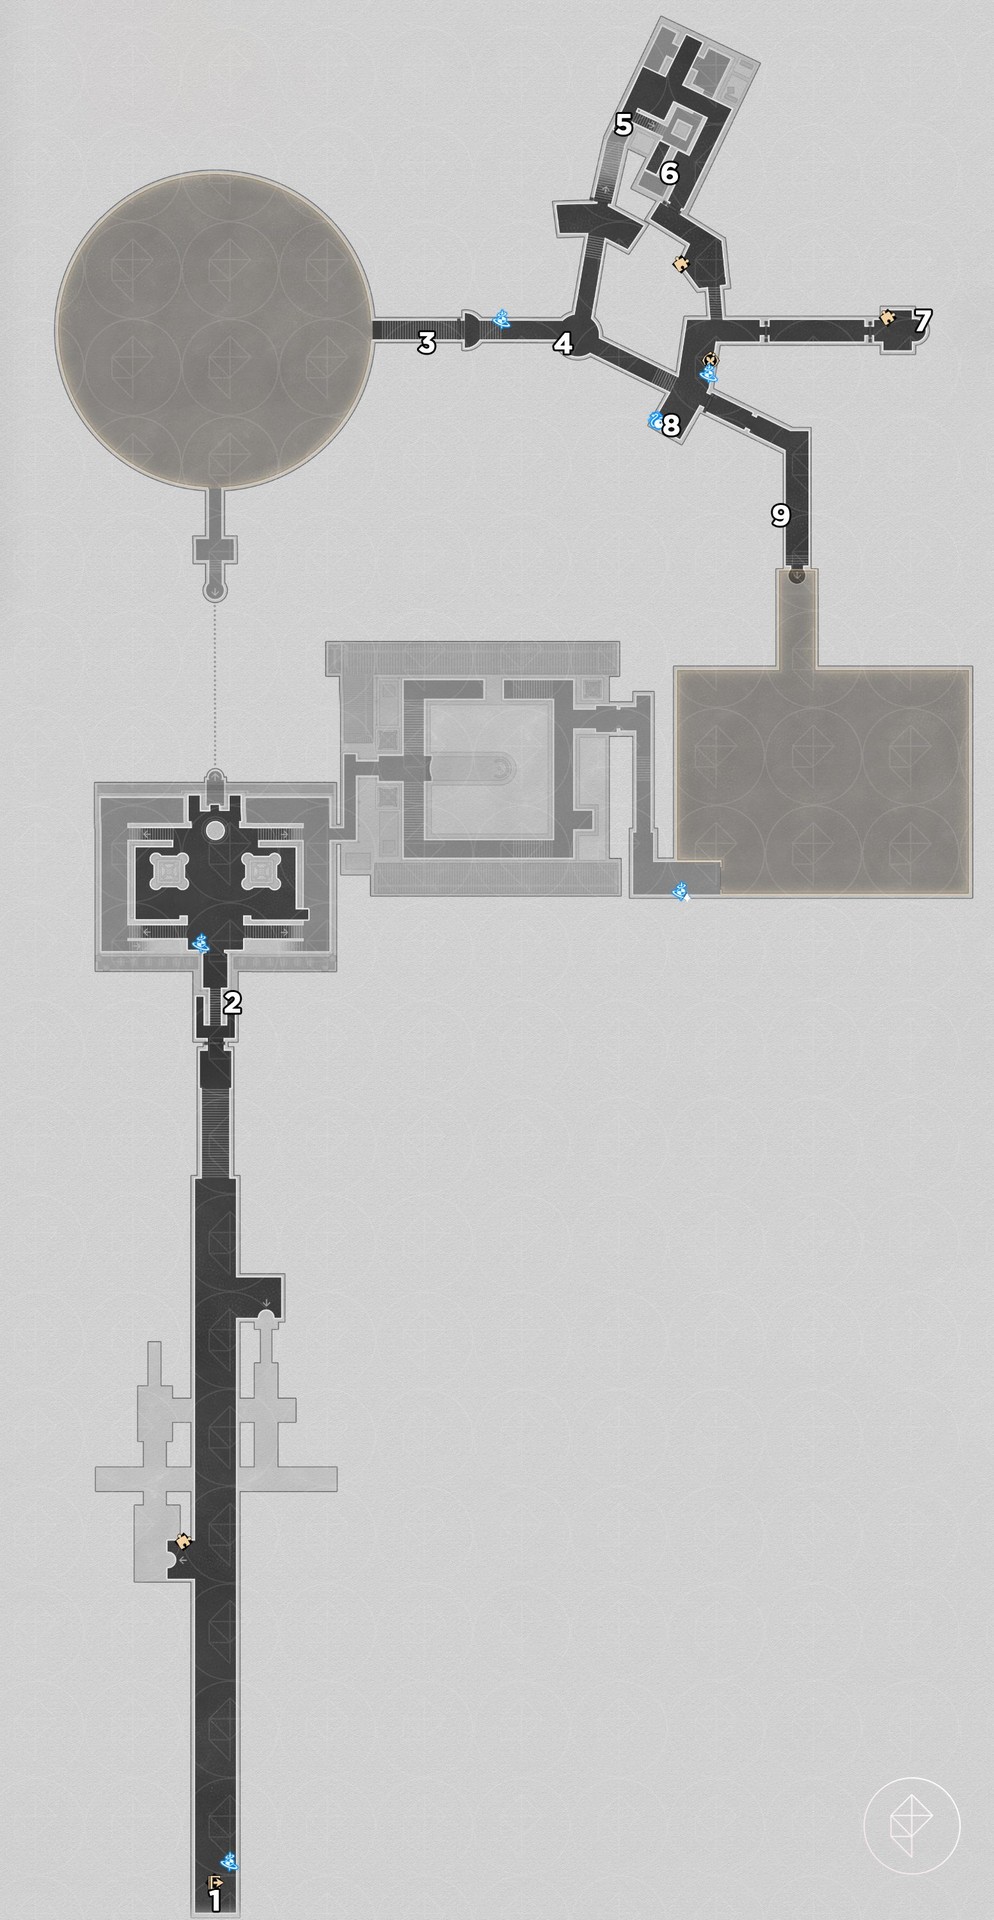
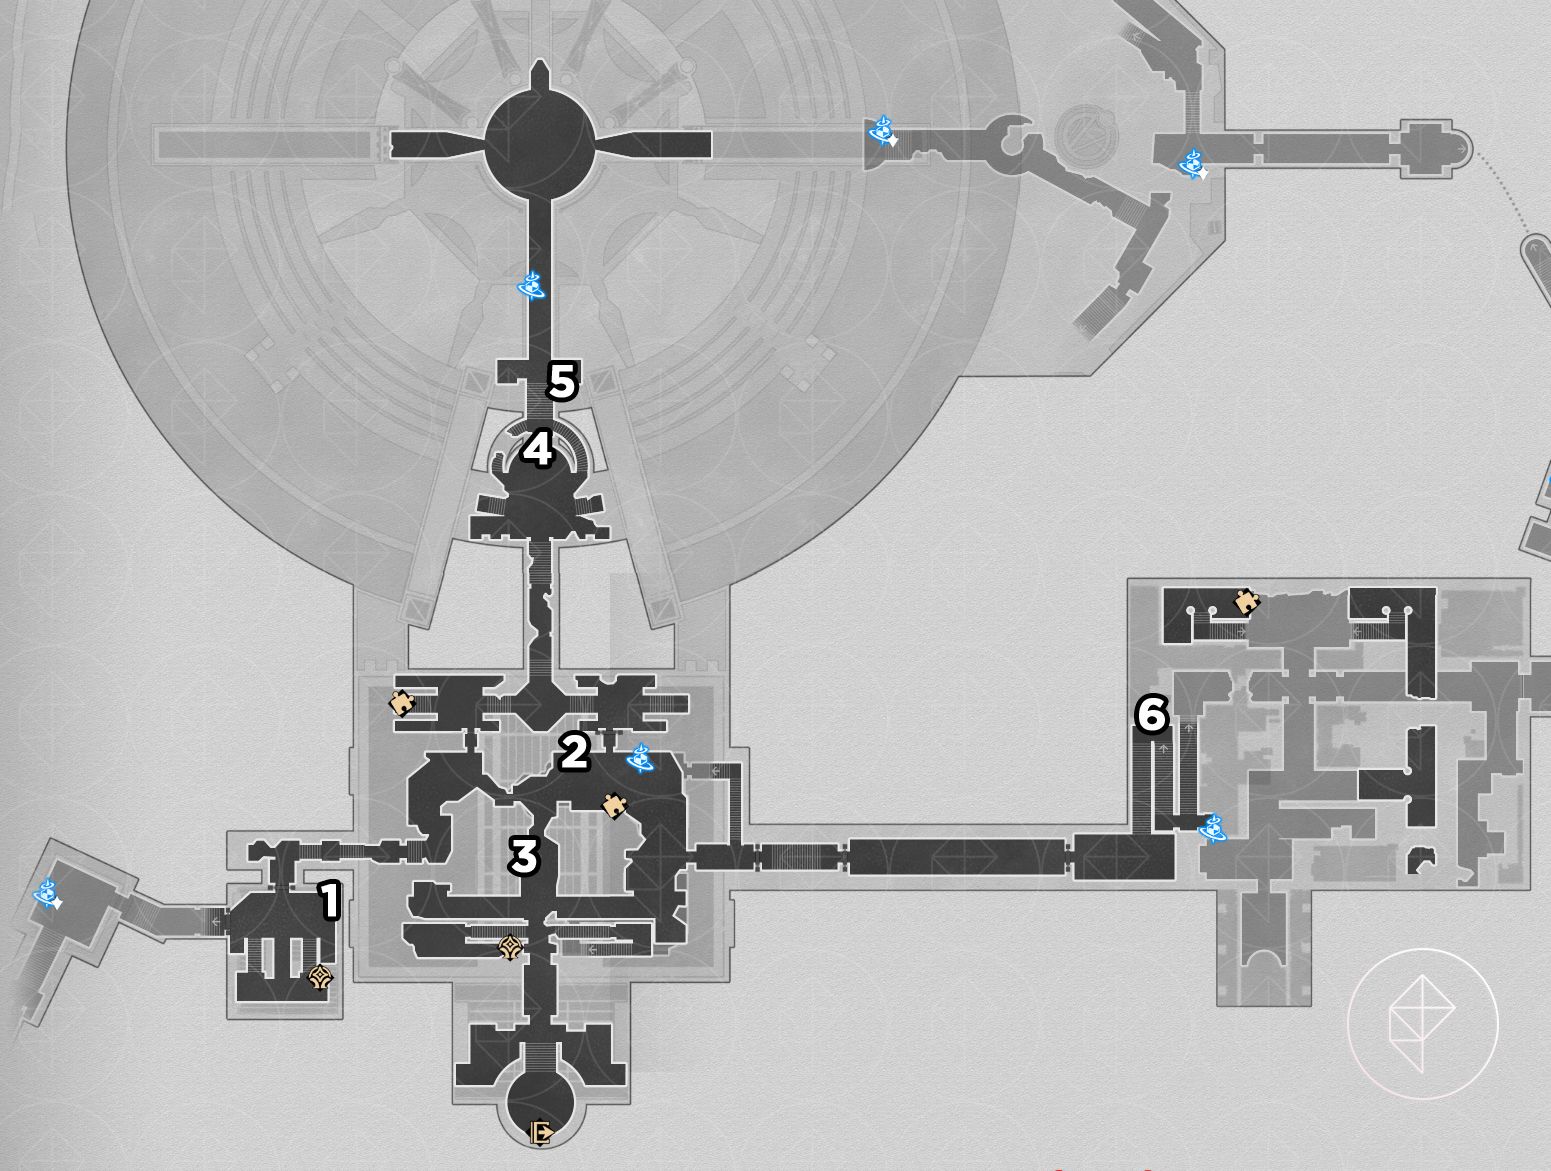
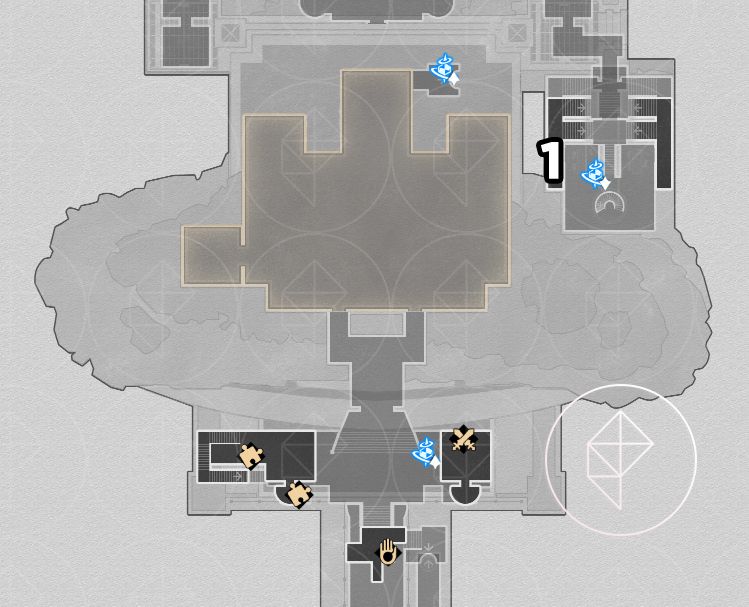
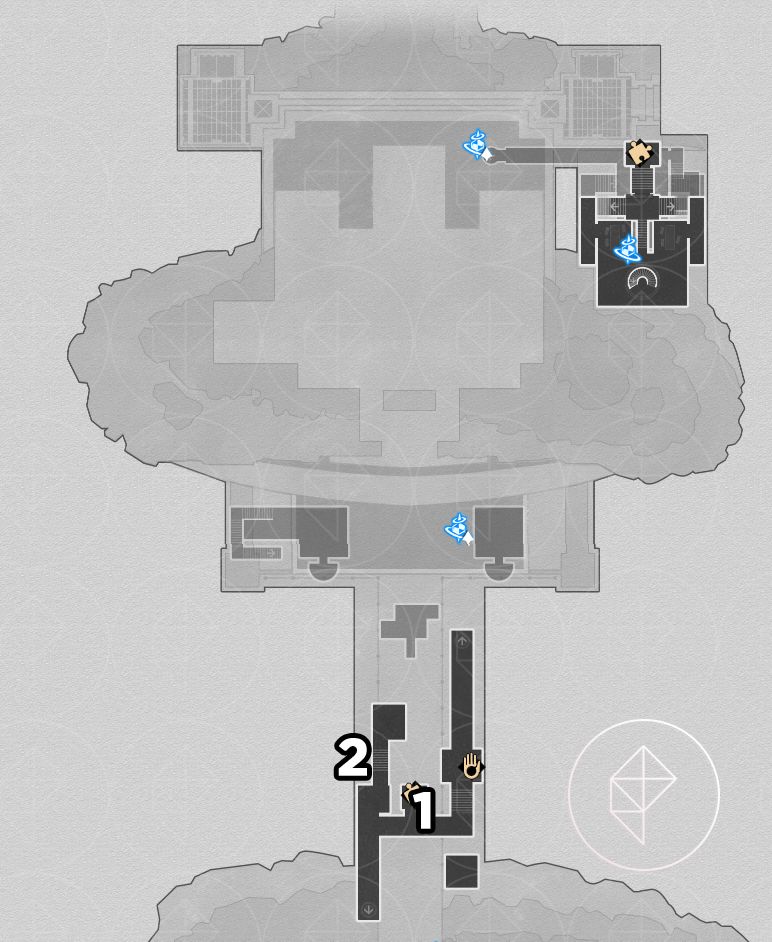
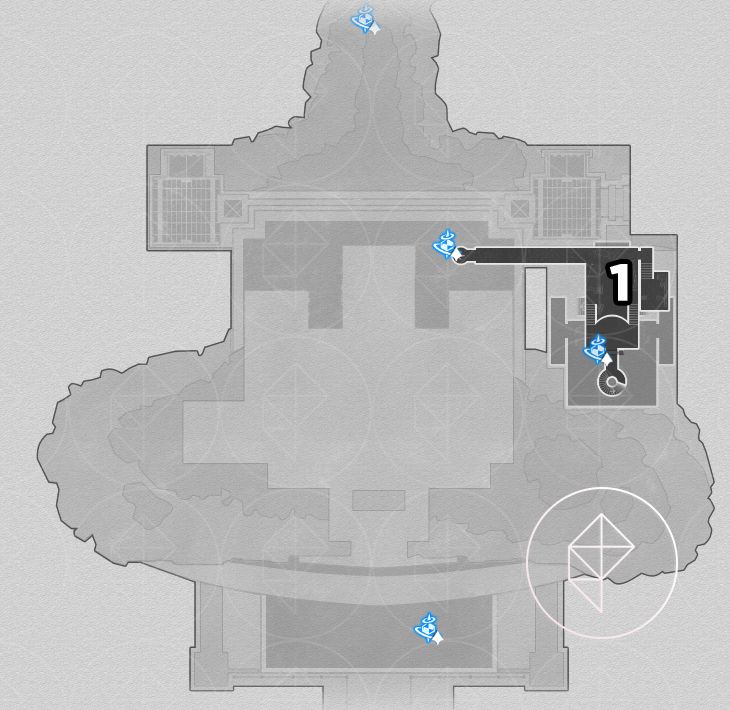
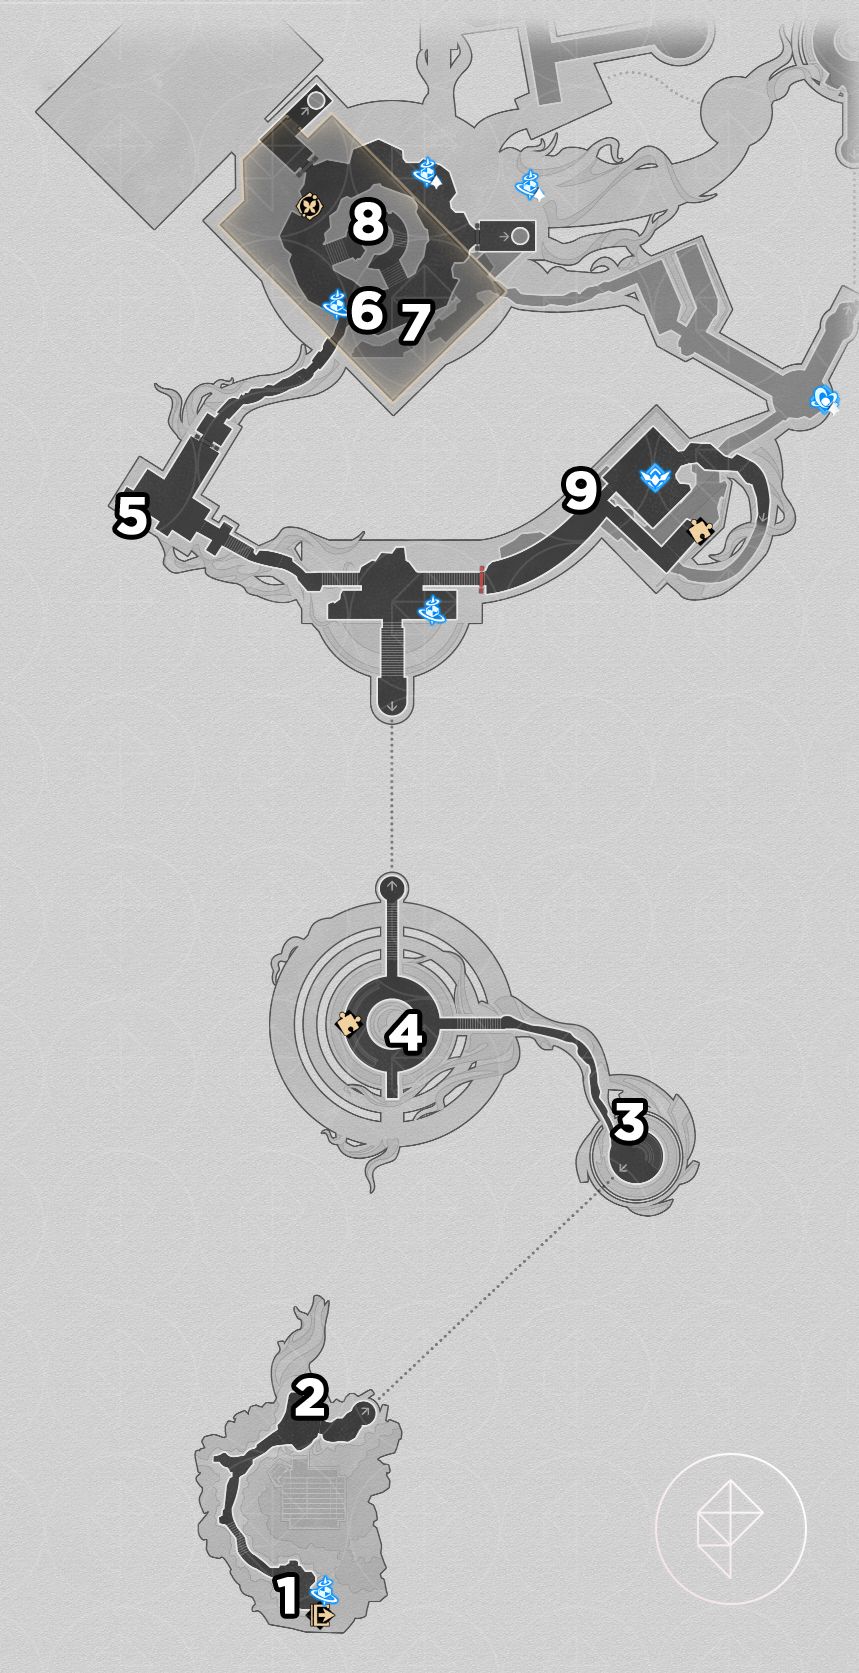
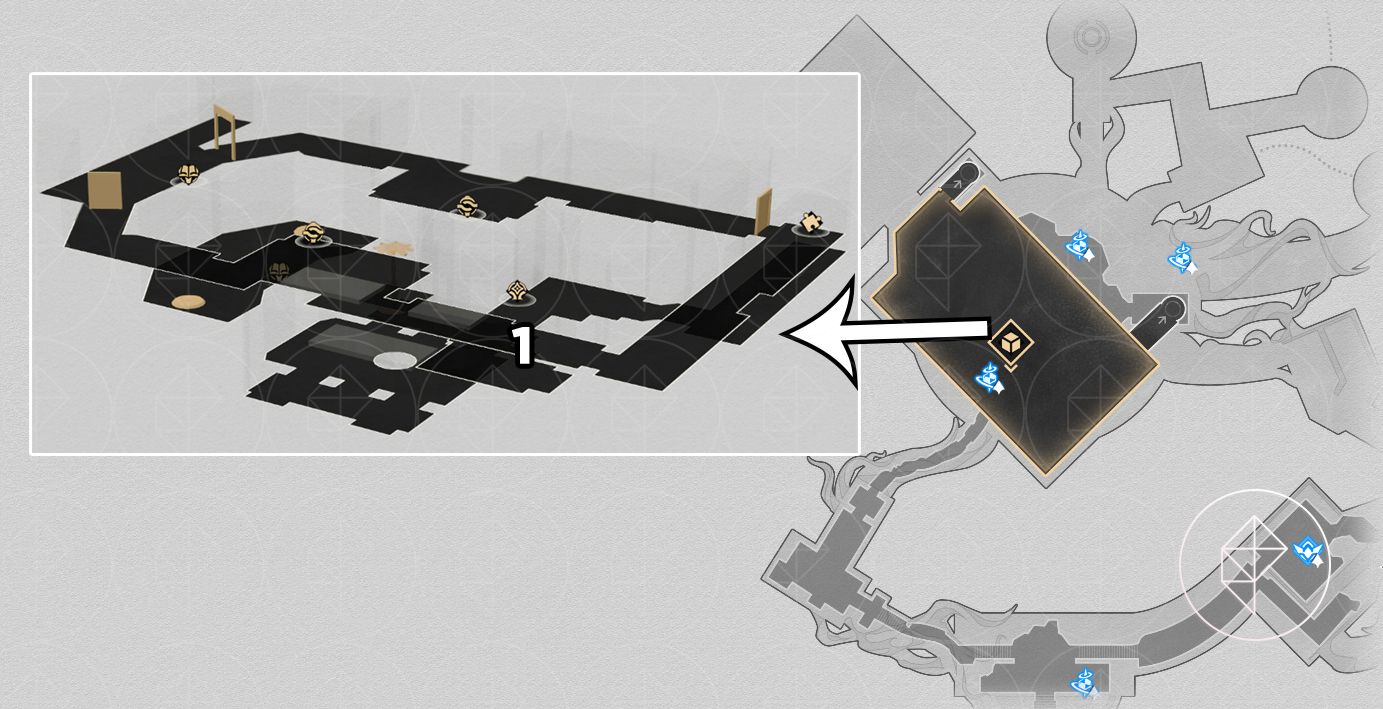
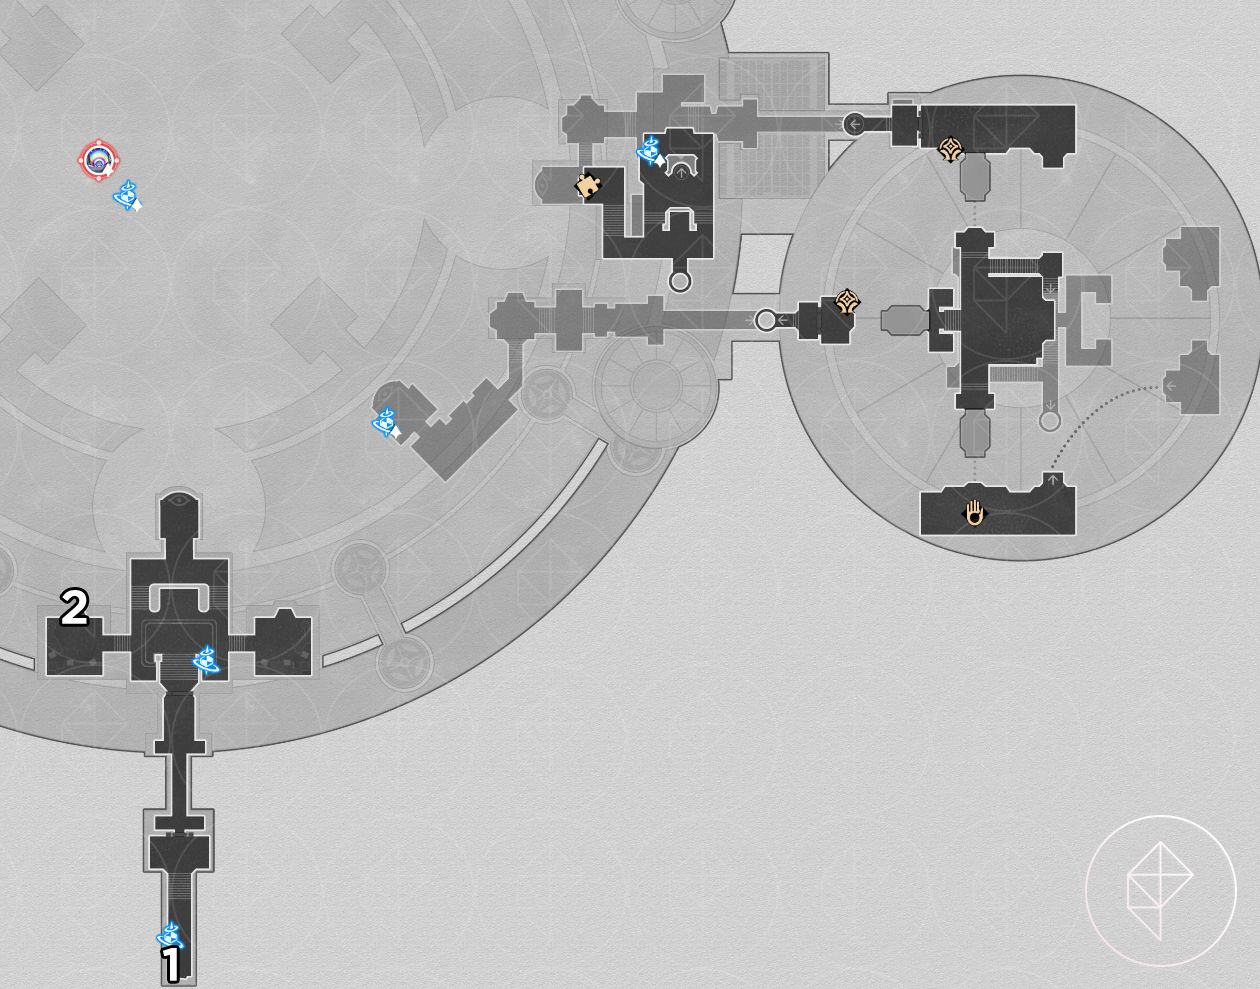
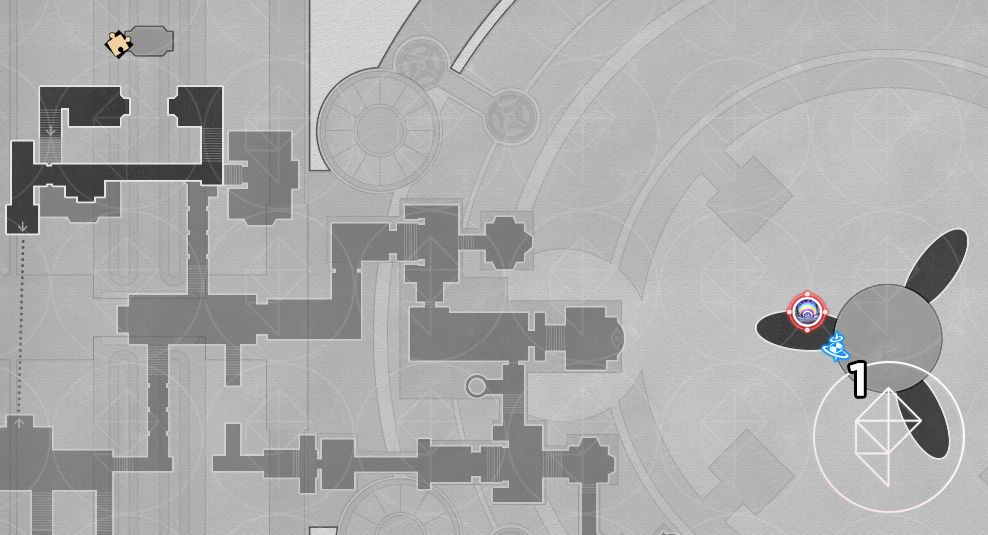
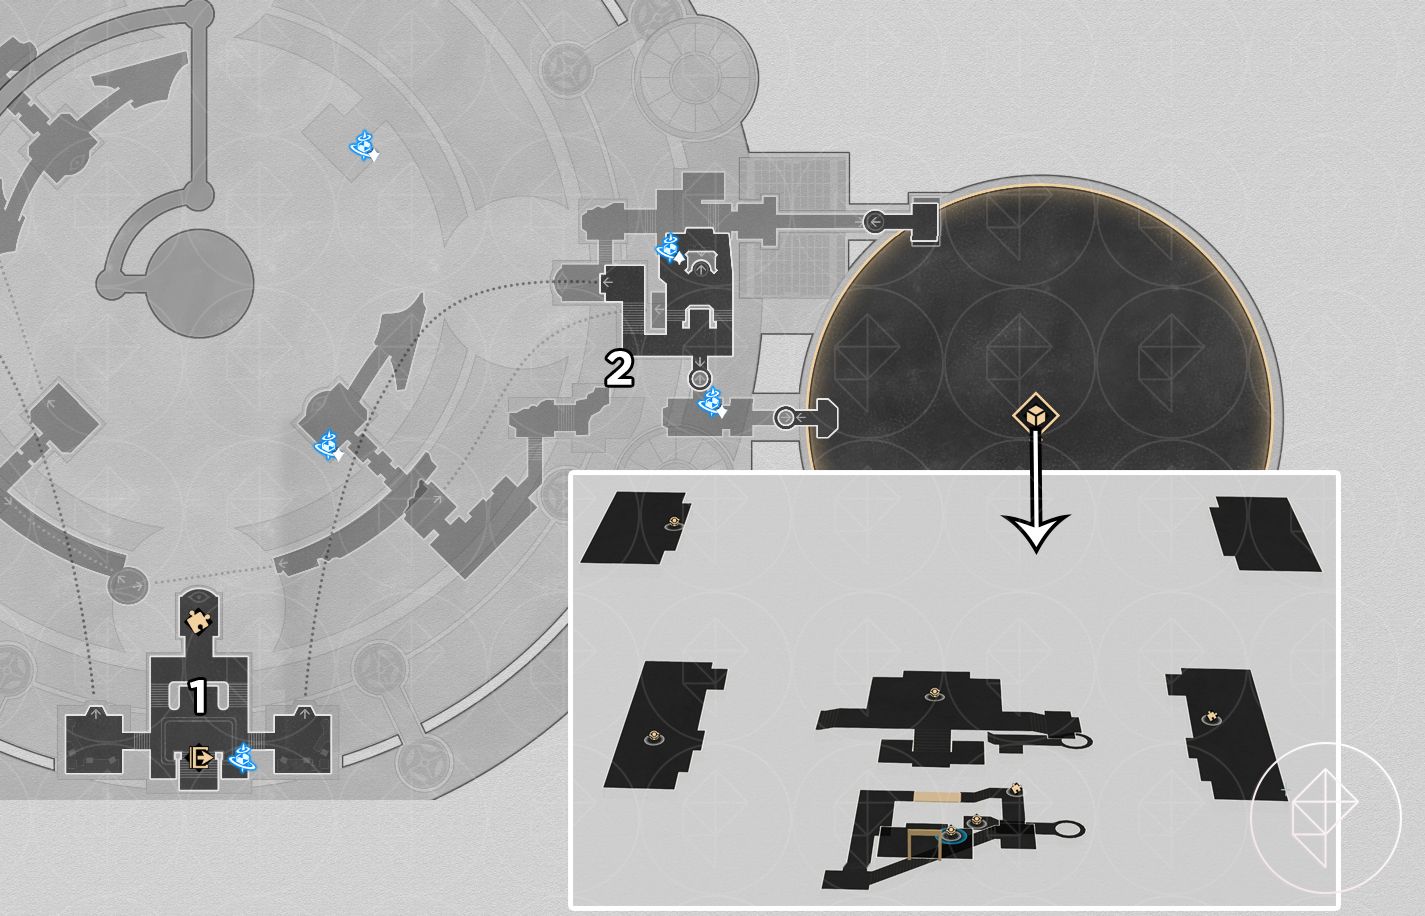
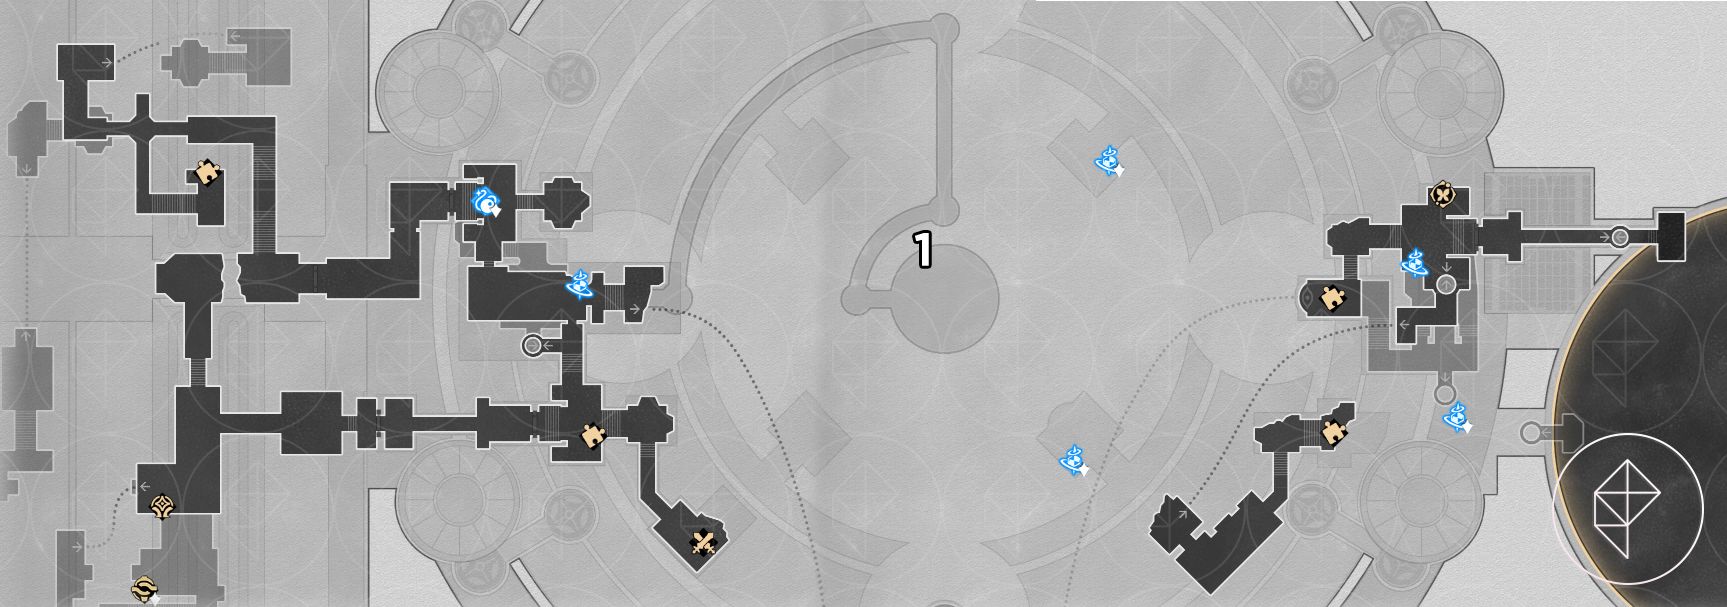
‘Eternal Holy City’ — Okhema (20 nymphs, butterflies)
Marmoreal Palace F2
- On the “Garmentmaker.”
- On some flowery bushes.
- Blending into the butterfly mural on the wall.
- At the top of the ramp on the curved structure above.
Marmoreal Palace F1
- On the center water fountain.
- Sitting upright on a chair.
- Sleeping in the towels by the bath area.
- On the edge of the stage.
- On the potted plant on the table (it will move between pots and needs to be caught multiple times).
- On the lift walls — take the lift up and down to collect; final spot is at the top of the lift.
- Hiding among the stuffed seals on the shelf.
- Flying above the pool.
Marmoreal Market F2
- In the prayer fountain.
- In a basket on the edge of the building.
Marmoreal Market F1
- On the golden wall structure.
- On the smithy forge.
- High up on a pillar.
- Inside the dinosaur’s feeder.
- On a guard’s head.
- On the bell at the Droma’s station.
After collecting all 20, Aglaea will text you and the Garmentmaker moves near the elevator to point to a fountain-based puzzle that rewards a precious chest and the “Chirping Secret: Golden Journey” achievement.
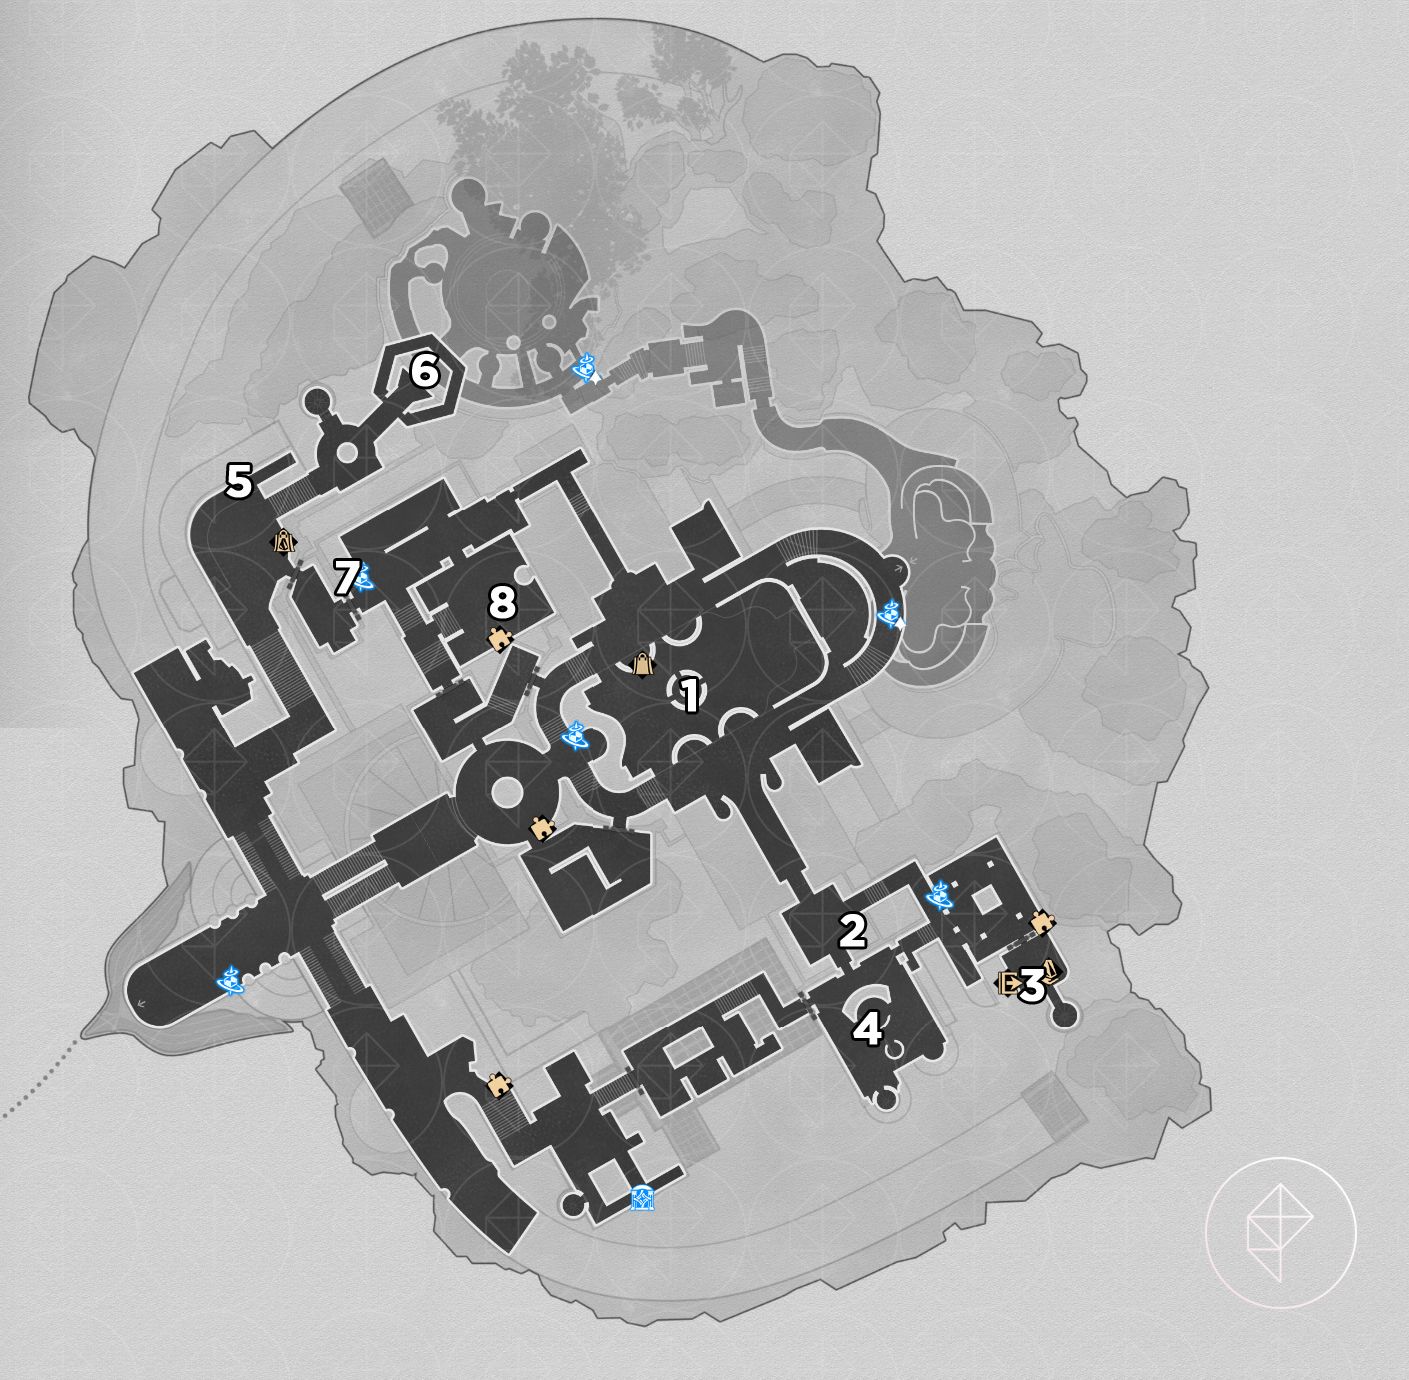
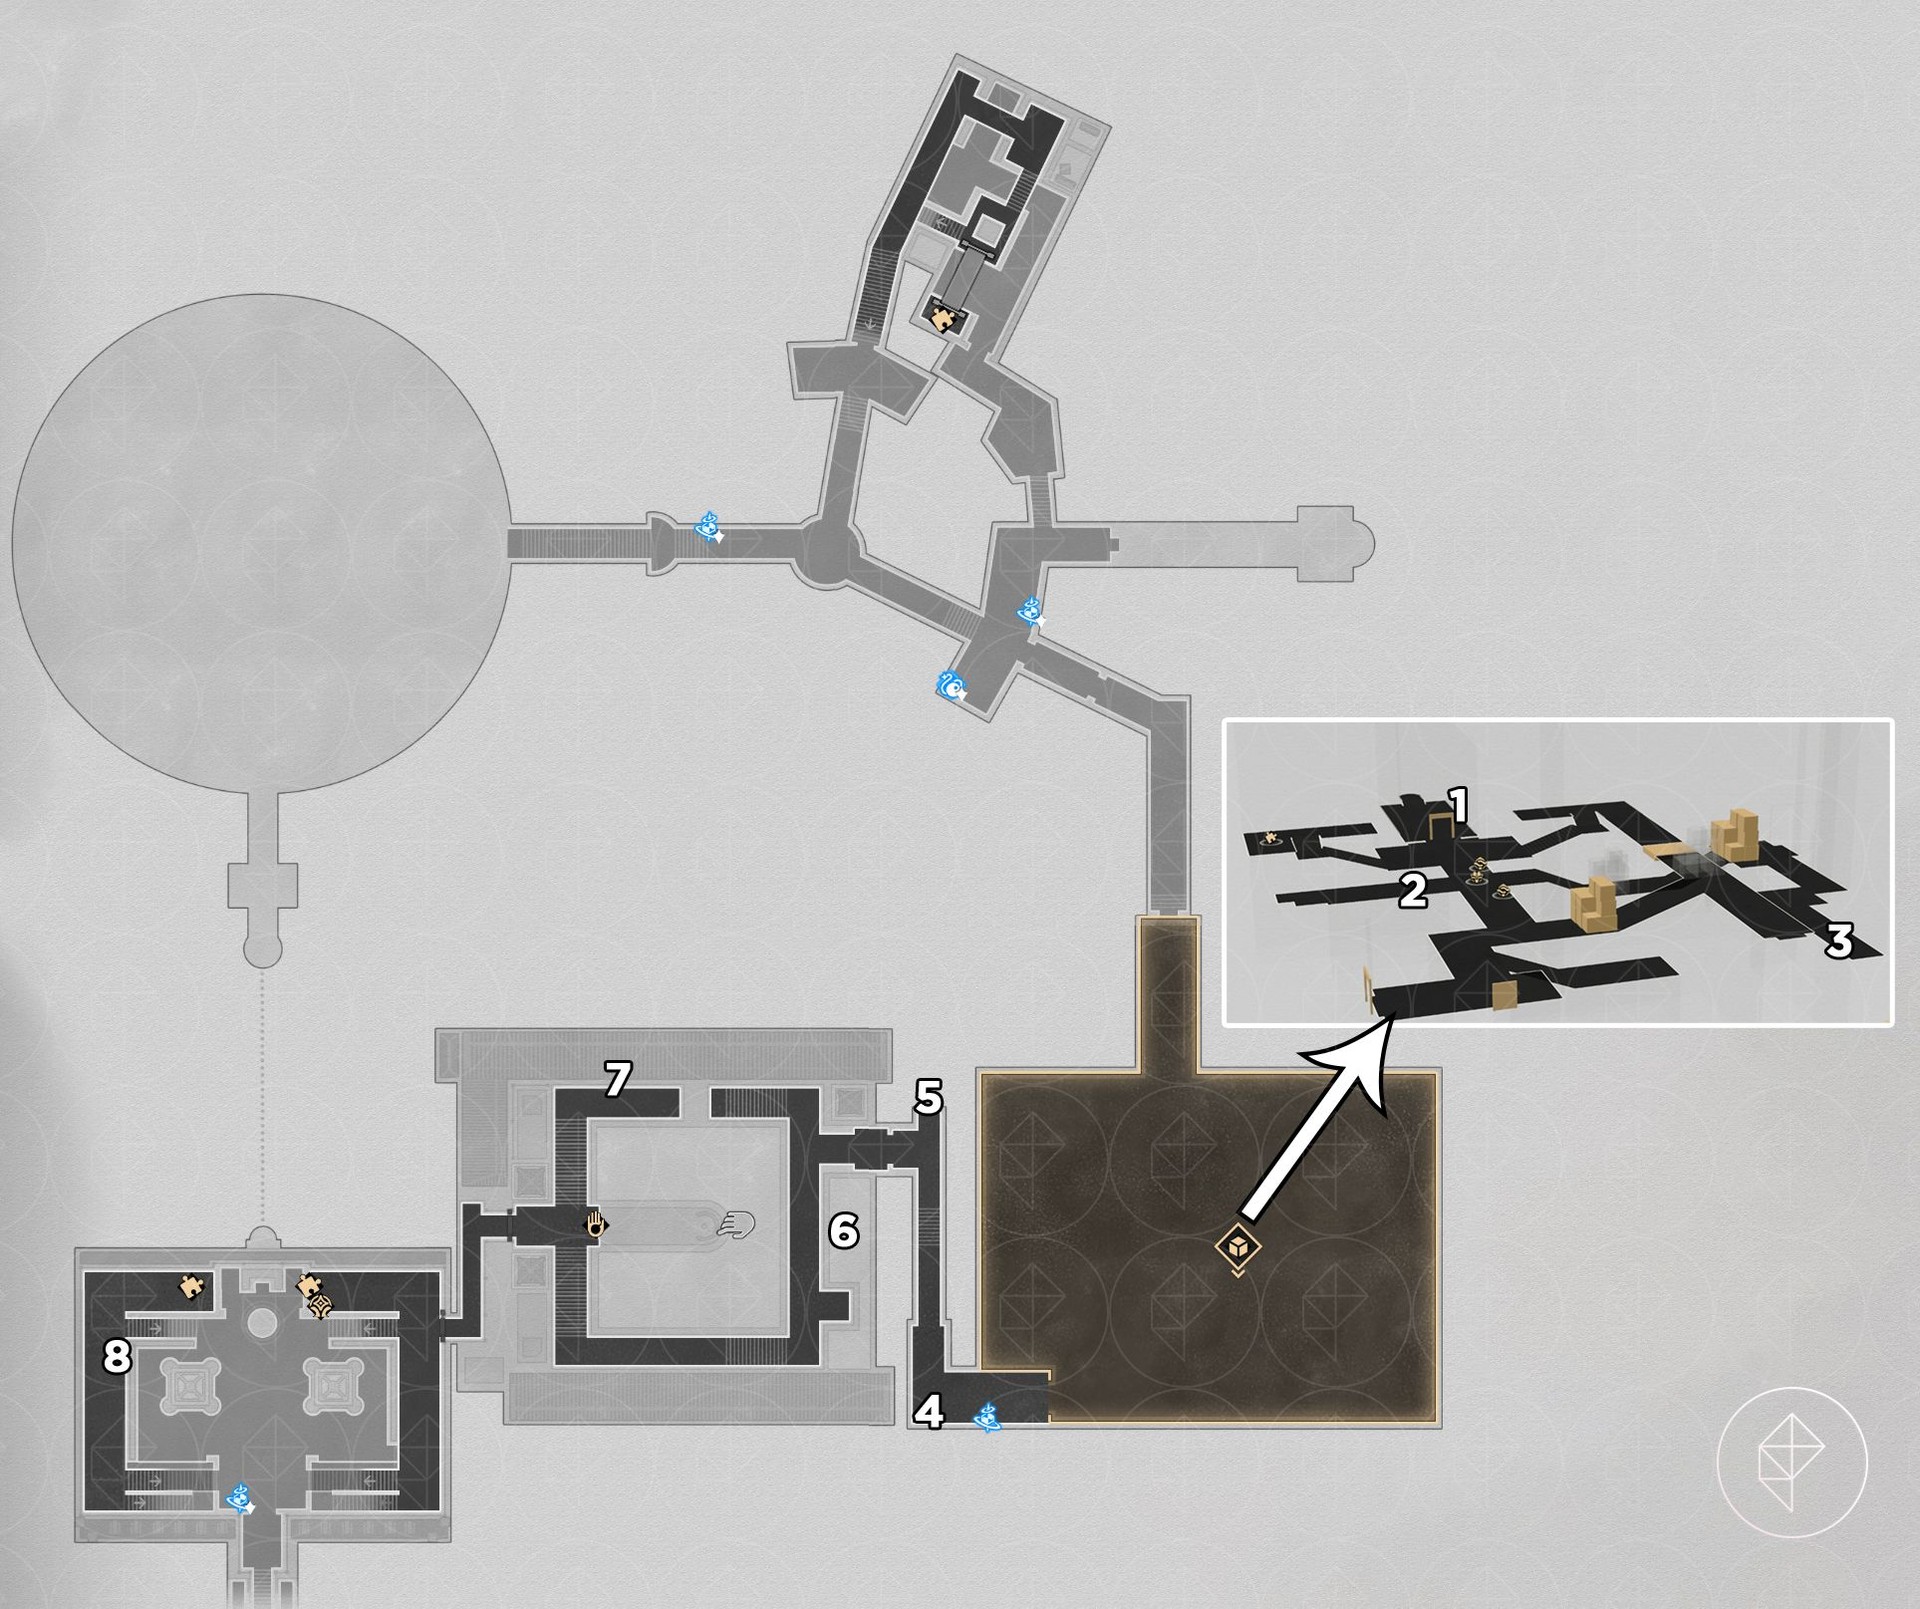
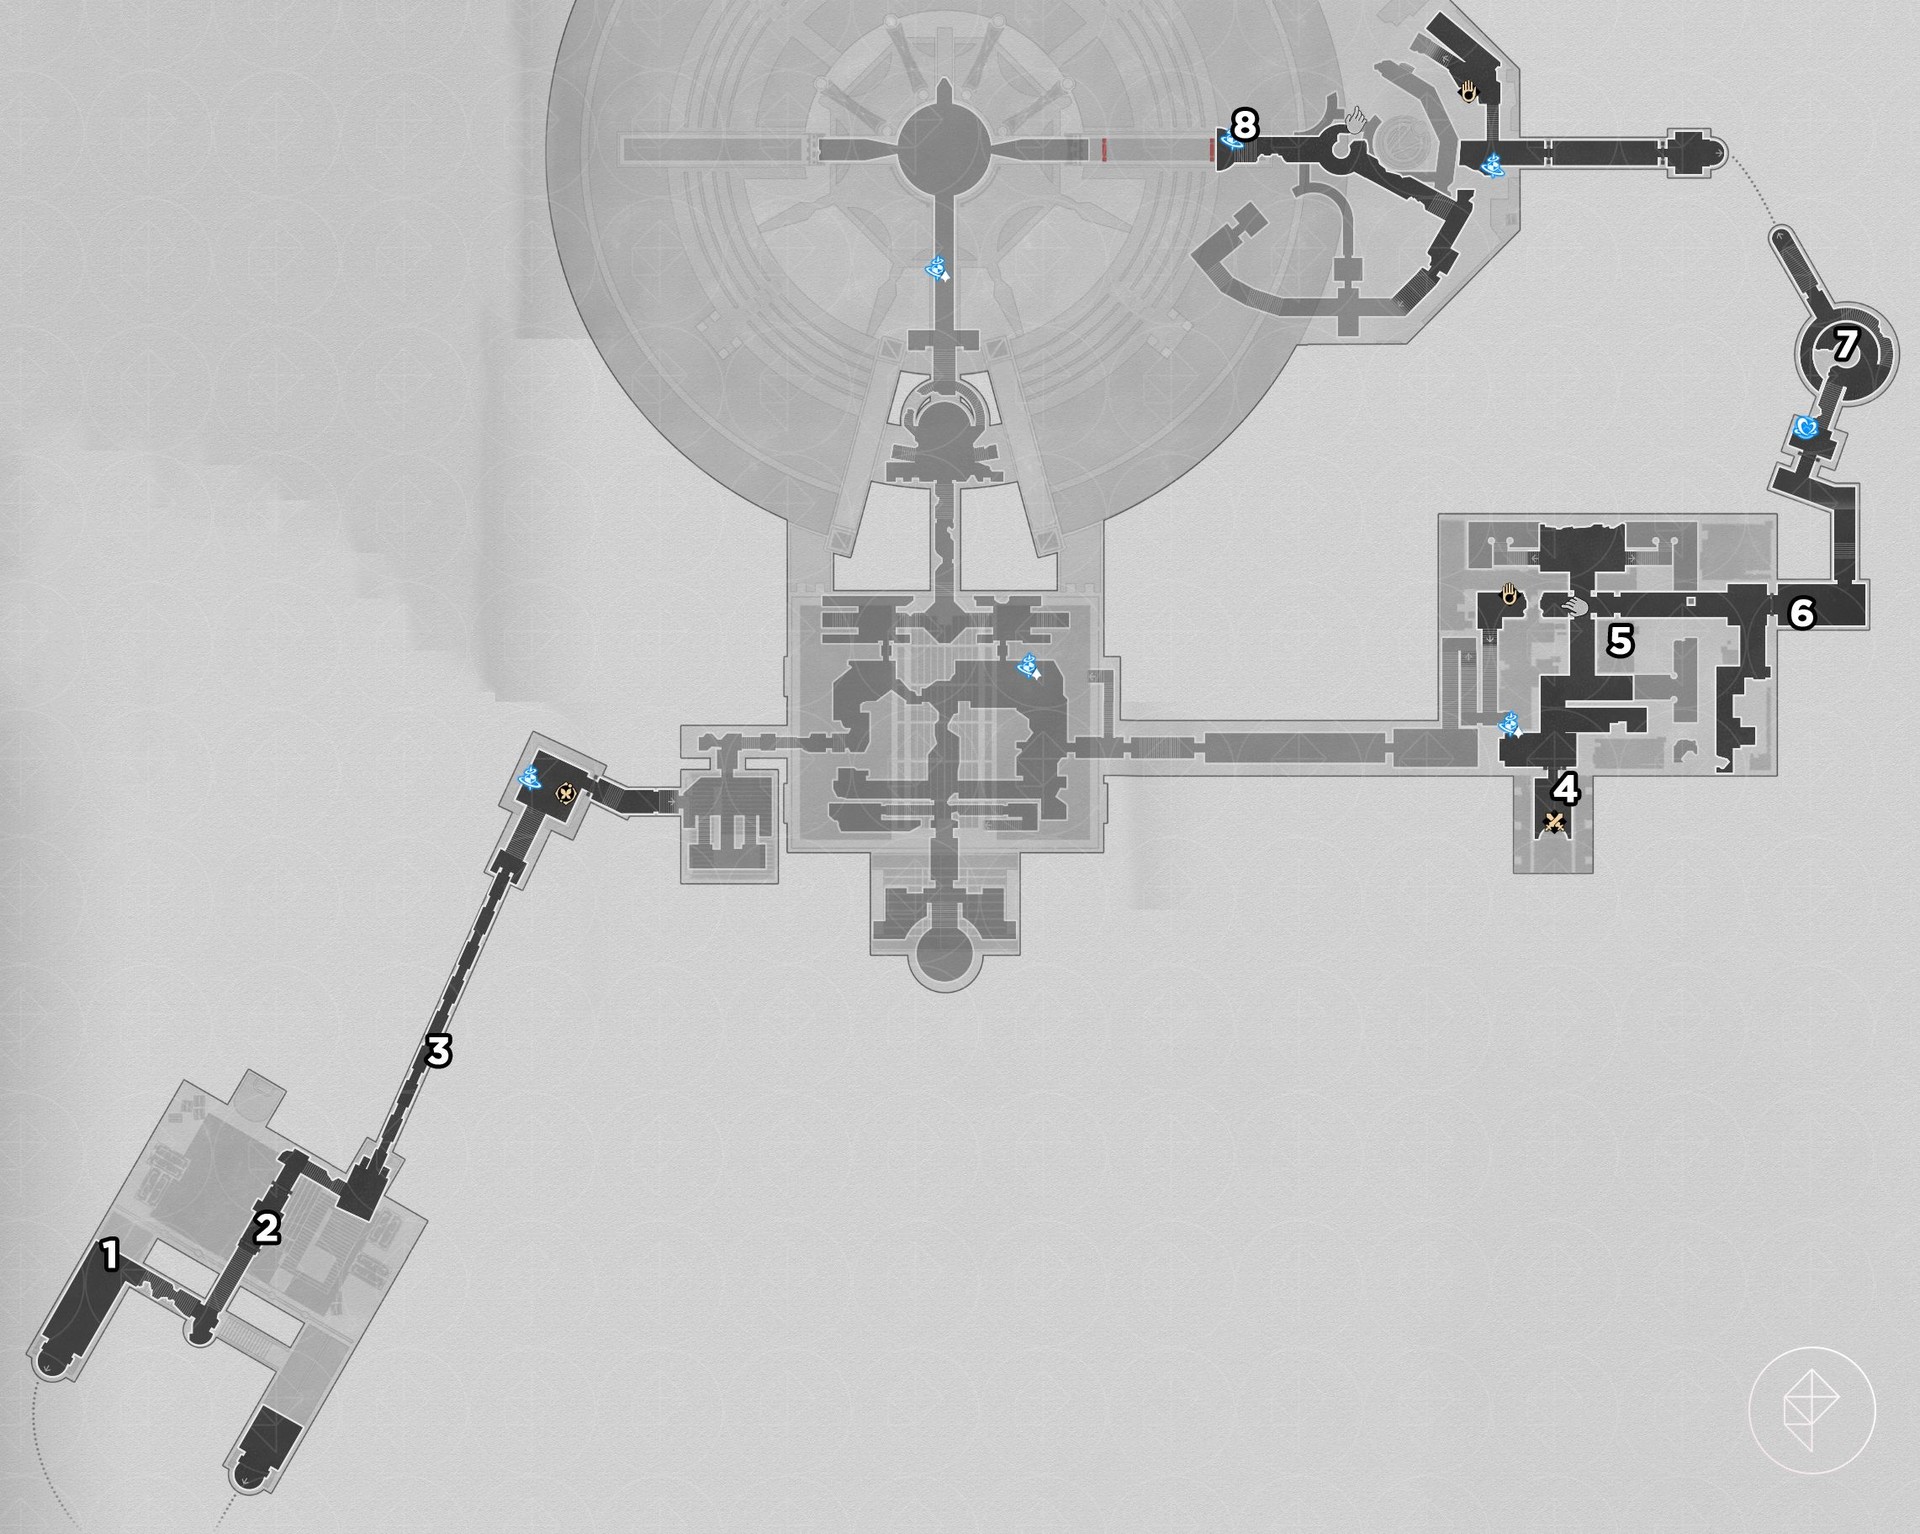
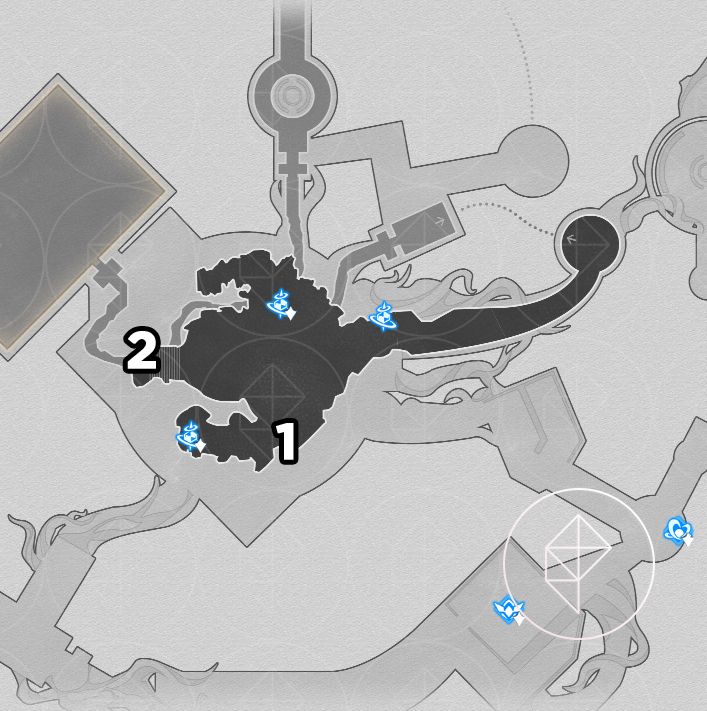
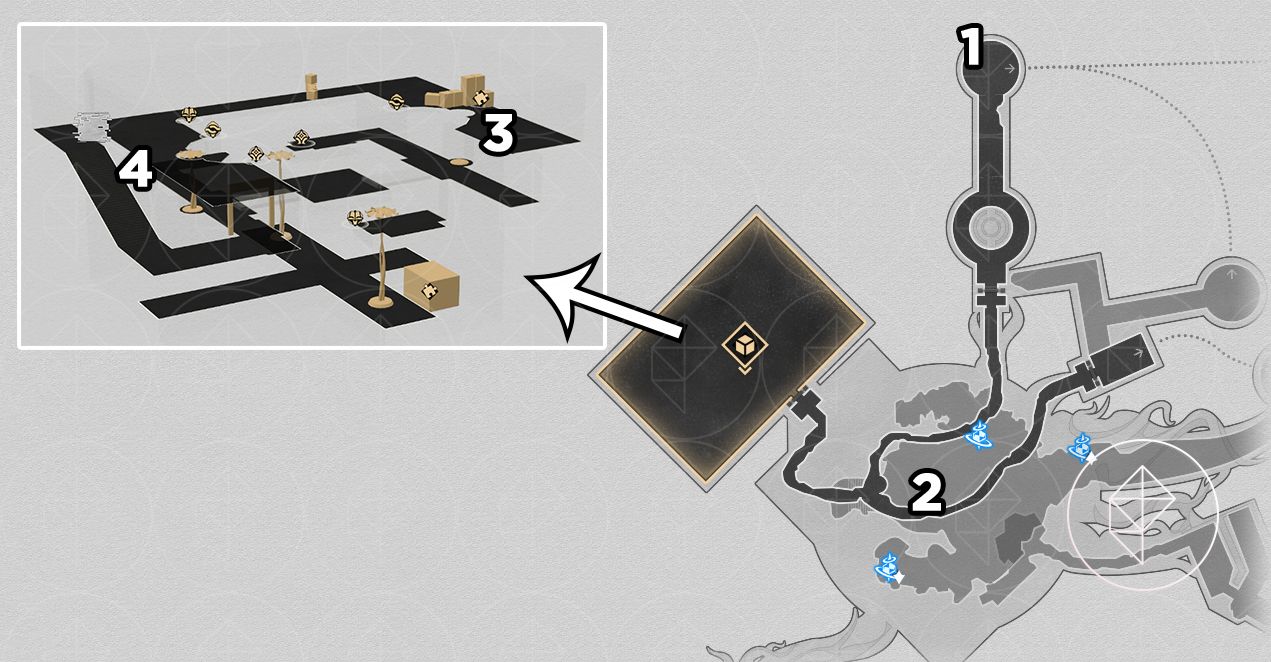
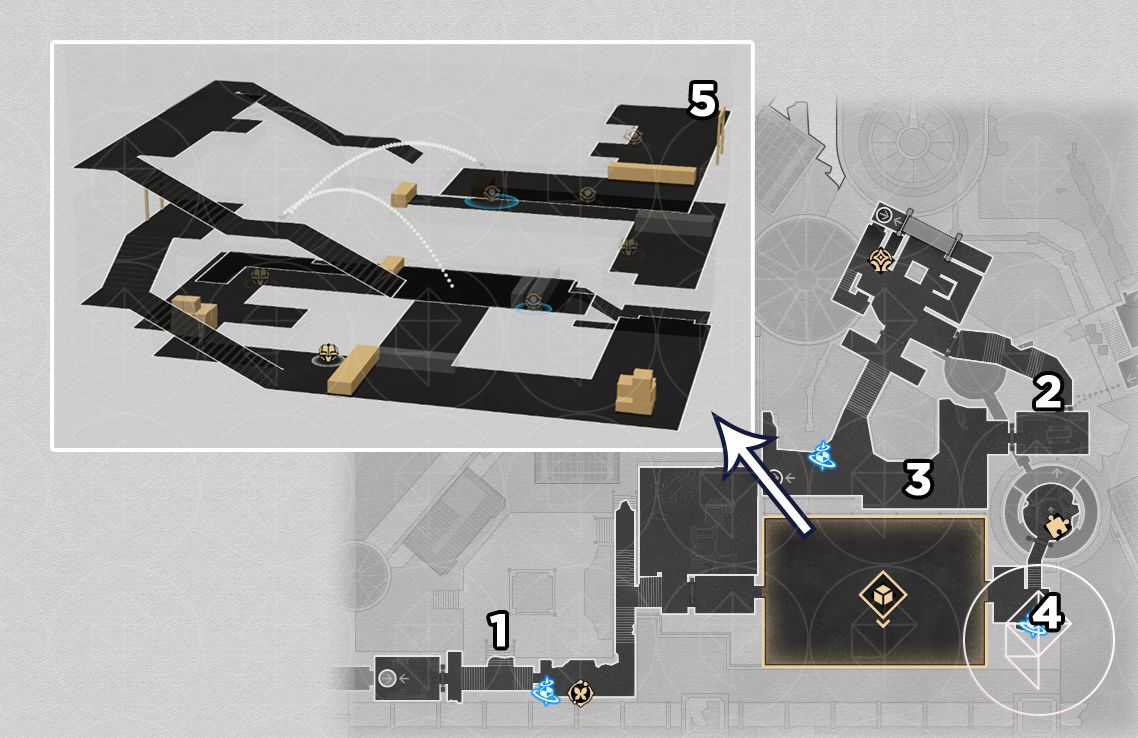
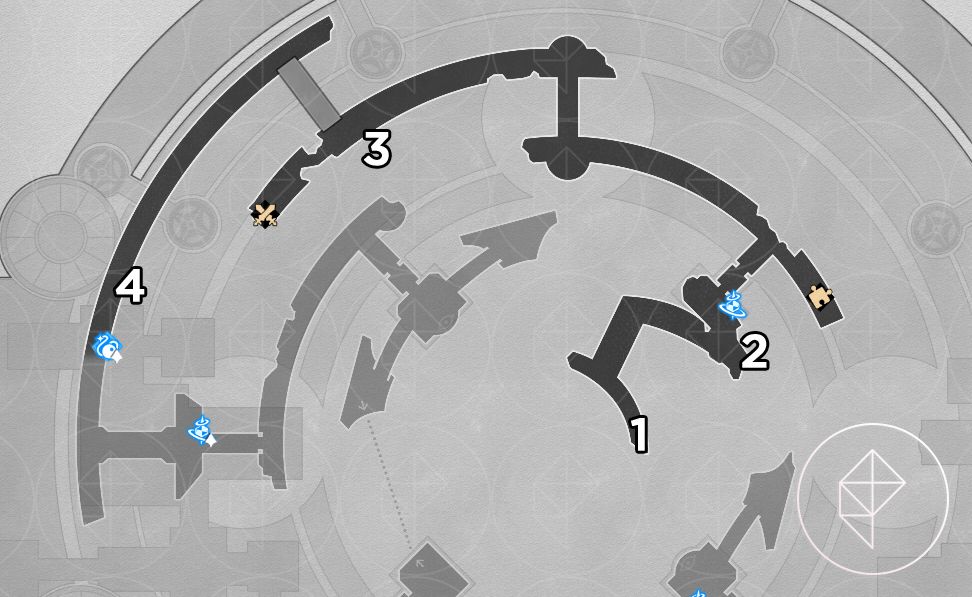
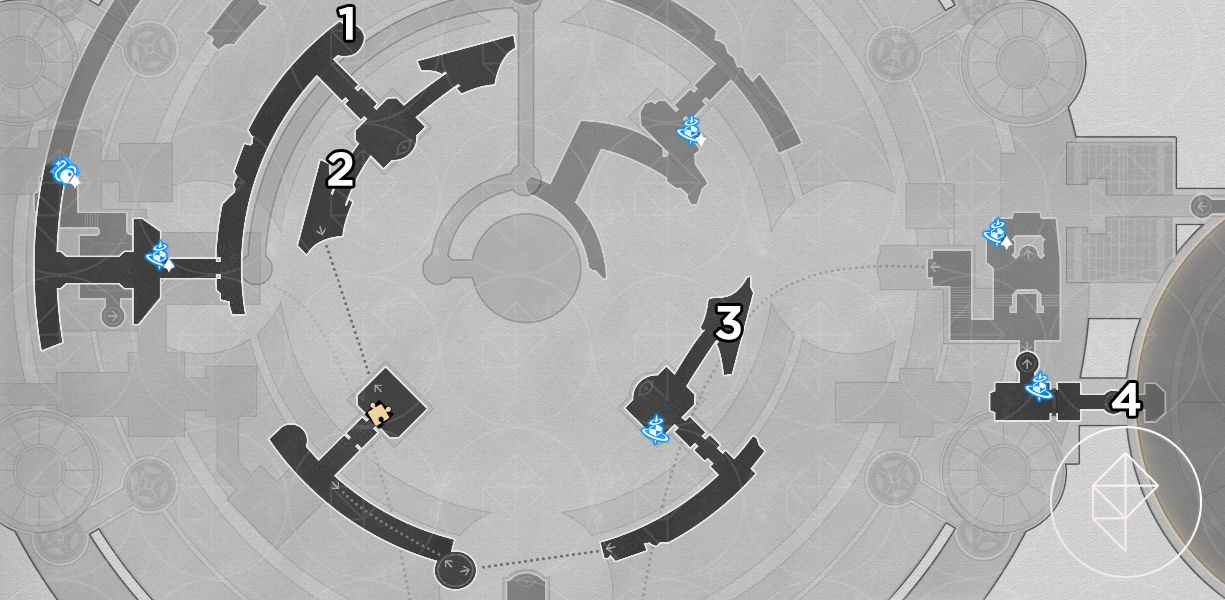
‘Bloodbathed Battlefront’ — Castrum Kremnos (20 nymphs, red-orange beetles)
F2
- On the wall in the room with two enemies.
- On the edge of the walkway (two spots).
- On wall decor.
- Hidden on walls — hitting certain structures with a ranged attack can reveal them.
- On top of the large sword structure (use the hand mechanism to reach).
- On a ledge above the pathway.
- On the ground in front of the large ball; the ball can squash it (squashing counted as collecting in testing).
F1
- At the entrance behind the doorway to “Strife Ruins.”
- In the fire (collectible spawns in flame).
- On the side of the steps—requires rolling a ball up.
- On an ornamental structure edge.
- On a pile of blue cubes.
- On the edge of a platform overlooking the area.
- By boxes on the ground.
- High on a wall — this one can be captured by a Spirithief.
B1
- On the curved structure above the path.
- Sitting on the statue’s sword (use the floating hand mechanism).
- Standing next to the hidden passage machine.
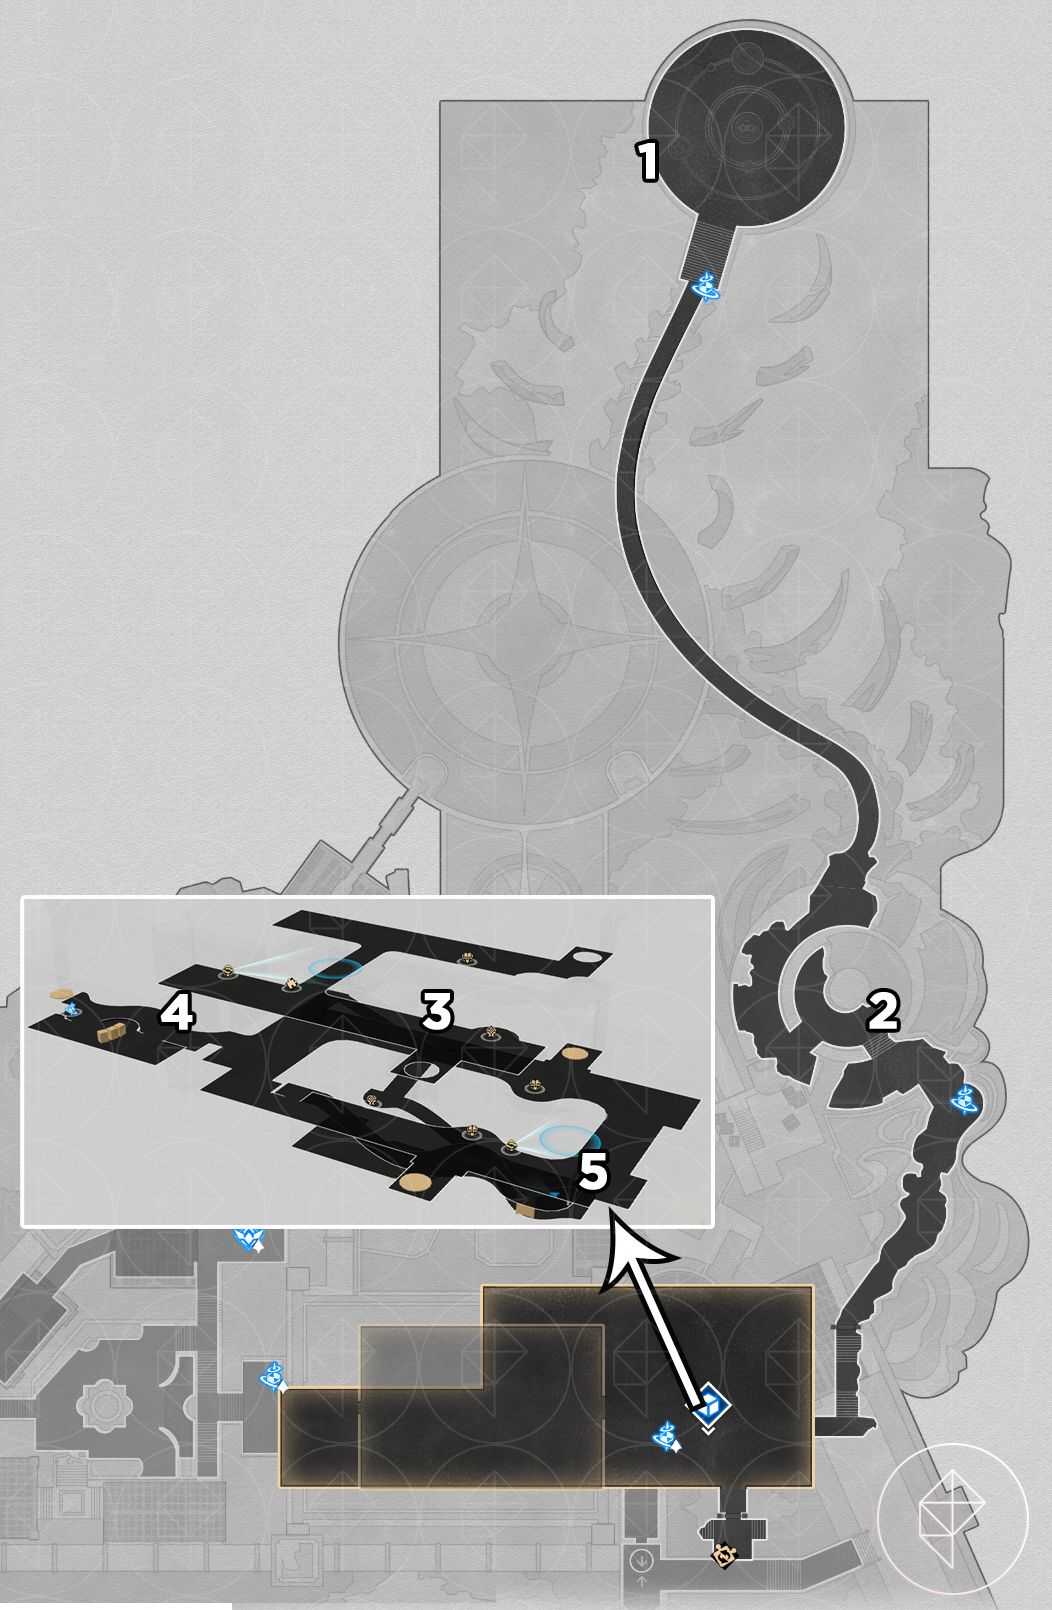
After the 20 nymphs, you receive the “Portentous Goldwoven: Bloodbathed Battlefront” item and Celestial Ambrosia. The item hints that you must walk into the center of the round 3D room on B1 at dawn and answer the nymph’s question with “Four warriors” to get the precious chest and the “Chirping Secret: Blemish of Light” achievement.
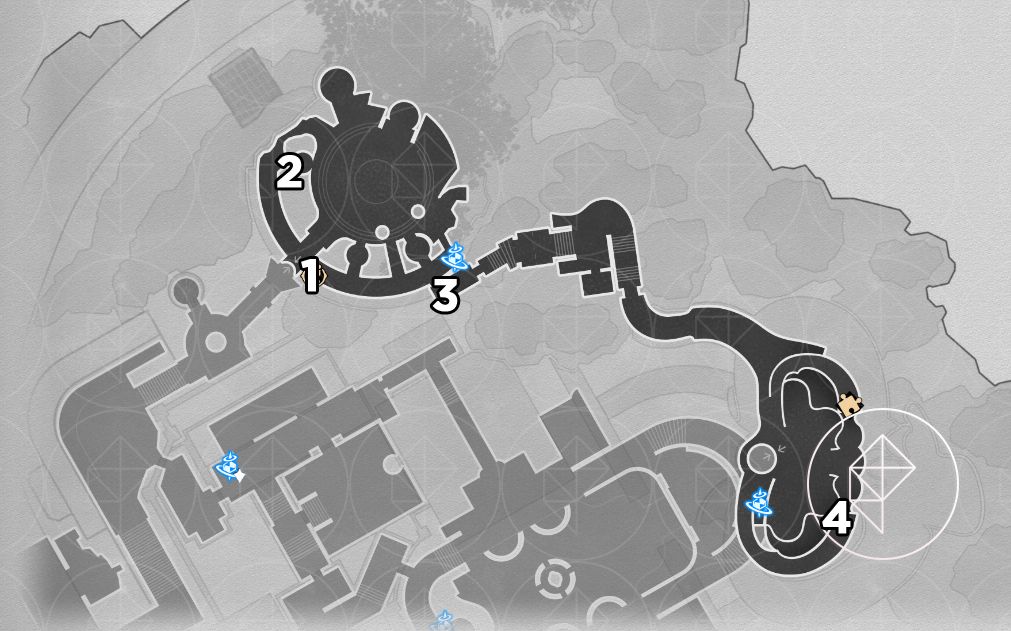
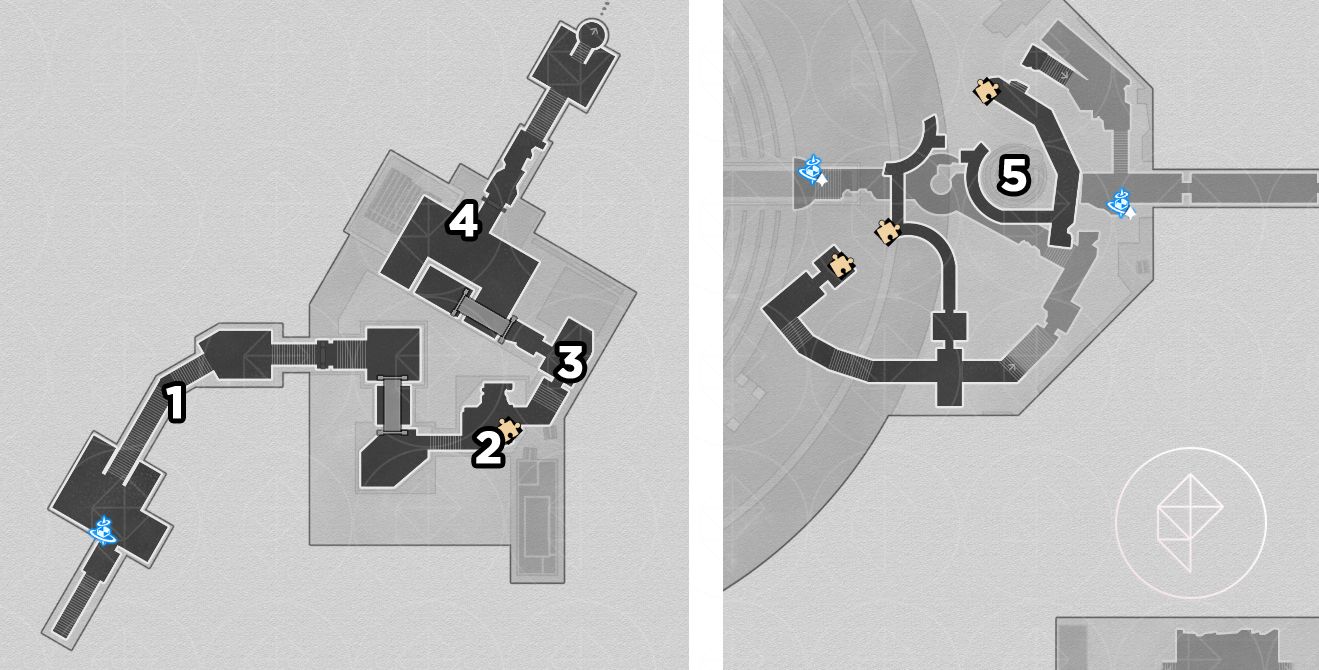
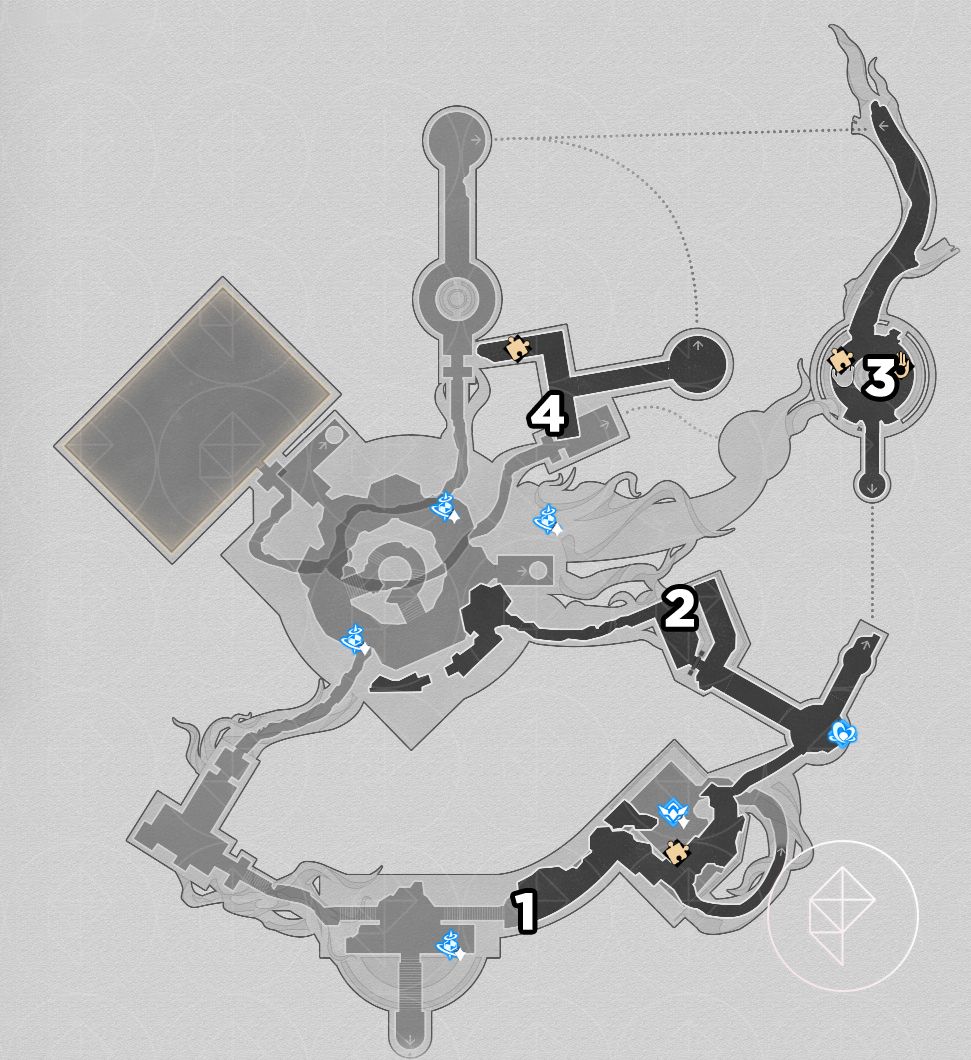
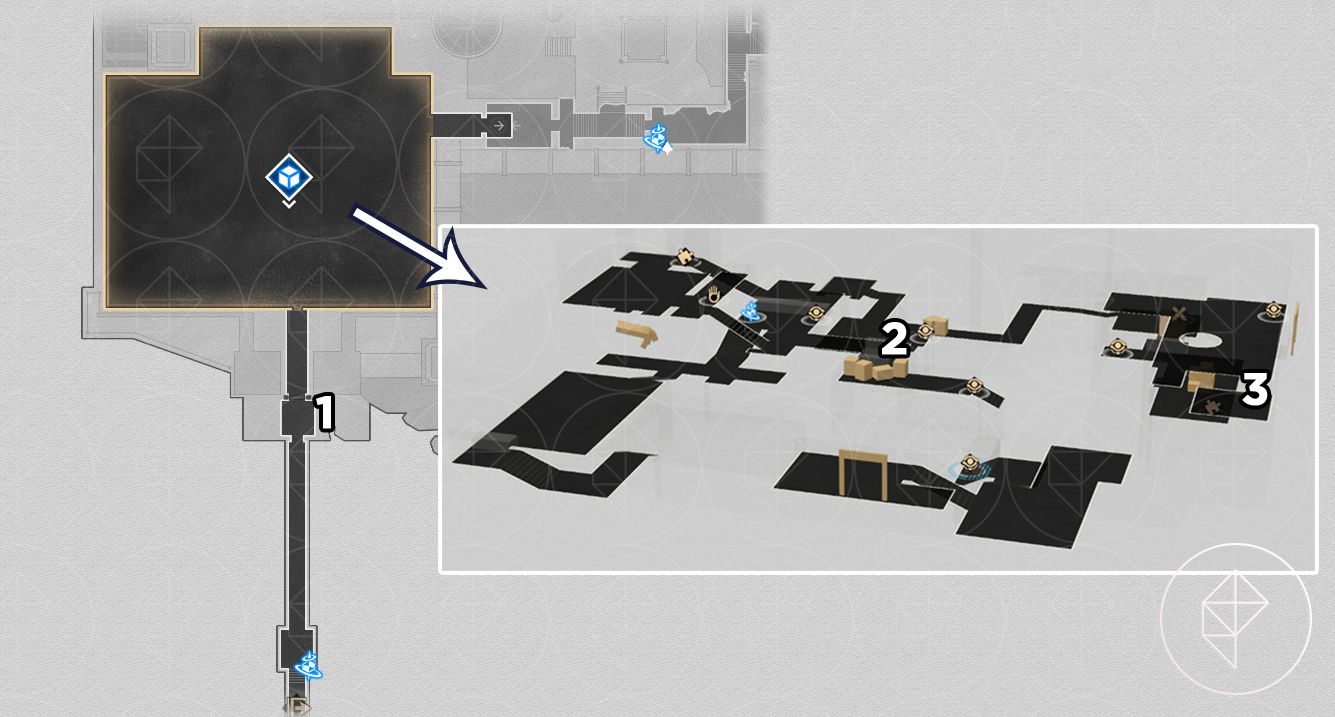
‘Strife Ruins’ — Castrum Kremnos (20 nymphs, blue beetles)
F3
- On a wall.
F2
- In a pile of boxes.
- Behind shields on the wall — attack the shields to reveal it.
- On a railing.
- On the edge of a structure.
- On the lip of a bowl-like decor piece.
- On a mural.
F1
- On a wall carving.
- Near rubble.
- Overlooking the chain bridge.
- On the sword in a base.
- On the floor.
- Very high on a light fixture — use the hand mechanism.
- Atop the center structure.
- Next to the space anchor.
B1
- In the fire.
- On a door.
- On the floor.
- On a blue light fixture.
- On a round structure — use the hand mechanism to reach.
Collecting all 20 yields the “Portentous Goldwoven: Strife Ruins” item and Celestial Ambrosia. Use the item to access the Kremnos Arena north area and walk into the arena until a nymph appears; answering “13 flames” nets the precious chest and the “Chirping Secret: Fleetfoot Paradox” achievement.
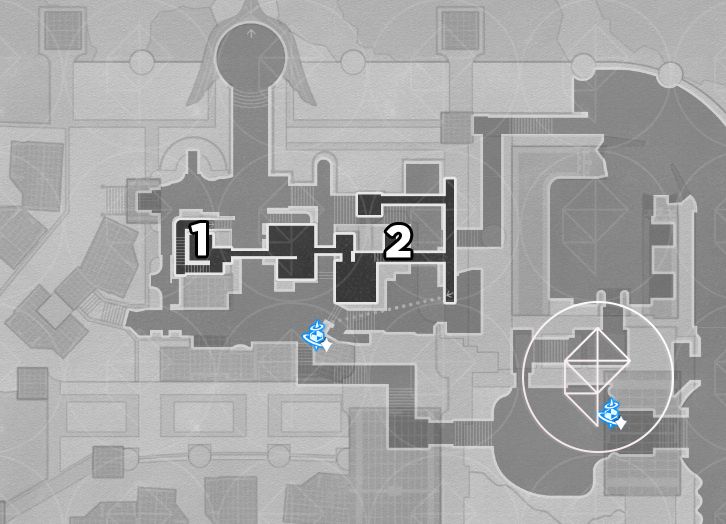
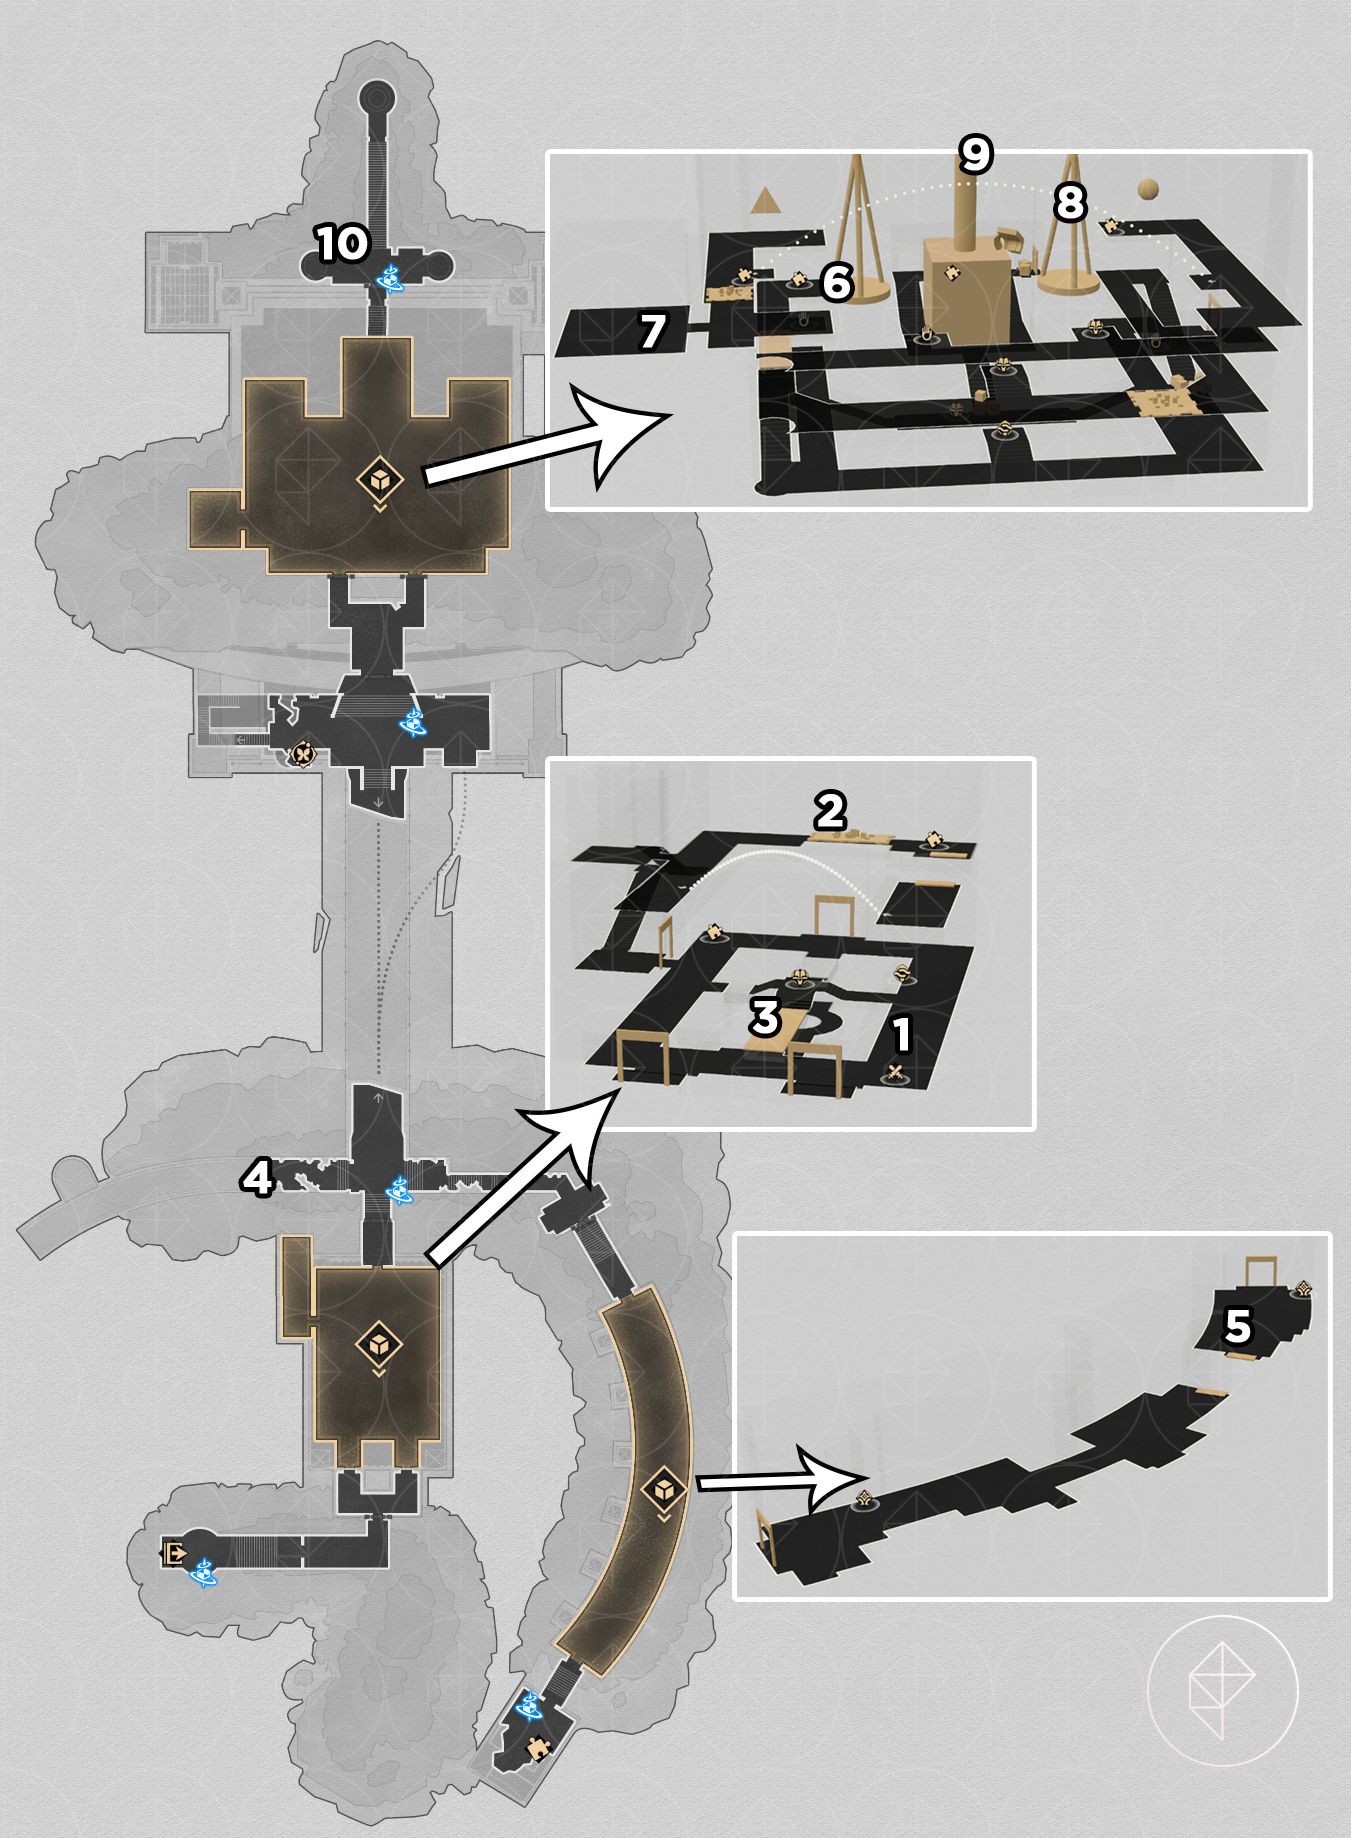
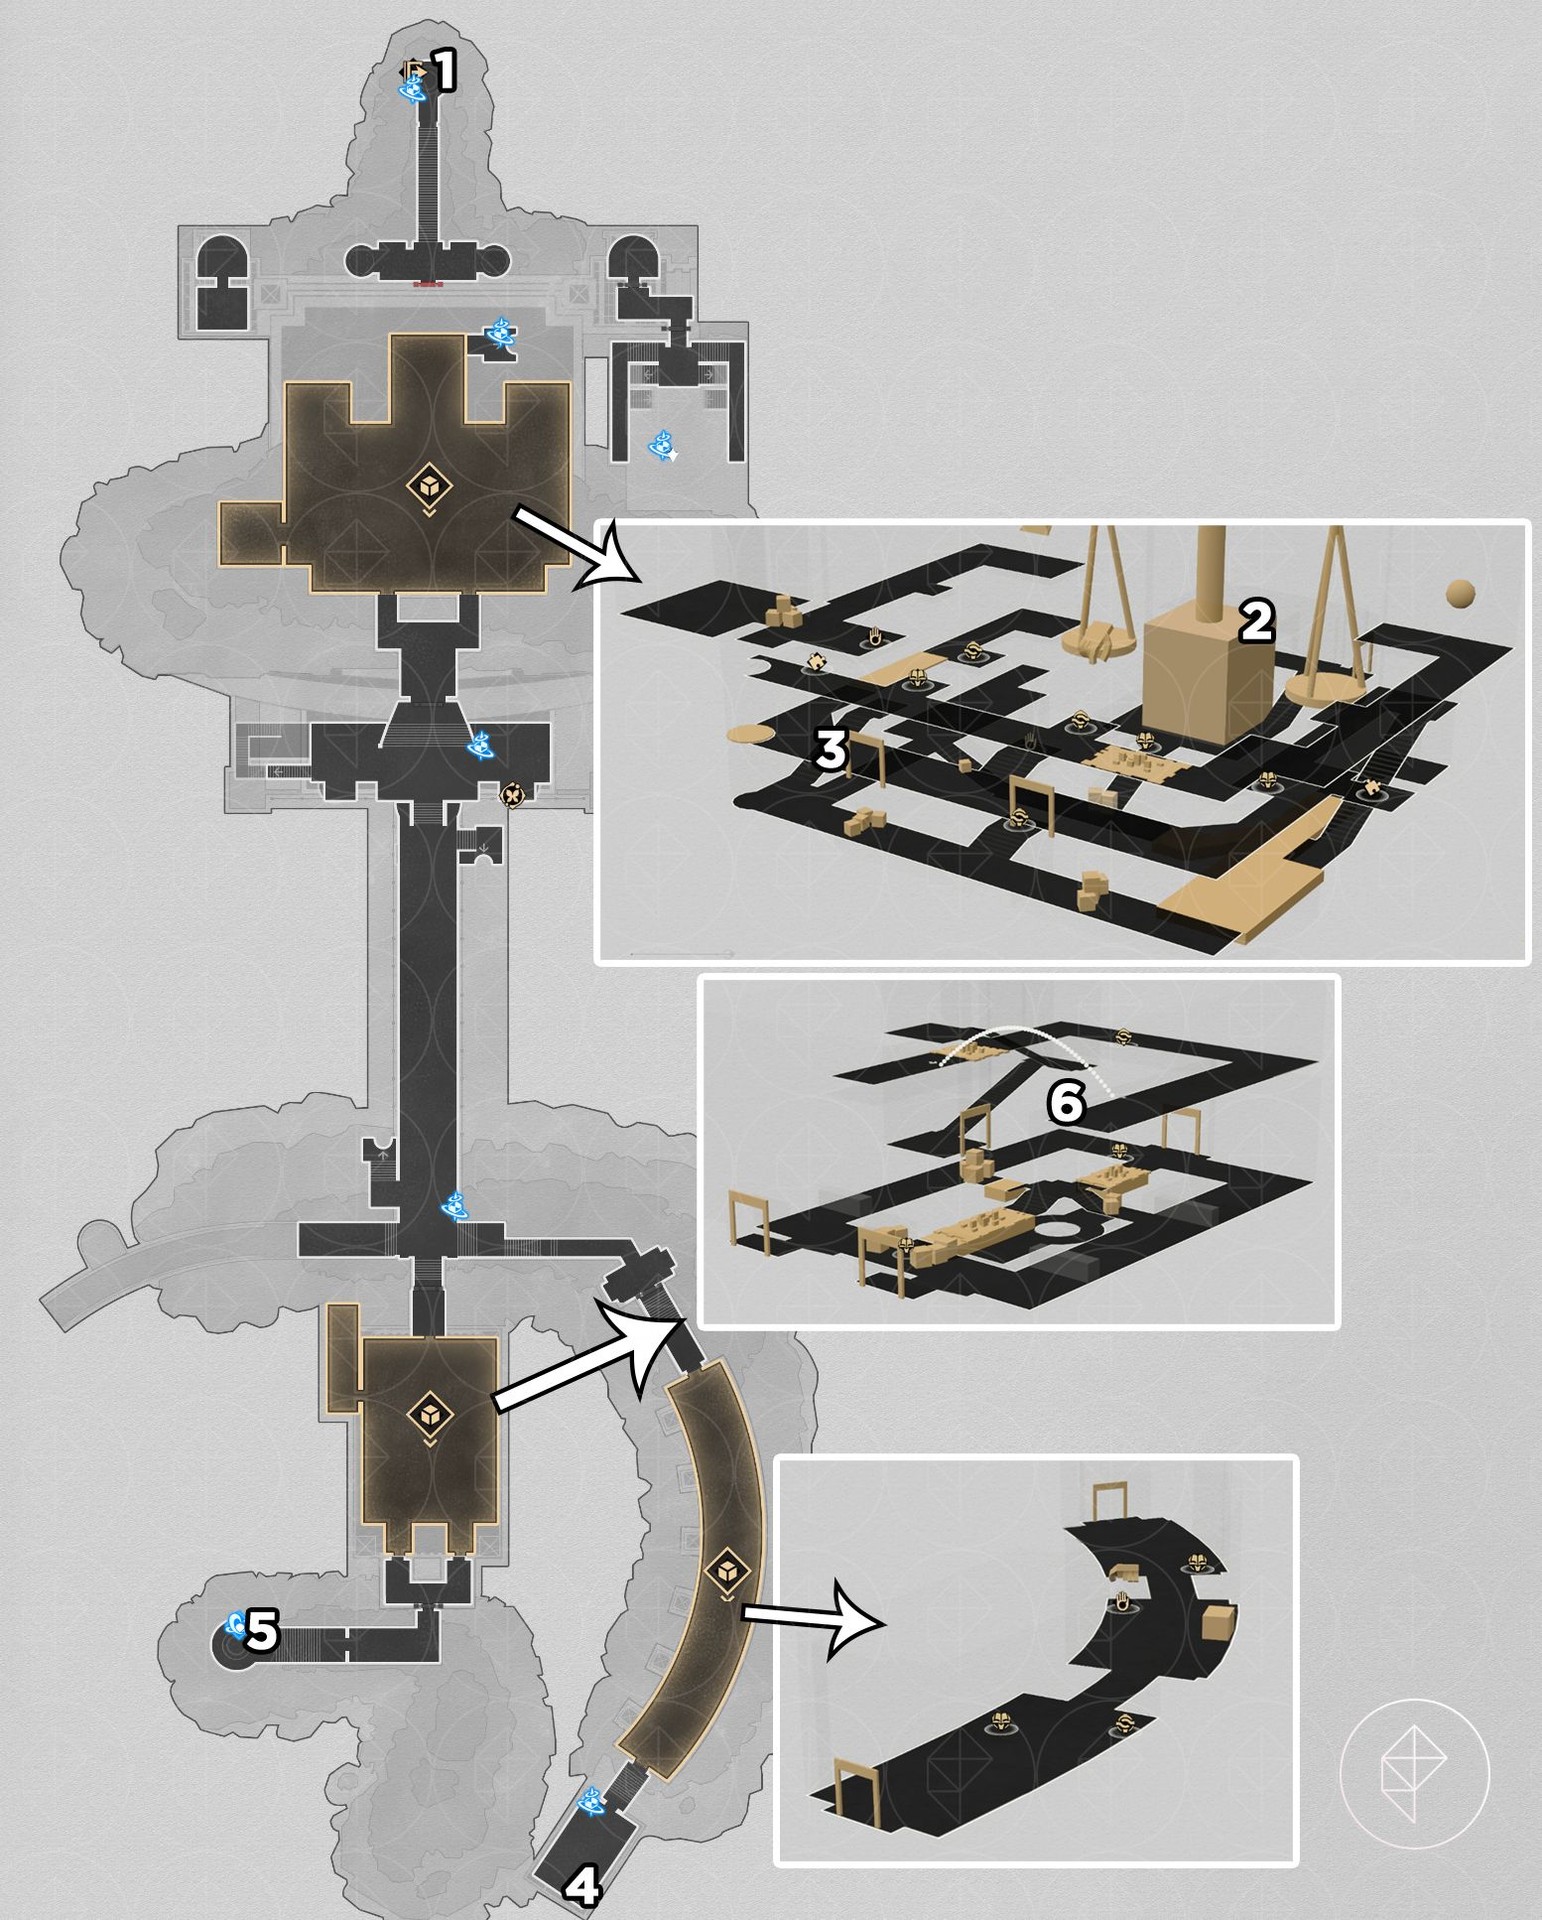
‘Abyss of Fire’ — Janusopolis (10 nymphs, teal beetles)
F2
- On a broken pillar (evernight).
- On a wall (evernight).
- On the bridge (dawn).
- On the edge of the path.
- Under a pillar on the ground.
- On the left scale (dawn).
- On the floor (dawn).
- In a back compartment behind the right scale on the third floor (dawn).
- On the top of the center part of the scales — use the hand mechanism to reach.
- In the hood of the tall statue.
After collecting all 10 you receive the “Portentous Goldwoven: Abyss of Fate” item and Celestial Ambrosia. The item reveals one-fourth of the solution to the southeast tablet on Janusopolis F2 — solving the “Crrk?” prophecy tablet correctly yields a precious chest and the “Chirping Secret: Many-Faced” achievement.
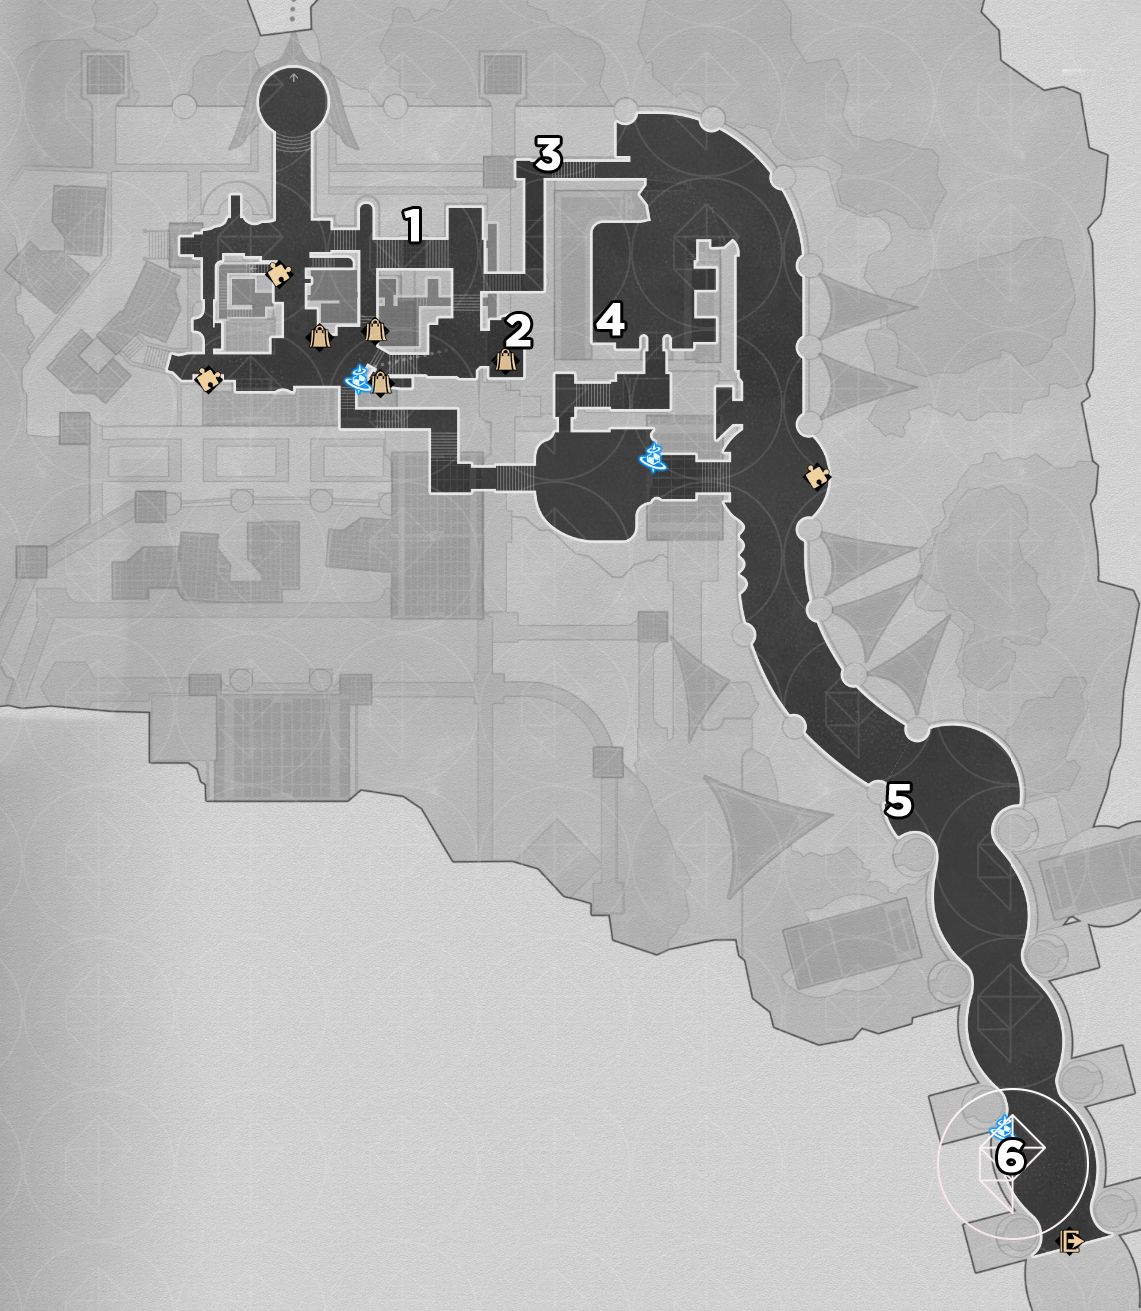
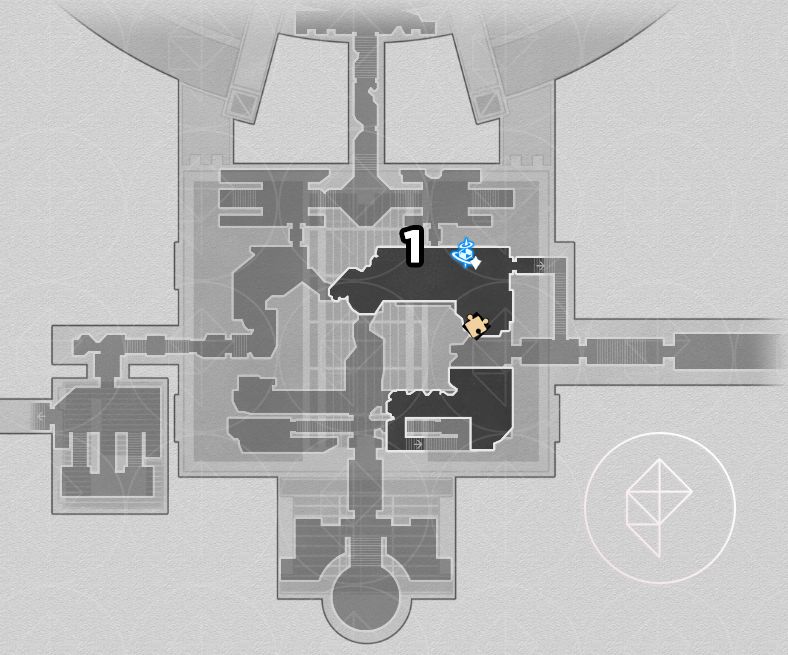
‘Sanctum of Prophecy’ — Janusopolis (10 nymphs, orange with blue detailing)
F1
- On the edge overlooking the sky.
- On a light holder in the back (dawn).
- Sitting on a chair (dawn).
- Hanging from a tapestry.
- Looking at the calyx.
- On the curtain at the top of the room (dawn).
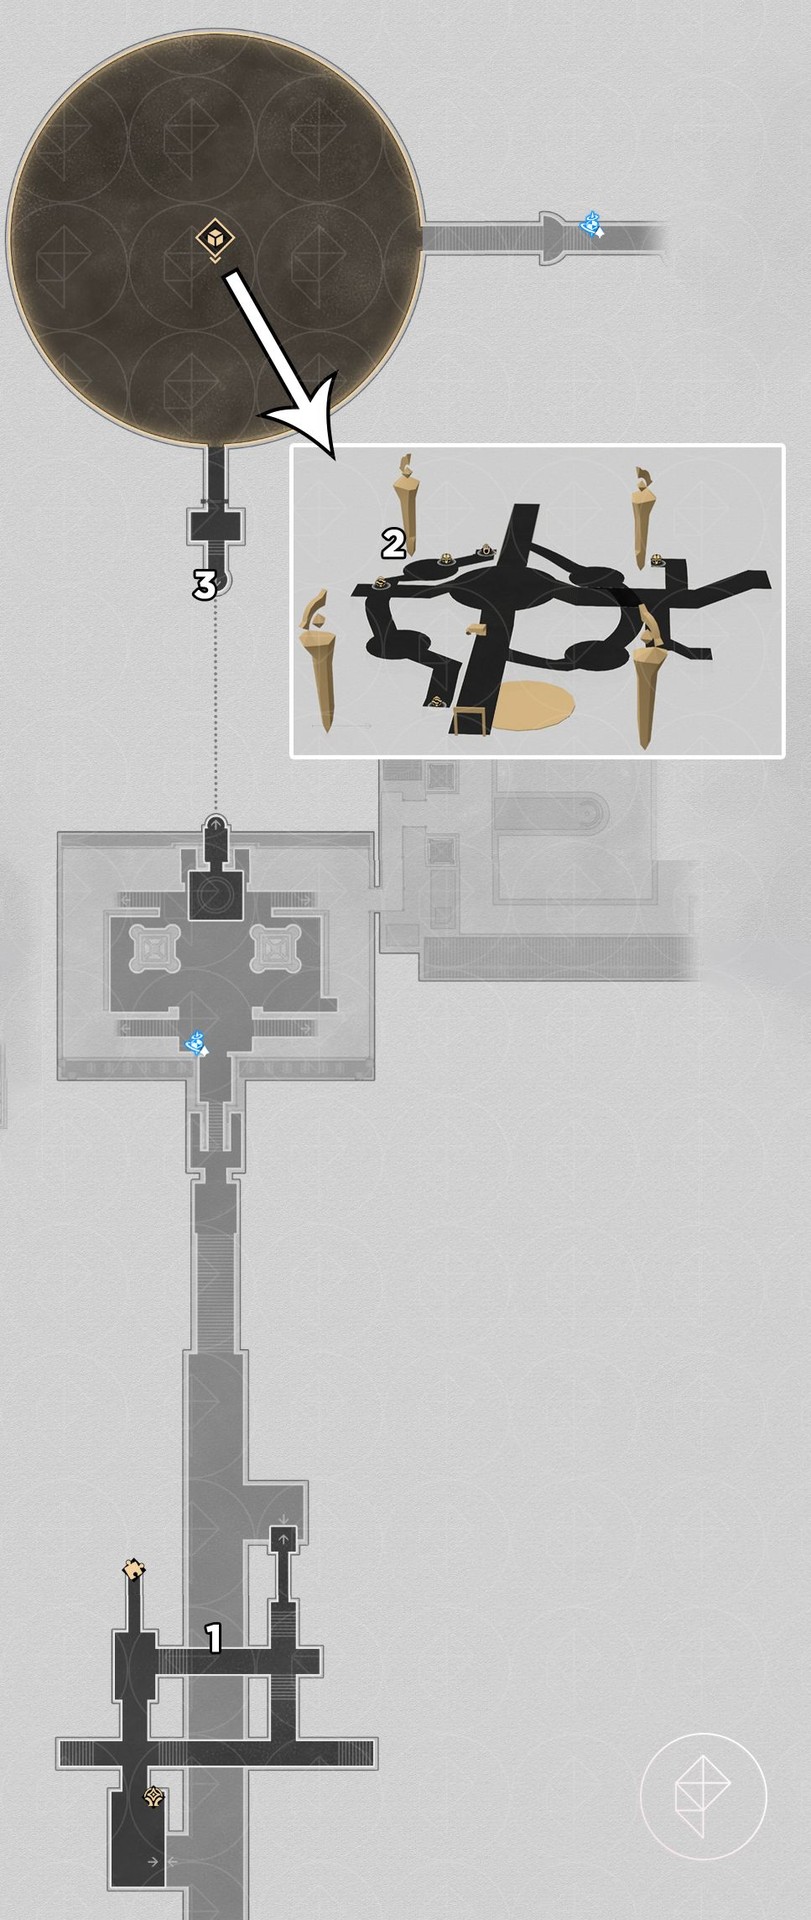
B1
- On the floor looking at scrolls.
B2
- In front of the ram head puzzle.
- High up on part of a bridge — use the giant hand to float up and grab it.
B3
- On the table.
Collecting all 10 gives the “Portentous Goldwoven: Sanctum of Prophecy” and Celestial Ambrosia. Then, you must drive the giant hand through specific circles on B2 in an arrangement that encodes π to seven digits. For a visual solution, see the linked video below.
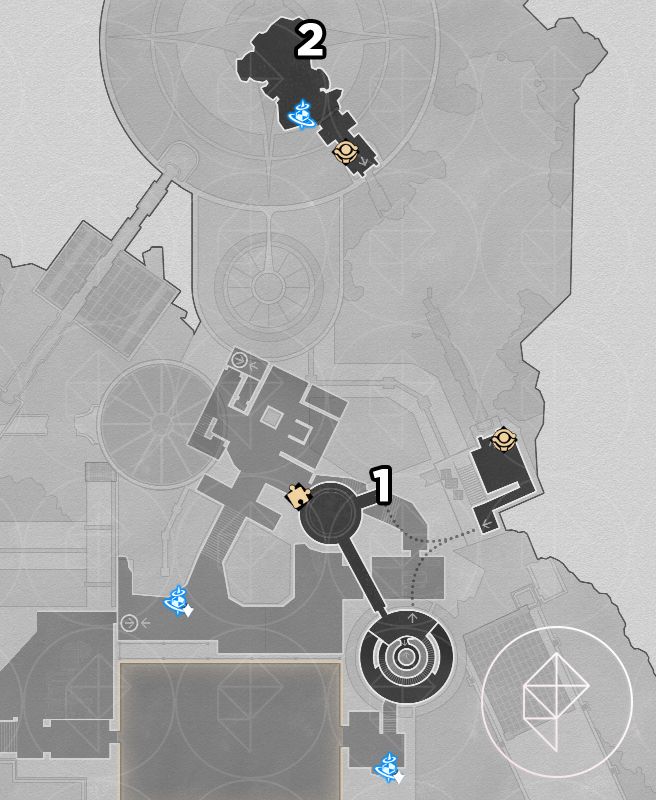
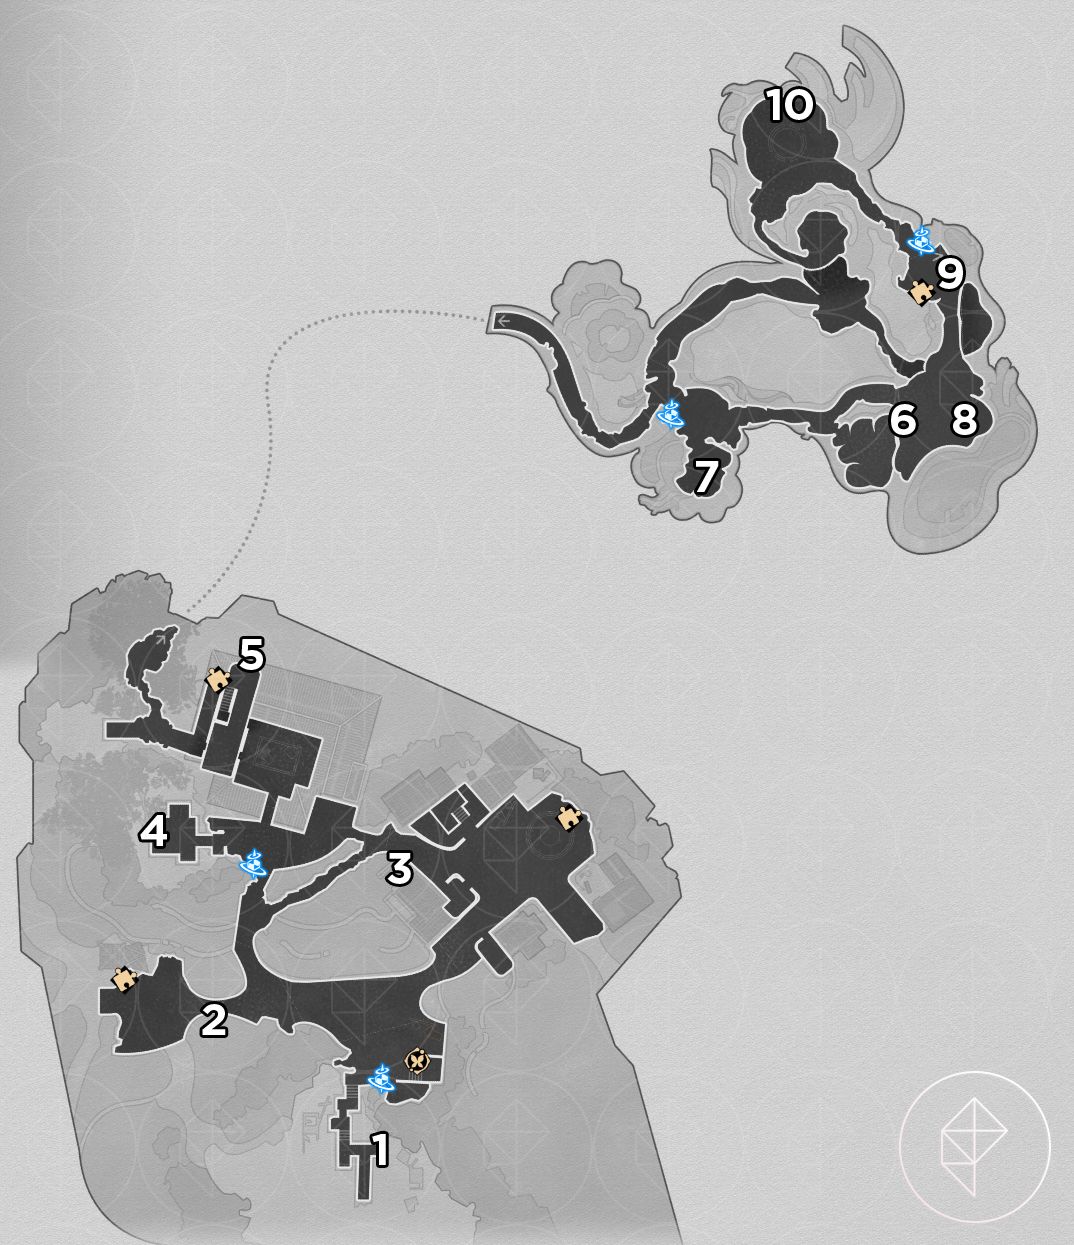
‘Murmuring Woods’ — Grove of Epiphany (20 nymphs, green beetles)
F4
- Looking at the mural.
- On the side of the throne.
F3
- On orange growths coming out of the wood.
- On wood near butterflies.
- Topmost floor in the flowers (evernight).
- On the wall by the stairs (dawn).
F2
- On the edge of the walkway.
- Inside a building on the window.
- In the pond.
- On the wall.
F1
- In the lap of the statue.
- Next to a floating scroll.
- On the outer edge of a structure.
- On the center tree cocoon.
- On the railing.
- On the ground by tree roots.
- On the water wheel — wait for the platform to rotate into position.
- On the edge of the fountain.
- On the wall.
B1
- On the edge of the pool of water (evernight).
Collecting all 20 yields the “Portentous Goldwoven: Murmuring Woods” item and Celestial Ambrosia. That item lets you do a multi-step statue/destroy-and-rewind puzzle; a good visual guide is linked below.
‘Demigod Council’ — Dawncloud (10 nymphs, red butterflies)
Locations (mixed floors)
- Above the fire.
- In the center of a mural.
- On the tip of a vessel.
- Riding a pig speed vessel — wait for it and use a ranged hit.
- On a column.
- High on a cliff at the bird mural’s head (requires giant hand).
- On trees.
- On a broken stone arch (requires giant hand).
- On chimes.
- Low on the waterfall (requires giant hand).
Collect all 10 to receive Stellar Jade and Celestial Ambrosia. The melody the Garmentmaker plays after investigating collected nymphs provides clues; you must “offer greetings to Kephale” at specific map points to spawn the chest. See the demonstration below.
‘Dragonbone City’ — Styxia (10 nymphs, light-blue firefly-like)
F1
- Floating over the railing.
- On the edge of a walkway (requires rune to set area to day).
- Atop a platform near water (requires rune to set area to day).
F2
- Sitting on a flying pig speed vessel — shoot the pig when it passes.
- By a fallen pot near a door.
- Floating along the path.
- Floating over the railing — hit with ranged several times to catch.
- Looking at scrolls on a shelf.
F3
- On top of a floating scroll.
- Flying by some debris.
Collecting all 10 grants the “Portentous Goldwoven: Dragonbone City” and Celestial Ambrosia. The area’s special chest puzzle involves arranging giant stone balls on F2; a video solution is linked.
‘Fortress of Dome’ — Eye of Twilight (10 nymphs, turtle-like beetles)
F1
- On debris floating above a crack.
- On the edge of a platform.
F2
- On the wall in front of the elevator.
- Among shelved balls.
- On a wall fixture.
- On a pillar — ride the platform back toward the fan to grab it.
- On a tall corner structure.
- On a platform edge.
- On a mural (it moves as you move between murals).
F3
- On a golden orb along the edge of a platform.
Collecting them all gives Stellar Jade and Celestial Ambrosia. The Garmentmaker’s hint leads you to use the giant hand on the eastern map side to push huge nymphs away; doing this spawns a special chest and the “Chirping Secret: Divine Enigma” achievement. See the demonstration below.
‘Fallen Twilight City’ — Okhema (variant)
If you already collected all nymphs in the normal “Eternal Holy City” Okhema, the Prototype Garmentmaker on this war-torn variant can auto-collect the nymphs for you. You still receive Stellar Jade and Celestial Ambrosia. Additionally, a Prototype Garmentmaker puzzle asks you to teleport to the bottom-most left point of Okhema, follow and break summoned speed-boost pigs to earn a precious chest and the “Chirping Secret: The Westward Ordeal” achievement. See the demonstration below.
‘Lightless Chapel’ — Dawncloud (variant)
As with Fallen Twilight City, the Strict Garmentmaker will auto-collect nymphs here if you already finished “Demigod Council.” You still receive Stellar Jade and ambrosia, and you also get the key item “Portentous Goldwoven: ‘Lightless Chapel.’” The chest puzzle for this map requires combining key-item slices from other players or following a visual solution; a helpful video is linked below.
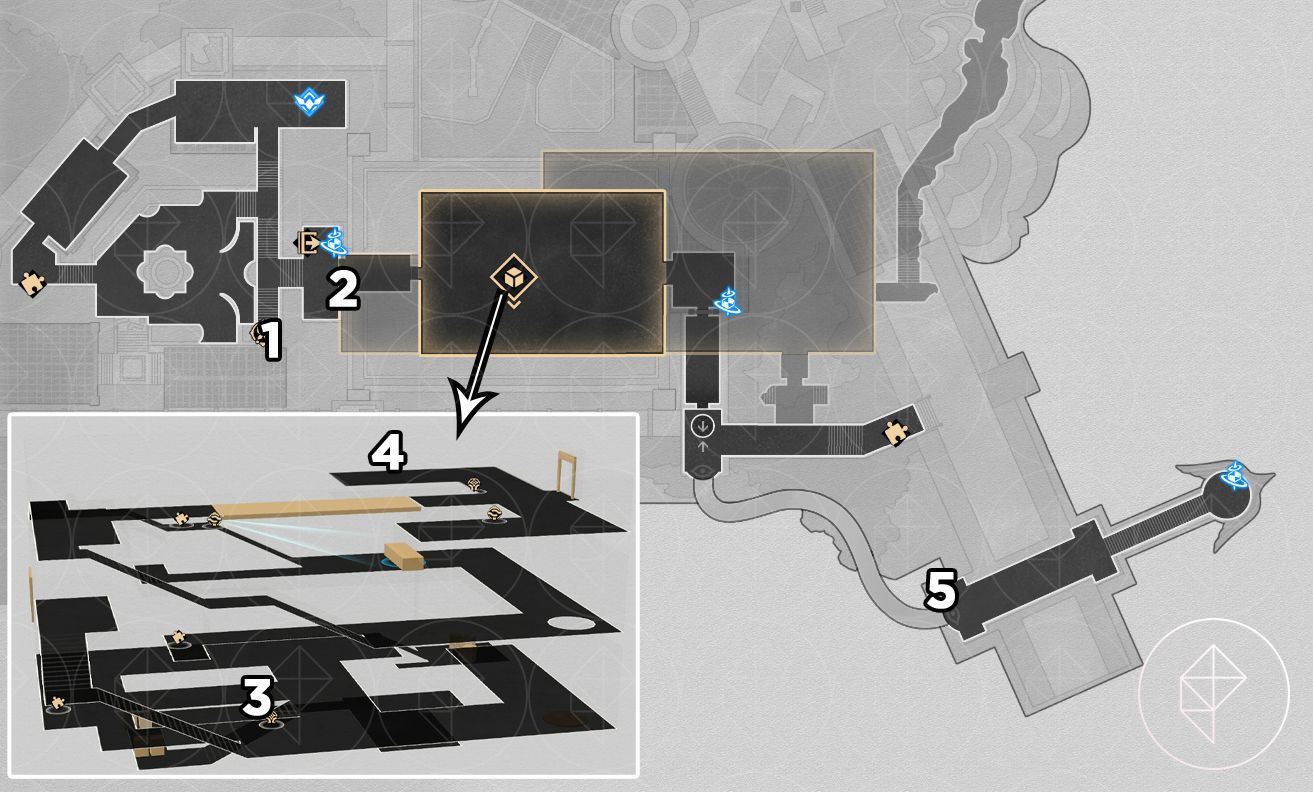
‘Cloudedge Bastion Ruins’ — Eye of Twilight (20 nymphs, purple-blue beetles)
F1
- Sitting on debris (may be kidnapped by a Spirithief).
- In a gold waterfall fixture.
- In the river of golden liquid.
- On a pillar.
F2
- Under rubble.
- On the side of the bridge.
- On the ceiling.
- On the wall in front of the elevator.
F3
- Atop a large console.
- On a pillar-like structure.
F4
- On the center-most platform — reach via the compass tool.
This map mixes manual and auto-collection (auto-collect applies to matches from the Fortress of Dome variant). The Gentle Garmentmaker’s hint points to a compass puzzle on F2; solving it yields a special chest and the “Chirping Secret: Rainbow’s End” achievement. Video demonstration below.
‘Aedes Elysiae’ (version 3.4 addition — 10 nymphs, pink winged beetles)
Locations
- Flying above the dock.
- On top of a scarecrow.
- Among piles of hay.
- At the roots of a big tree.
- Attached to a flying pig — use a ranged character when it passes.
- Hidden in dirt on the lower portion — interact with sparkles.
- On a table.
- On the porch of a tiny house.
- Flying by stacked stones.
- Flying by mural rocks.
Collecting all 10 grants the “Portentous Goldwoven: Aedes Elysiae” key item and Disorder Ambrosia. For the bonus chest: run three circles around the northern harp, then hit bells in a specific order; the video below demonstrates the sequence.
‘Warbling Shores’ — Styxia (10 nymphs, yellow beetles)
F1
- Behind the Revelry Garmentmaker, looking at a wall.
- In a west square room — above broken vases in a lift room.
- Bottom-most floor of the 3D room near four artifacts on display.
- Top-most floor of the 3D room looking at a harp-like structure.
- Floating over an edge looking at the rainbow bridge.
B1
- On the edge of a platform.
- Floating among rubble in a passageway.
- Middle floor looking out a window in the 3D room (dawn).
- Floating in water near a space anchor (evernight).
- On the very bottom of the pool — you must drain the water completely (dawn).
Collecting all 10 nets Stellar Jade and Disorder Ambrosia. A maze puzzle in the bottom of the 3D-room pool gives a hint to a hidden treasure; a video solution is below.
Final notes
Collecting each map’s full set of nymphs awards Stellar Jade and ambrosia, plus a map-specific key item in many cases. After finishing a map you should talk to that area’s Garmentmaker to claim the rewards and any follow-up clues. Furthermore, several puzzles require timed positioning or use of the giant hand and other map mechanics, so use ranged characters and the hand mechanisms where noted. Finally, if a variant map auto-collects for you (as noted above), you still get the same rewards and can complete the extra puzzle for the precious chest and achievement.
